
Creating mockup 3d in Maya for your business card presentation. The final step of the mockup will take place in Adobe Photoshop.
In this post we are going to learn a few things about mockups in general and mostly how we can create a mockup for a business card with 3D techniques, using tools like Autodesk Maya.
As I said, the final step will take place in Adobe Photoshop to prepare our mockup with smart object technique, so it could be easy to replace the artwork of the business card afterward. If you are already familiar with mockups you could jump into the creation process.
At the end of this article, you can find two links for downloading, the Maya file and the final Photoshop mockup file as well.
The task in front of us:
- The theory behind mockups, in general
- Create from scratch a mockup with Maya and Photoshop (business card)
What’s a mockup:
In general:
A mockup is a template of design that we can use to present our product or services. Mockup could be anything, from a screen of a laptop and phones to a cup and t-shirt.

You guessed right, those are mockups.
Almost everyone has come across this kind of files images. However, If you are not some kind of designer, you have probably wondered or at least suspected, what’s the purpose of those files, right! Well, now you know for sure 🙂
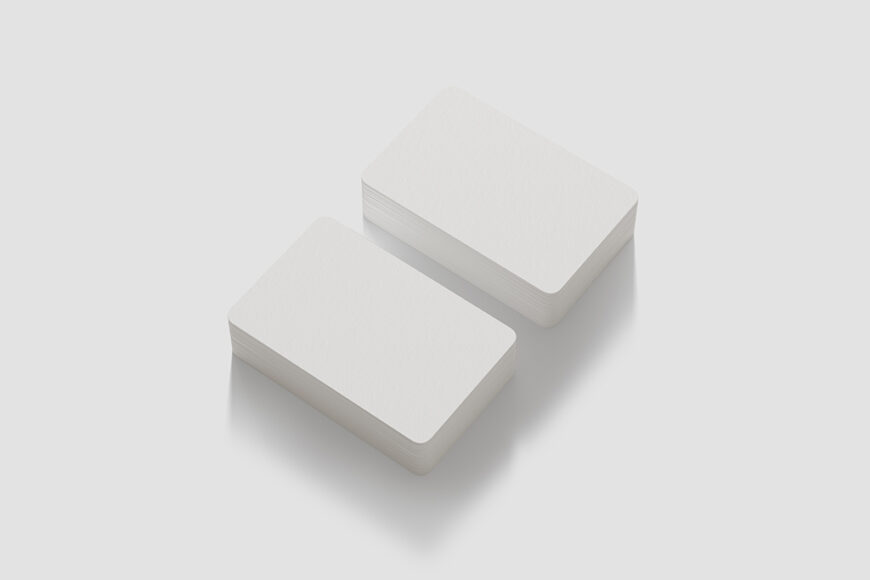
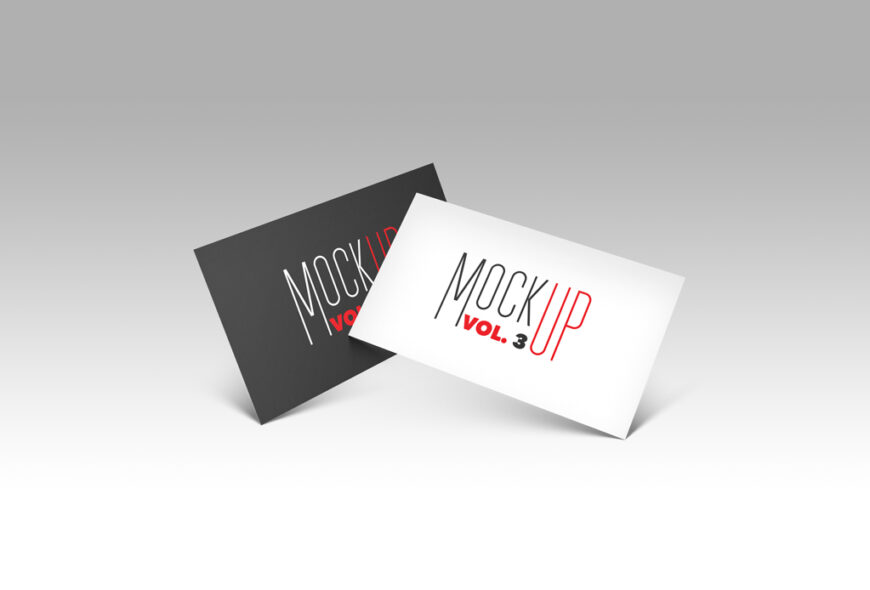
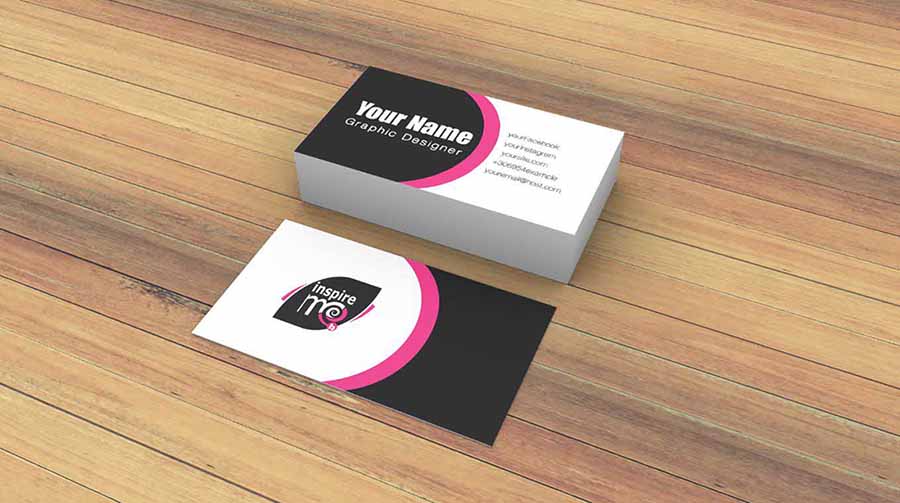
Business card mockup:
Those images are specific mockups for business cards. We are going to create from scratch a similar one.
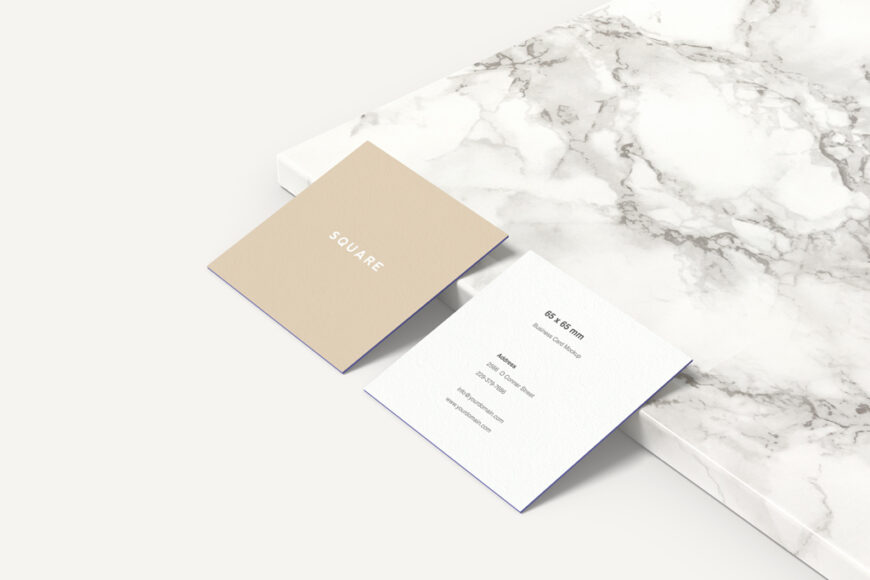
Mockup format:
Professional mockups are mostly PSD formats.
The reason behind, this is because as we said, a mockup is a template of design that we will use for our purpose. In the case of a business card, we want to make some small adjustments in the original mockup and of course, add our artwork.
We will want to replace the front and back (2-sided card) of the mockup business card. And the easy way to do that is by using smart objects in Photoshop. Smart objects as the name suggests are a smart and easy way to make those replacements with our content.
More about how to use smart objects in Photoshop you could find at the end of this post when we are done with the creation of our mockup and want to properly close the mockup PSD file.
Note: if you want to know everything about smart objects in Photoshop you could visit Adobe official site.
Why to use mockups:
Every Graphic Designer uses mockups to present his/her work, especially when he/she works on the creation of business cards. Besides business cards, the presentation of other creations such us, posters, envelopes, flyers, stationery in general, etc. most of the time have been presented with a mockup, to mix things up and to look more appealing.
The presentation is much more professional when you use mockups, for obvious reasons such as the potential client sees and feels, in a way the creation you made, looks more complete, and of course, it’s more tangible in a way.
3D mockups:
Many mockups are real-life photography images, which have been created by shooting with a camera and then creating smart objects in Photoshop and there you go, we have a mockup. 3D mockups are just images that have been generated – created in 3D applications, such as Maya, 3DS max, Cinema 4D, etc.
As you guessed, in our mockup 3D in Maya we are going to use Autodesk Maya application for creating our project. Feel free to use any of the other 3D packages you are comfortable with, in order to follow through with this article.
Not an expert on 3D software:
Lastly, before diving into mockup 3d in Maya for our presentation of a business card, I just want to point out that, you could just download mockups in general or specifically for business cards just for free.
Let’s face it. Not everybody is familiar with 3D software. Those who are not, they can just download mockups for presenting their business cards.
Just google it. Something like: mockup business card, it will show a ton of results. After that, it’s up to you and your aesthetic to choose the right one to work best for you so you can properly present your “work” (creation – product – services)
Note: in most cases, mockups are completely free of charge, of course, there are paid mockups as well. Although for the free ones, in most cases you have to give credit to the creator in some way. This is completely reasonable considering you are getting some things free and saving yourself a lot of time.
Some great sites for downloading mockups (a few of them). They have a great collection:
Pros and Cons:
The pros and cons of just downloading the mockups you need, instead of using 3D software and creating them by yourself.
Pros:
- saving time
- great and professional end result
- plenty of concepts to choose from
Cons:
- limitation of dimensions
- not the perfect shot for your business card
- not easy adjustments
Now that we have grasped some basic theories about mockups let’s jump into Maya and create one.
Creating mockup 3d in Maya:
So, the fun part of creating the actual mockup for our business card with Maya starts.
As I already said, we are going to create a 2-sided business card mockup. I am not going to create something very complex considering at least the 3D modeling techniques. As you understand the whole process, you could absolutely create your own version, which could be as complex as you like.
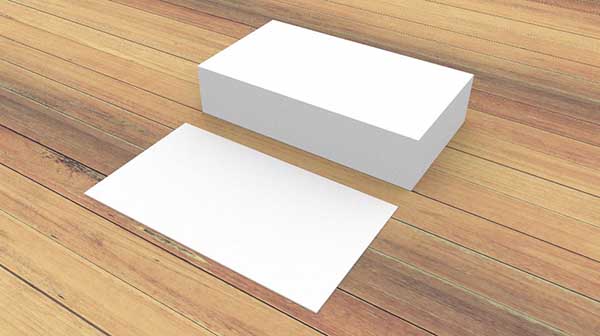
Just to have a clear idea of what we are going to accomplish in Maya, the final mockup will look like this:
At the end of this post, you could find the Maya file and the final PSD file format of our mockup, if you want to use it. You could use it for personal and commercial purposes.
In summary of the steps of creating a mockup 3d in Maya:
- 3d modeling business card
- prepare the scene to render
- finishing mockup in Photoshop
So, open up Maya, and let’s get started.
3D Modeling of business card:
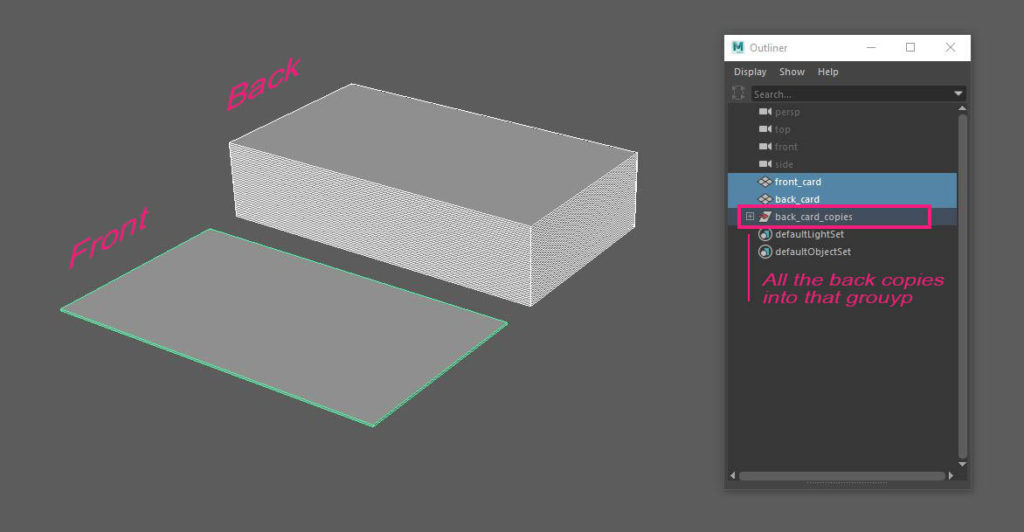
We are going to create a 2-sided business card with 3D geometry. So, we will create two separate geometry. One for the front and one for the back of the card. One of them, let’s say the back, will be in a stack (many copies), and the other one will be a single one (just one copy).
Lastly, we will create a simple floor geometry, to hold the business cards.
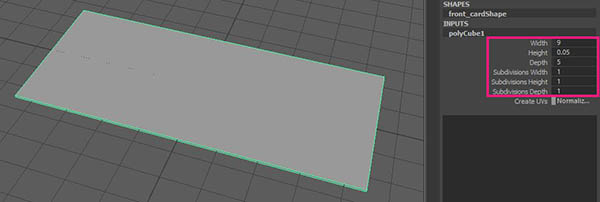
Let’s say we want our business card to be 9x5cm in dimensions.
Business card creation:
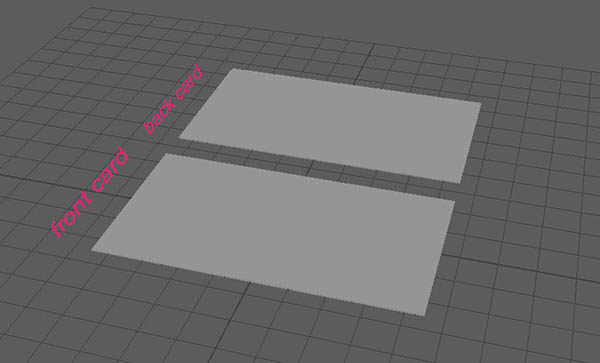
Front card:
Note: Since we are going to use smart objects in Photoshop to add our business card concept, we don’t really need UVs in the 3D geometry we are about to create. Although if you are curious, take a look at the official site of Autodesk for more info about UVs.
Let’s start the 3D creation..
Create a simple cube 9 width x 5 height x 0.05, by going to Create – Polygon Primitives – Cube. There is no need for extra subdivisions, just put the number 1 for all three attributes (width – height – depth). Rename the geometry you had just created to something like a front card.
Awesome, that was it 🙂
The back card will be a little less easy, but still a piece of cake 🙂
Back card:
Take the front card and make a duplicate, by going Edit – Duplicate, or by pressing ctrl + d for a shortcut. Rename it, a back card.
Position it a little further but close to the front card, just like the image below.
Now, we need to make our stack of copies with our back card geometry. We can make it in two ways, the easy one (duplicate special – automatic) and the hard one (manual, one by one). I don’t know about you, but I love easy stuff. So we go with duplicate special approach.
Select the back card and go to Edit – Duplicate special option (square box).
The plan is to have a back card above the back card etc. without extra gaps between them. In my case 0.05 in the Y-axis (translation) works best.
To find the duplicate special window go to Edit – Duplicate special option (square box). The image below shows the settings I used for the duplication process:
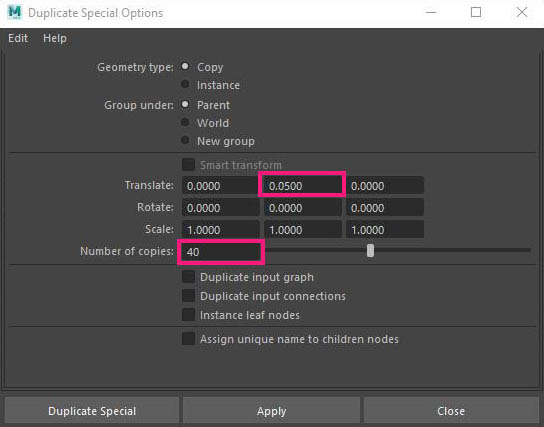
As for the number of copies put any number you want for more or less than 40 copies, it’s up to you.
We have created the front and back cards. Now is the time to create the floor.
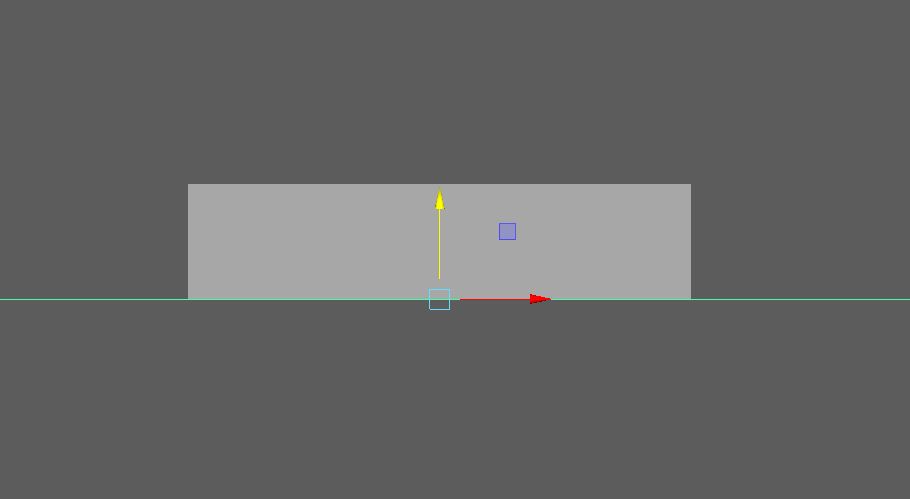
Floor geometry:
Just create a simple polygon plane by going to Create – Polygon Primitives – plane, and make it big enough to cover a big part of the scene. No need for subdivisions, put 1 for both width – height.
Lastly, you have to move it a bit in the Y-axis the geometry you just made, to not penetrate with the business cards. In my case, I moved the floor geometry to Y -0.025.
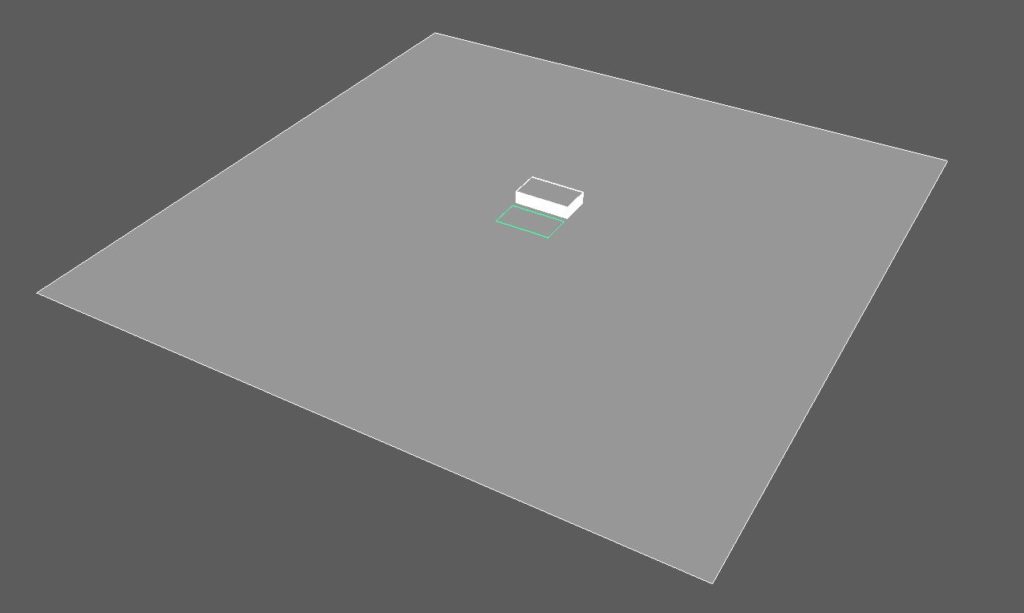
So far, we have both the front and the back of our mockup cards plus the floor. Said that we have done all 3D modeling for our business cards.
Feel free to make some organization in your scene, by grouping things together, to clean the outliner a bit. Take a look at the image below, which at this point have also the finished stage of 3D modeling done.
Prepare the scene to render (mockup 3d in Maya):
As we had finished the modeling process, its time for assigning materials to our objects. But before we do that, it’s a good point to decide which render engine are we going to use.
Since we are trying to accomplish a photorealistic end result, we are going to use a photorealistic renderer, something like a V-ray renderer.
For simplicity purposes, if you are more comfortable with a non-photorealistic renderer such as Maya software renderer or something else, feel free to use it. Although the final product won’t be as much realistic.
Render with V-ray (mockup 3d in Maya):
Although we have chosen V-ray to be our renderer for this project, we are going to use very simple stuff.
Just to point out. Because we are trying to make a mockup, and mockup means flexibility, we won’t use the final render from Maya as it is. We will just render the fundamentals inside Maya that we need to dress it in Photoshop. So there is no need to apply textures and deal with UVs in Maya.
Note: The only texture we will apply will be the floor texture.
So, we have only two separate “topics” that need materials (both front and back cards, and the floor)
Assign materials:
Let’s create the first material.
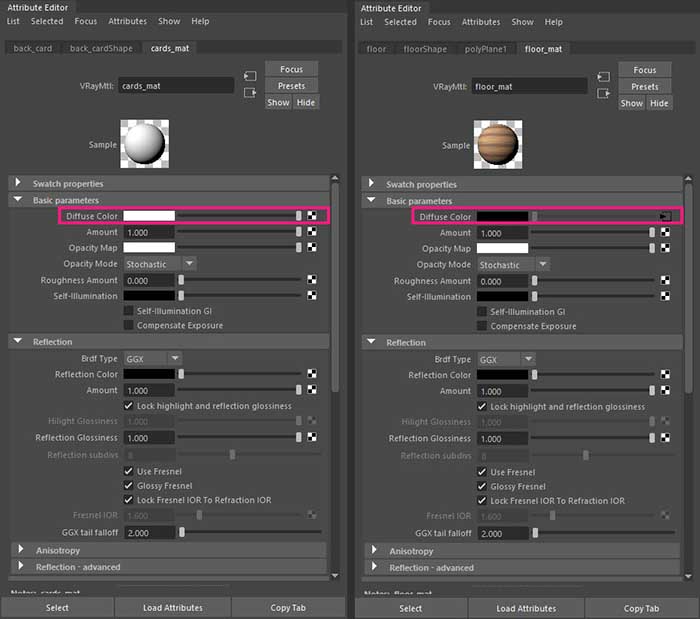
Select all the business cards (the front and all the backs) and right-click and chose to assign new material. The assign new material window appears. Choose the VRay Mtl. Is the basic v-ray material. Go to the attribute editor and just change the Diffuse color to white or something. Feel free to rename the material to something like “cards_mat”.
Create the second material.
Likewise, select the floor geometry in your scene, right-click, and chose assign new material. Again chose the VRay Mtl. This time apply to the diffuse color a file node (wooden texture). You could download the file from below, or you could use your own texture. Rename the material “floor_mat”.
Note: You could download the file from here. The creator of the texture is the Pexels at pixabay.com/
Tips: You could apply a bump map in the floor material if you want to.
That’s all. We have done the material process as well.
V-ray render settings:
As with materials we used a simple setup, we are going to use pretty much the default setting for the v-ray renderer as well.
We need to make the shot. In other words, we need to create a camera from which the final render comes from.
To create a camera, go to Create – Cameras – Camera. Adjust the camera to look like the image below (inside camera).
Note: You could obviously make your shot different than mine. Again for simplicity purposes, I made my composition to be centered.
The final step before the render settings is to create a v-ray light in our scene. Just go to Create – Lights – V-ray Dome Light. Leave the settings of the light as it is.
Now we have the camera and the light in place, let’s go to the render setting and make some adjustments.
- Render using = V-ray
- Common tab | Renderable cameras: chose the camera you just created
- Common tab | Resolution: presets: HD 1080
- Vray tab | Progressive: Min subdivs 1 Max subdivs 32 | noise threshold: 0.005 | Max. render time (min): 5
Adding render passes:
We only need one render pass, in order for our shot to look believable, which is the deep shadows on the bottom of our objects (cards). We call this ambient occlusion.
In V-ray we could achieve it by adding a render pass called “extra tex” and then applying a dirty node inside it.
So, the steps:
Go to render settings in the Render elements tab, and under available render elements look for the “extra tex”. After finding it, double-click on it or just press the add button at the bottom to add it to the right column of the Render elements.
Select it and open the attribute editor. Go to the Extra Attributes section and expand it. Look for the Vray Texture extratex. Click on the checkboard on the right. The Create Render Node appears. Select the first node which is the Vray Dirt from the right column. Open the Attribute Editor once again and increase the subdivision to 12, for better quality and decrease the Radius to something like 4.
Subdivision is the quality of the deep shadow, and radius is its distance of it.
Final render of our scene:
Feel free to make some render tests to see that everything is ok before you make the final render.
To render the scene just press this button:

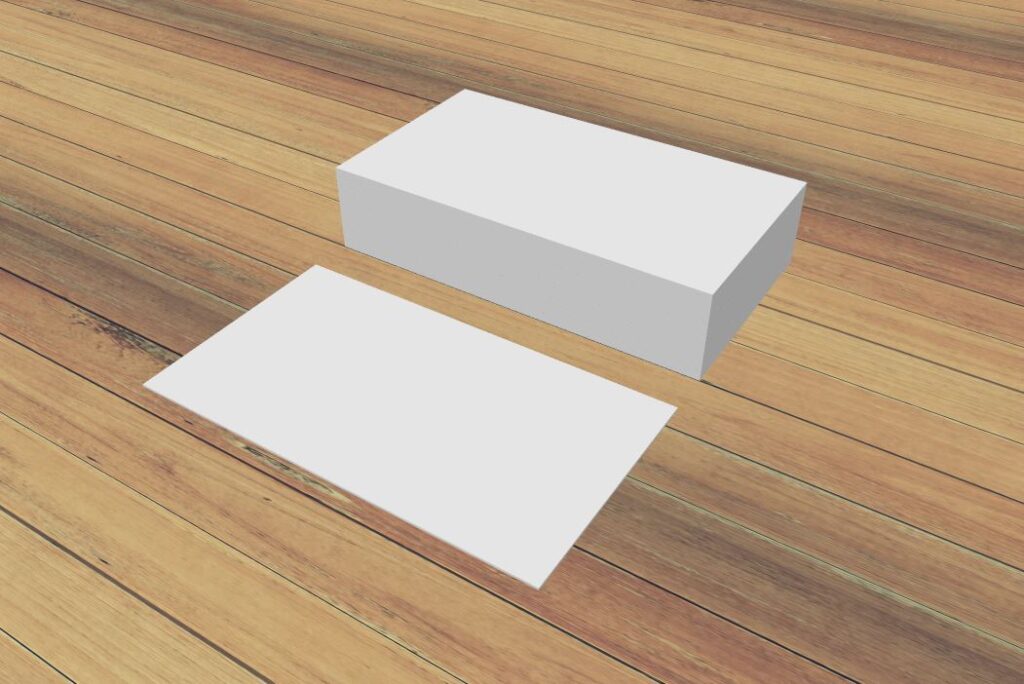
At this point, my final render looks like this inside Maya:
The ambient occlusion pass is not visible in the master layer that we see, although it could be seen alone from the passes inside Vray frame buffer, in the left upper corner.
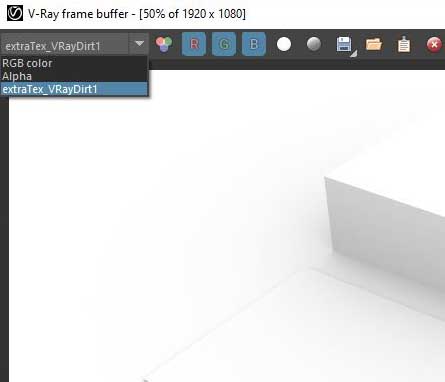
However, is not an issue, is the way that works. We will need this pass in the next step, inside Photoshop.
So let’s do the final render inside Maya.
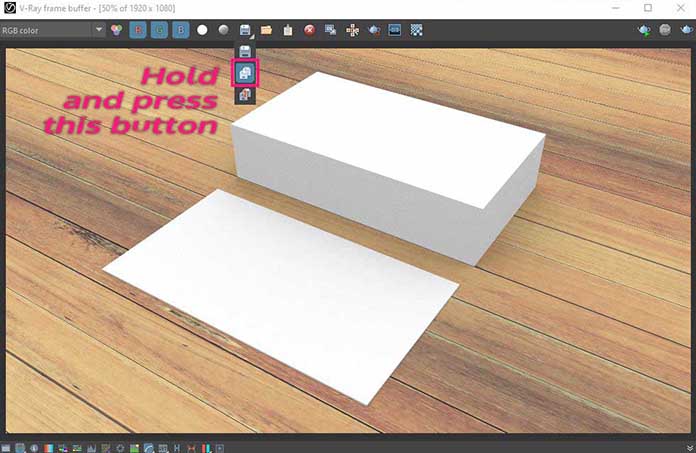
Press the render button. After the render has complied press the following button to save your render with its passes. Specify the location where to be saved and give it a name.
We have just finished the whole project inside Maya.
The next step is to put everything together in Photoshop and finally to create smart objects so we can change with ease the artwork of our business cards every time we need to.
Finishing mockup in Photoshop:
Ok great. All the 3D parts have been done. We have in PNG file format all the images we need for Photoshop.
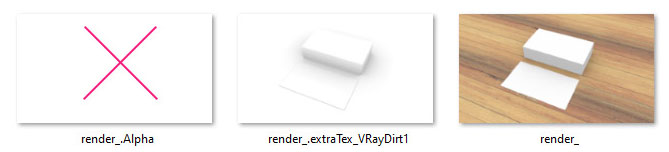
We are not going to use the _Alpha image from above for obvious reasons. We will use only the central and the right one.
Note: We would use the Alpha image if we decided that we will not create a ground – floor in our scene, which is not the case in this project.
Putting together all render passes in Photoshop:
At this stage, we want to combine the images we have rendered from Maya. The Master and the Dirt (ambient occlusion).
Run Photoshop and open the master image (render_).
After that, drag the second image Dirt into the same composition and change the blending mode to multiply.
If the effect is too strong for your taste, feel free to decrease the opacity of the layer through the slider to something like 50 or so.

As we already said with Dirt (ambient occlusion) we enhance our realistic effect.
Creating smart objects in Photoshop:
The reason behind it:
Now the final step is to create smart objects, to be precisely two smart objects. One for the front card and one for the back.
At this point let me say, that we could apply our artwork of our business card inside Maya at the stage of applying materials.
However, the reason we didn’t do that, is because every time we want to change the artwork we had to re-render the same scene in Maya.
On the other hand with smart objects in Photoshop, the process is super easy. You create the smart objects once, and then you just click on that smart objects and just change the artwork. And that was it 🙂
Creating smart objects:
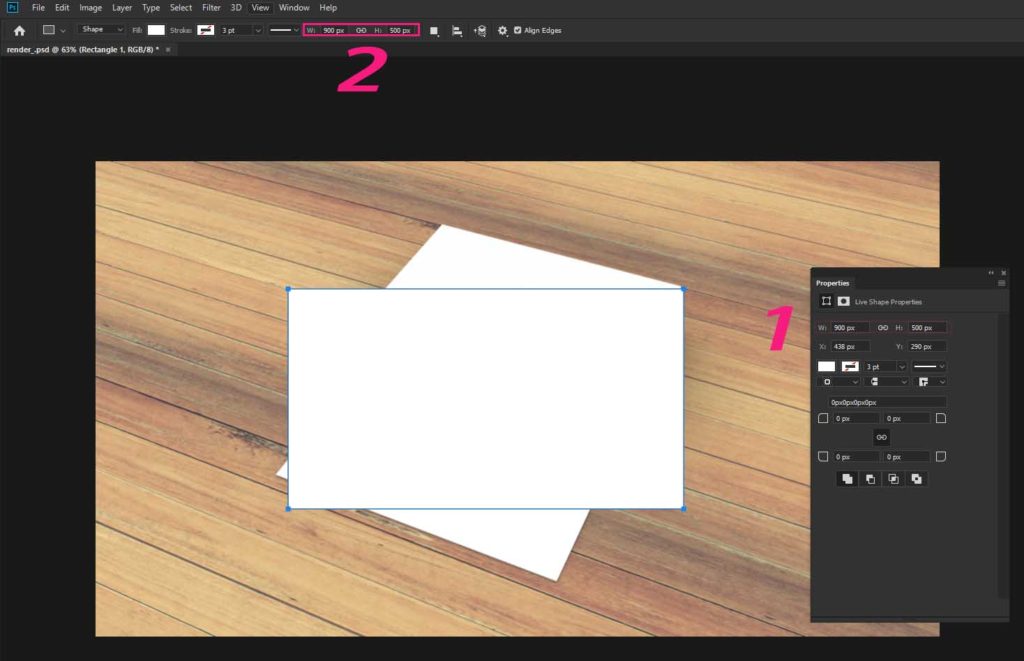
1. In the composition, we already work on, select the rectangle tool (U) and drag just a box in the composition. Make the fill color white and have no strokes.
At this point, it doesn’t really matter the position and the scale of it, we will address it in a moment.
2. As we said in the beginning our business card is 9x5cm in dimensions. So the box we just created we want it to be 9×5 aspect ratio. So, select the box and change its width and height of it. Either from the properties pallet or by the main menu, to be the same aspect ratio as our cards. I used 900px by 500px.
Now, we have the aspect ratio right.
3. Selected the shape layer, right-click on it, and select Convert to smart object.
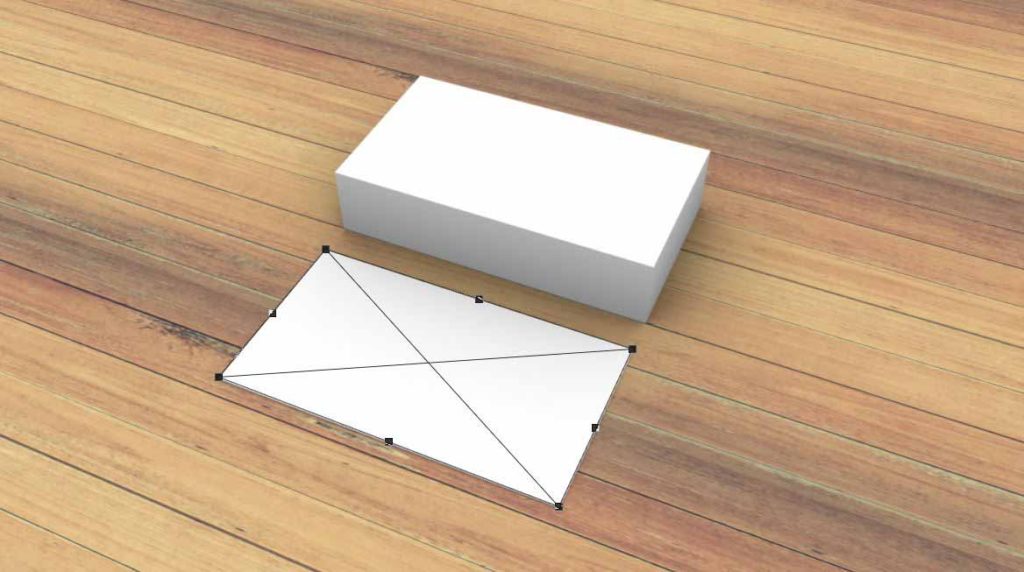
4. Try to adjust the shape layer to be matched the front card below it. The easy way to do that is by using the Distort tool (Edit – transform – Distort).
Tips: Try to lower the opacity of the shape layer we just created, so it could be more visible than the below layer and make your life easier. When you have done repositioning it, don’t forget to make the opacity 100% again.
At this point, we have finished our front card. Feel free to rename your layer in Photoshop if you wish to.
Adding your artwork:
For this post let’s say that these are the artworks that we want to add to our mockup 3d in Maya
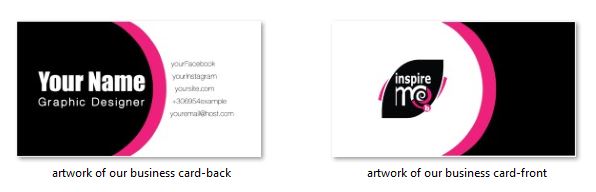
The way to add the artwork of your business card is extremely simple.
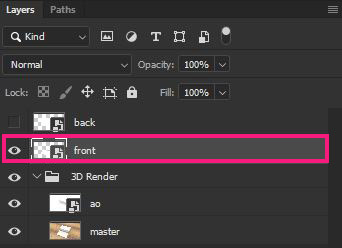
Just double-click on the front layer (the shape layer we just created for the front card).
Photoshop opens new documents with the dimensions we specified earlier (900x500px). So, just drag or open your artwork into this composition, place it correctly, and press ctrl+s (save). That was it.
After saving that new composition, the changes in the main composition are immediate. Go back to the main composition and take a look. You may close the composition you saved with the artwork.
Note: if you want to change anything in that composition again, just double-click on the smart object layer (front), make any change you want, save it, and close it again.
Now for the back card, repeat the steps 1-4 we made for the front card.
- drag a box with rectangle tool (U), white fill, no stroke
- get the aspect ratio right (9×5)
- convert the shape layer to a smart object
- reposition and match to the back card (using Distort tool)
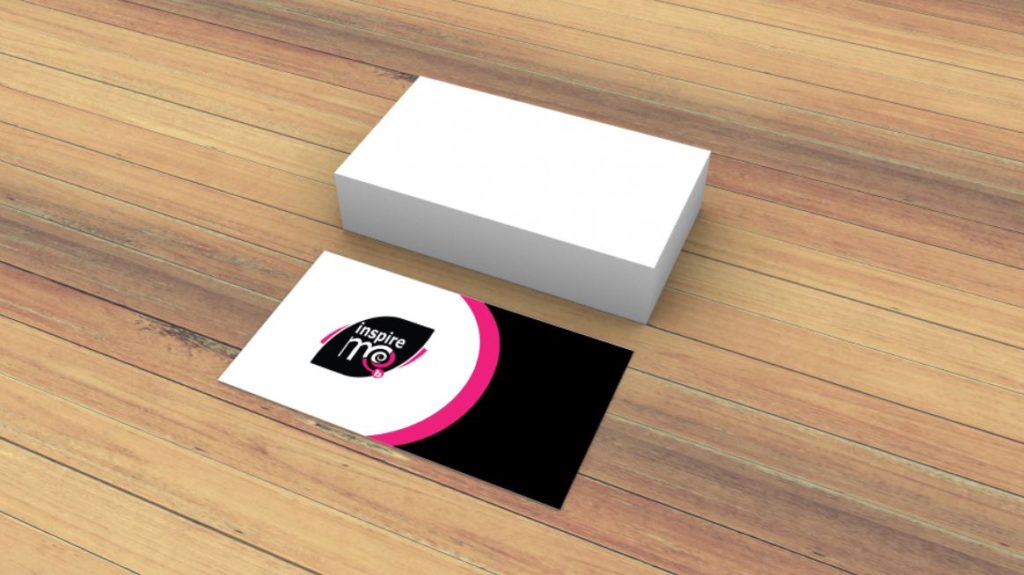
Here is the final mockup 3d in Maya with both artworks in place (front-back)

That’s all
It was a big post I admit it, but I think it had many theory information about mockups in general, and the creative process was detailed in a way not to be bored.
Our concept was pretty basic. We made the 3D geometry of our cards, we assigned simple materials and we render the scene with V-ray, pretty much with basic settings, plus we add an ambient occlusion (dirt) pass for composition purposes in Photoshop. And all of that in a standard centered composition.
We could make it way too complex, from the geometry (more high-poly) to render passes (add reflection, select lights, etc.)
But I just wanted to give you some taste, that you could create a mockup 3d in Maya from scratch, and not limit yourself to a pre-existed one, that you can download for free or not.
Another creative way to create mockups from scratch is with Adobe Photoshop alone using 3D tools. Just a thought.
As I have promised, here are the files which you could download and use for personal or commercial use:
Download Maya mockup file (mb)
Download Photoshop mockup (psd)
If you have any questions about the process of creating Mockup in Maya and Photoshop feel free to ask me. I will do my best to answer them.
Thank you for your time, see you in the next post. Until then, happy creative time 🙂


2 Responses
‘Creating mockup 3d in Maya’ sounds intimidating at first! But if you’re not a 3D guru, MoRock: Free Mockup Generator for Creative Projects can be a lifesaver. I was just browsing mockups during my coffee break; is it really that easy to create professional-looking visuals these days?