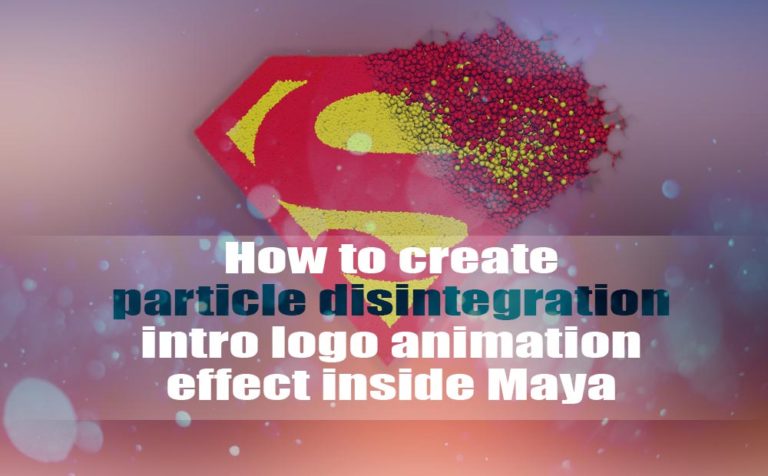
Are you interested to create your own or for a commercial purpose particle disintegration intro logo animation effect inside Autodesk Maya! The technic is simple enough but the power that brings is endless.
We are going to create an interesting disintegration intro logo animation. Keep in mind that with this technic you could achieve some other interesting effects as well. The world of the particle is endless. As always the only limitation is your vision 🙂
The whole project will take place inside Maya.
Table of Contents
ToggleAlso, you can watch in fast speed the entire post through the video.
I am quite excited, are you! So, let’s get started..
If you want to learn more about fluids in Maya, you can visit their official site for that matter.
Prepare the logo file:
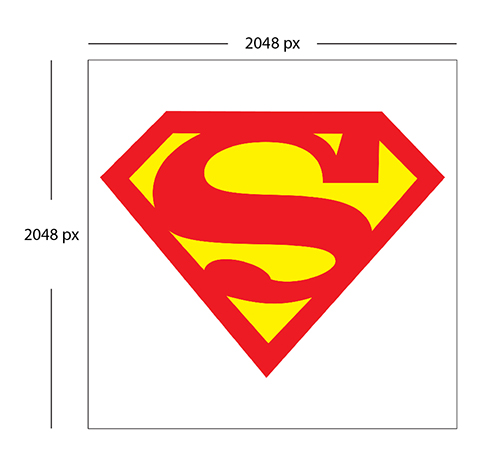
In order to make a disintegration intro logo animation we probably need a logo, right! You can use your own logo or the logo of the corporation you work for. For this particular project, I am going to use the “superman” logo which I found quite interesting.
It doesn’t matter in which image editing software you make your adjustments. In my case it was Photoshop.
If you are new to Photoshop feel free to take a look at “How and why to learn Photoshop”
Make sure of the following as you prepare your logo file:
- resolution at least 1K (1024×1024) – in order to have enough pixels to look at least decent
- a square image like (1024×1024, 2048×2048, 4096×4096) – in any other case, we will have a distortion in our logo inside Maya
- white background
- save as jpeg
Here is my logo file after preparation..
Create the particle version of our logo inside Maya:
All right, now we have our logo ready let’s just jump into Maya and make some cool stuff 🙂
The goal here is to create our logo the same one we prepared earlier to be made of particles inside Maya. The process to achieve that is to emit particles from a surface and apply the logo of ours on that emitter in order to appear as we wish.
Create the emitter:
So, open up Maya and create a new scene. Create a new plane geometry by going (create – polygon primitives – plane) with the following settings: width – height 25, subdivisions width – height 1. Rename the plane geometry to “particle_surface”.
The plane geometry will hold the emitter for our particles.
Note: the settings I was using didn’t really make a difference. Just keep the subdivisions for the plane low, cause we will hide the geometry in the following step.
Now, select the plane we already created and go to (FX) module Legacy Particles – emit from object. Make sure the emitter type is set to Surface.
Well, if you play the animation, you will notice some random particles coming out from the particle surface geometry we already created and moving forward. We want the particle not to move at all. And we do that by selecting the emitter, opening up the attribute editor, and looking for “basic emission speed attributes”. Zero down the speed parament.
Also, hide the particle surface geometry, it’s a kind of distraction right in the middle of everything.
All right, we have our emitter and our particle in place. Now what!
We want to control the randomness to be something specific, like our logo, right!
Create the particle appear of our logo:
How we do that, is simple! With the texture map of our logo.
Open up hypershade by going to windows – rendering editors – hypershade. In the create section in the search bar just type “file” and select the first note it appears, which is the file of course 🙂 Select the file note and open the attribute editor. In the image name section press the yellow folder icon to search and locate your logo version (jpeg). After you select your logo file you are good to go. You may close the hypershade.
Awesome, now we have to connect the logo texture map with the emitter in order for the particles to take the form of our logo.
So, select the emitter and open the attribute editor, and look for the “texture emission attributes (nurbs/poly surface only) section. Expand it and you will see a couple of paraments.
While you have selected the emitter open up the hypershade once again and located the logo texture map you created earlier. Middle drag the texture note into the texture rate of the attribute editor for the emitter. Also, make sure both “enable texture rate” and “emit from dark” are checked. Lastly, crank up the “rate (particles/sec)” up to 1.000 or so.
Note: when you dealing with particles or really anything dynamics in a 3D package it’s good practice to expand your length of animation like 1000 frames or much more. Also, make sure you always have the playback speed to “play every frame, free”, or play every frame, max real-time” or anything else except “real-time”
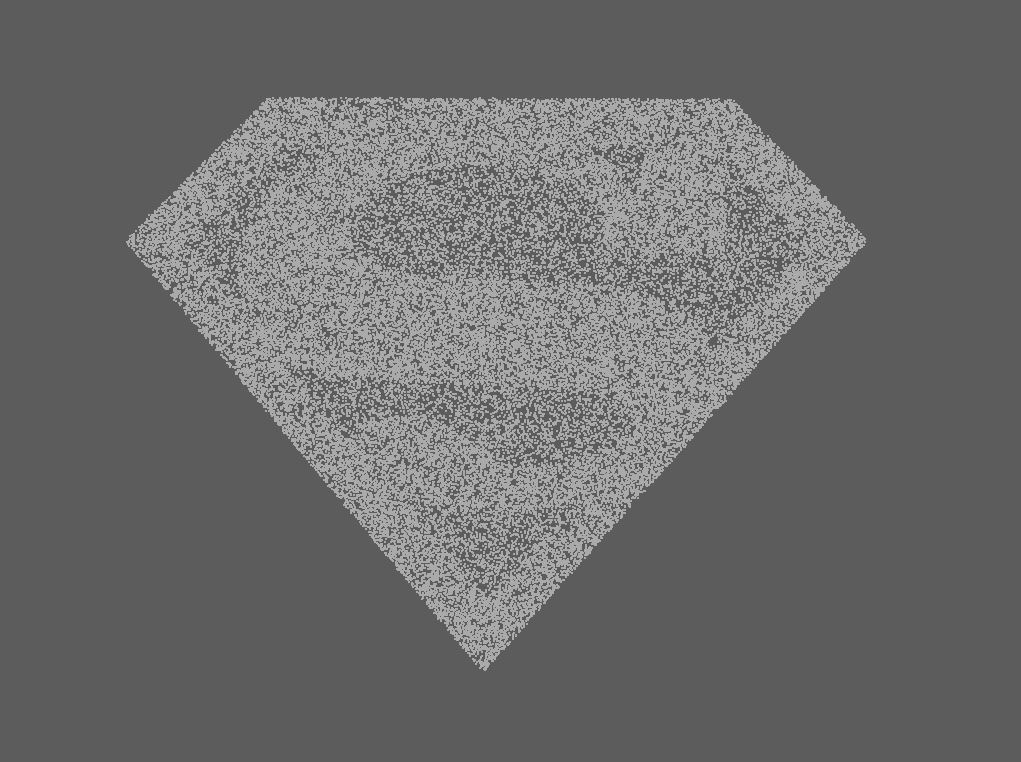
Now if you play the animation you will notice that particles appear to have the form of our logo. In my case, my scene looks like this:
Colorized the disintegration particle logo in Maya
All right, now we have our logo formed with particles, cool. What about some colors, colors of our logo!
It’s a two-step process to colorize our particles.
1. Select the particle note in the outliner and open the attribute editor once again. Locate the “add dynamic attributes” and click on it. It shows three options, general, opacity, color. We want to use the color option. Click on it. It pop-up a small window with a few options. Select the “add per particle attribute” and press add attributes.

2. Select the emitter and open up the hypershade once again and located the logo texture map you created earlier (your logo). Middle drag the texture note into the particle color of the attribute editor for the emitter “texture emission attributes (nurbs/poly surface only)” section. Lastly, check the inherit color.
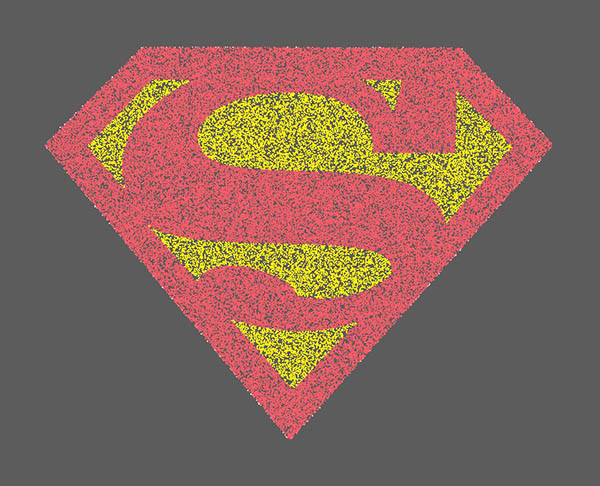
Colorized is done. If you play the animation you will have colors on your logo. Again in my case, my logo looks like this:
Particle render type:
Now at that point, it could be wise to choose the render type we want for our particles. In order to keep it simple, I have chosen Spheres in the “render attributes” of our particle and as a result, we will be rendering out disintegration intro with Maya Hardware 2.0 renderer.

Animating the disintegration particle logo in Maya:
At that point, we have our logo in particle form. It’s time to give it the disintegration effect.
Before that, let’s just crank up the rate (particles/sec) for the emitter under “basic emitter attributes, to something like 20.000. We do that because, in the next step, we will set the initial stage for our particle, and we don’t want to wait long for the particles to fully take the form of our logo.
Initial state:
So, play the animation, and after your logo has been full of particles, stop the animation. Select the particle note and go to Fields/Solvers – initial state – set for selected.
What really happens is that we have to change the initial state of our particles. If you play the animation you will notice that the starting point is different now. And that is what we wanted.
Note: Any time you could clear the initial state and restore the action.
Now we have our logo of particle there is no need for our emitter. You could either delete it or just zero out the rate (particles/sec). It’s up to you.
Add turbulence field:
If you play the animation at that point nothing moves. Don’t be alarmed, it’s normal 🙂 We have to give it some motion right!
Select the particle note and go to Fields/Solvers and select the turbulence field.
Very important: in the turbulence note, search for distance and check the use max distance and put some number in the slider below, in my case was 20.
Note: the value of the paraments could be different for your situation. It completely depends on your scene scale.
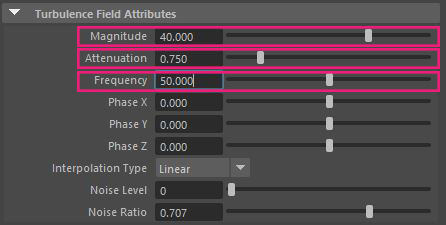
Feel free to play with the settings. In my case, my settings for the turbulence were something like these:
Select the particle and open up the Attribute Editor, go to the “general control attributes” tab, and set the conserve to something like 0.95.
Note: What conserve does is to determine how much energy our particles lose over time. When is set to 1, our particle doesn’t lose any energy at all. In most cases working with particles, you definitely want to lower this, but not much. Something around 0.9 to 0.99 will be fine.
Grab the turbulence note either from the viewport or outliner and move it to the upper and right corner. Set a keyframe for the position in frame 1 to be away from our particle and not have any effect on it and move a couple of frames, around 400 and set another keyframe this time closer to our particle, in order to have interaction with it. That’s the reason we use max distance previously.
As you play the animation and you see the result you got, feel free to play with the settings for the Turbulence field (magnitude, attenuation, frequency), for particles (conserve), and the keyframes translation of turbulence itself.

Render the disintegration particle logo in Maya:
We have our animation for the disintegration intro logo animation in place. We want to export it as an image sequence from Maya.
As we already set our particle render type to Spheres for simplicity purposes our only option for rendering is through Maya Hardware 2.0.
So, open up render settings and set up your frame range, in my case was 1 – 450. Also make sure the Frame/Animation ext: is “name#.ext” in order to batch render multiplay images. Lastly, choose a PNG image format, to have transparency on your images and choose your renderable camera and resolution. That’s all.
Go to render – Batch render. Don’t click on the square icon click on the word Batch Render, in other cases, Maya will give you a warning.
That’s it, grab a coffee and wait for a couple moments for Maya to render your timeline. Promise, it won’t take long since we used Maya Hardware 2.0 renderer.
Note: if you haven’t set up a project for Maya, the output images you have rendering will be located under “you machine – documents – Maya – projects – default – images”
Hope you like the topic of how to create a disintegration particle logo in Maya and find it interesting. See you the next time 🙂



2 Responses