3D render with Photoshop, that sounds interesting, right! You can import, make adjustments and render 3D models with a few clicks inside Photoshop.
We are going to export a simple guitar 3D model from Maya into Photoshop. After that, we will make some changes in a couple of levels such as textures, materials, and lighting. Finally, we will render our 3D model in Photoshop and mix things up with a real picture.
3D render with Photoshop:
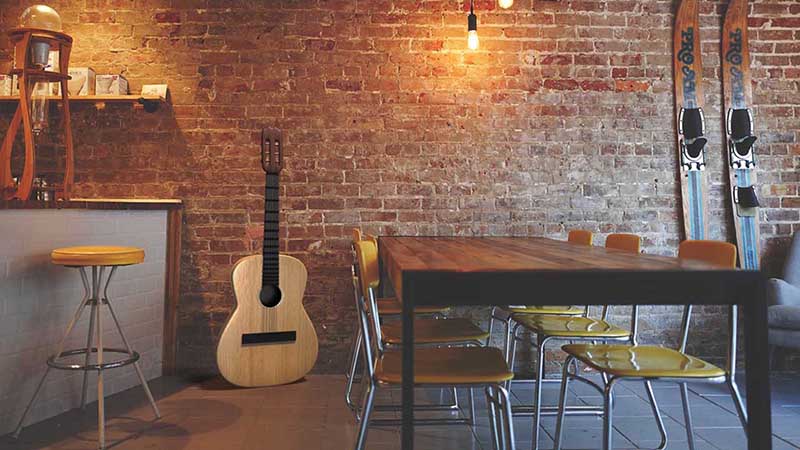
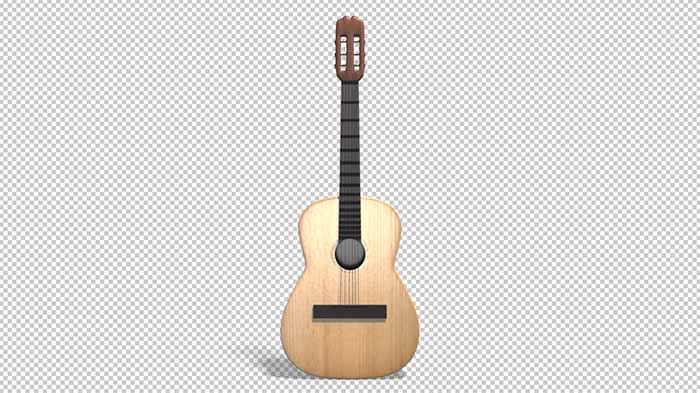
This is the final image we are going to accomplish. Except for the guitar which is a 3D model, all the other elements in that image belong to the real picture.
Before we dive into how we actually do that, let’s first grab some theory.
What 3D formats does Photoshop support:
Photoshop supports the following 3D formats:
- 3D Studio (3DS)
- Collada (DAE)
- Wavefront (OBJ)
If you want the longest list of what Photoshop support in the matter of format in all of its aspects, feel free to visit the official Adobe site.
From my personal experience with all three formats, the OBJ is the most stable. The other two formats in numerous situations had let me down, to be honest. Although 3DS and DAE formats are more organized 3D file scenes than OBJ inside Photoshop, for stability reasons alone I will use the OBJ format in this article.
Why use Photoshop for 3D content:
- if you are not a 3D Artist (not familiar with any 3D software)
- you don’t own 3D software
- you are a Photoshop artist (you are comfortable with Photoshop)
- blend 3D content with real image
The first three are more or less self-explanatory. Let me elaborate on the fourth one.
If you want to blend a 3D element – object with a real picture you either download online or take by yourself, I believe it could be done more easily inside Photoshop than trying to accomplish it inside your 3D software. Again that’s my opinion and it’s boiled down to what software are you more skilled in (any 3D software or inside Photoshop). In the last step of this article, we will try to blend our 3D model with a real-life picture.
Let’s start by exporting our guitar 3D model from Maya in an OBJ format.
Export our 3D model from Maya:
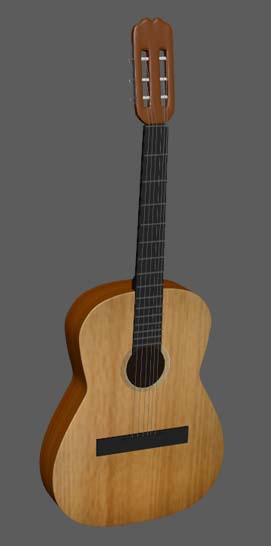
In the following image, you can see the guitar 3D model inside Maya that we will export as OBJ in order to import it in Photoshop.
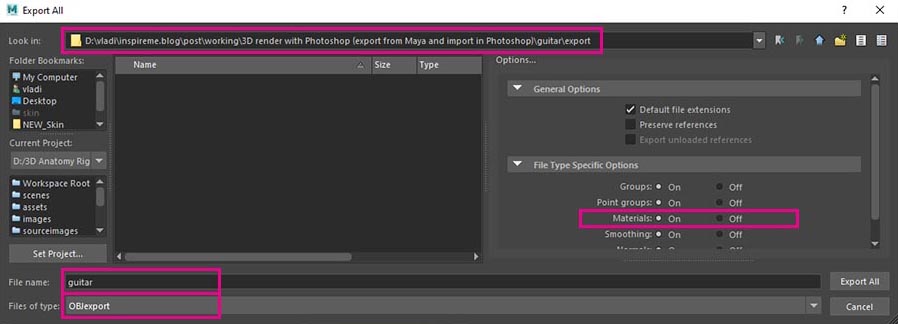
Open up your 3D model in Maya and go to file – export All. Select the destination of your export, choose a name for it, and lastly, make sure you turn on the materials in the options section and click Export All. Two files are created. An OBJ format is the file we open in Photoshop and an MTL format, is the file that contains the material information of our model. Photoshop will automatically read that information from that file. No extra work from your side.
Note: If we didn’t turn on the materials in the export setting in Maya, the MTL format wouldn’t be created and as a result, we will not have the materials of our model in Photoshop.
Two things that you have to be aware of when using OBJ format inside Photoshop:
- the hierarchy of groups of your 3d objects will be flat inside Photoshop
- the materials will have the names of the shading groups and not the material names inside Photoshop
With the other two 3D formats (3DS and DAE), this is not the case. The hierarchy of groups and material names remains intact.
Import our 3D model to Photoshop:
Importing a 3D model in Photoshop is just like importing any other element. Either by drag and drop it or by going to file – open, locate, and click on your file. As I said, the file you want to open is the OBJ file, not the MTL one.
A popup window appears:

There are two kinds of sizes you can set up in this window. The 3D Scene Size and the document size. The former is the more important. Basically, it determines the quality of your 3D renders eventually. In the image above you can see the settings, I have chosen.
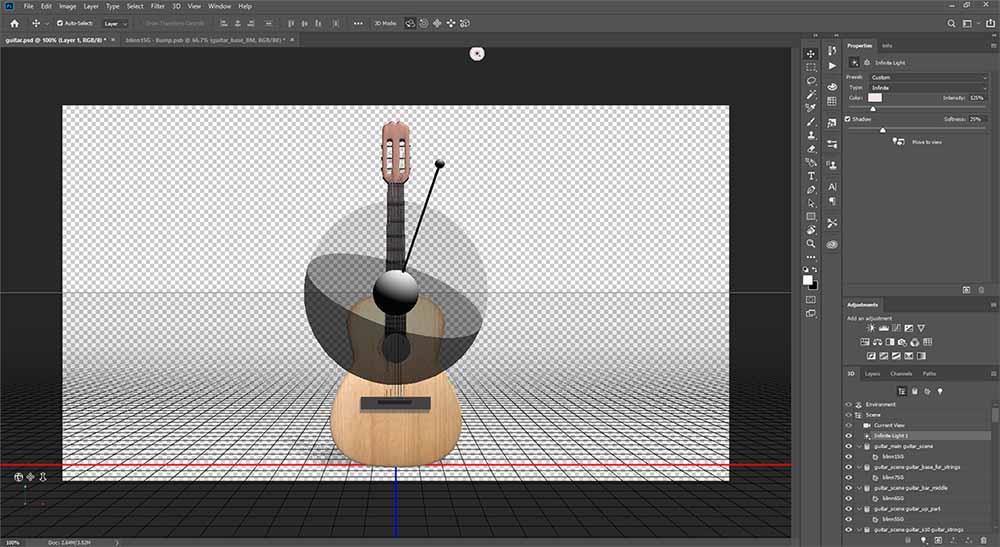
Photoshop will ask you to switch to a 3D workspace. Accept the offer. Here is the guitar 3D model in Photoshop.
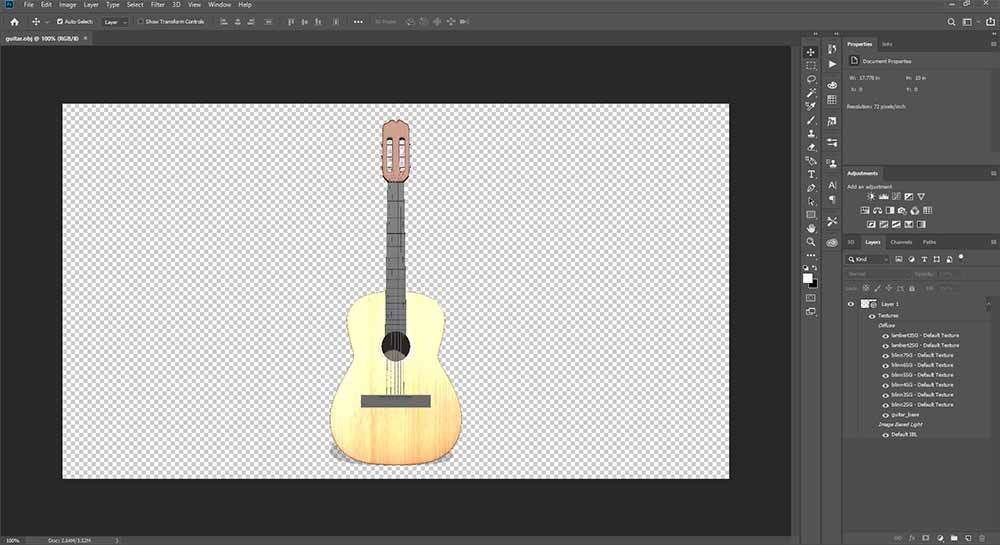
Since the scope of this article is not to show you the fundamentals of 3D in Photoshop but rather show you a generic technique of 3D rendering in Photoshop, feel free to learn more about how to navigate in 3D inside Photoshop and more from here.
Material adjustments of our 3D model:
Let’s make some changes to one of our materials. After learning the process, you can apply that knowledge to other materials as well.
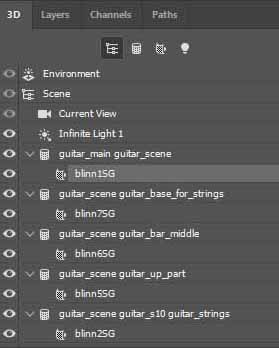
Each material it’s under a 3D geometry. Let’s say we want to alter the material of the guitar_main, which is the one that has a texture on it. Select the geometry in the viewport of Photoshop. In the 3D tab, you will notice a Blinn material, select it.
Note: As I said, in OBJ format the materials are getting their names from their shading groups inside Photoshop. We could rename those shading groups in Maya to reflect their material names before we exported them as OBJ.
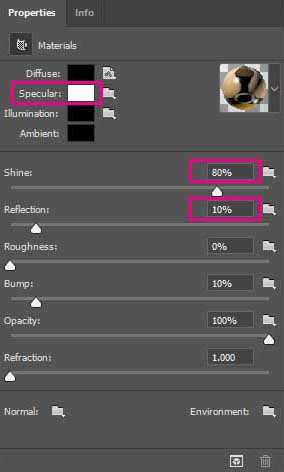
After selection, go to the properties panel. You could see a bunch of options to play with. Such as shines, reflection, bump, etc. Feel free to make some adjustments. You can see mine, in the image below:
Texture adjustments of our 3D model:
Now we have altered some attributes of our material, let’s connect a simple bump map for this specific material.
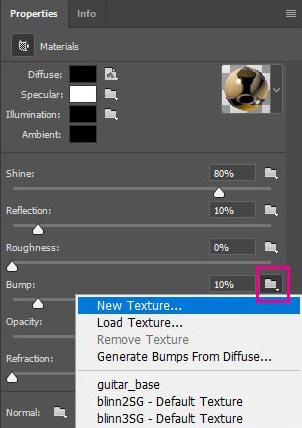
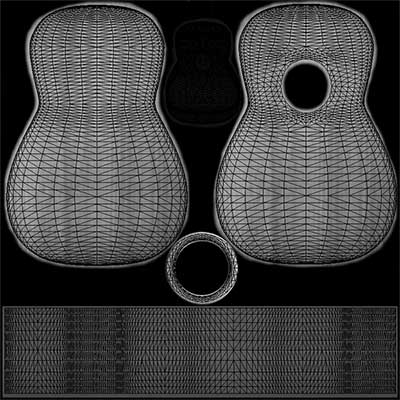
Once again select the material and go to the properties panel. In the Bump section, click on the folder icon to the right. A new popup window appears. Set the resolution of your map to something like 1024×1024. It must be square, in order for your map to have no distortion at all.
After that, a new Photoshop document opened, with the UV in place. You can either drag and drop a bump map you have already created for this material, or you can create a new one from start. In my case, I will drag and drop an existing bump map into the document. If you go back to your main document Photoshop has integrated the changes you made in the bump document. No need to save. I lowered the bump slider strength to 3%, for a lower effect.
Note: If you want to edit the bump map you have connected or created from scratch, go to the same material and click into the folder icon which now has changed, and choose edit texture. The bump map document will open once again for further editing.
You can connect or create other maps as well, in other channels, like shine, reflection, opacity, etc.
Lighting adjustments of our 3D scene:
It’s time to adjust the lighting in our scene in Photoshop.
Photoshop makes use of three types of lights, infinite, point, and spotlight. Each one has its own properties you can play with. Photoshop has also light presets you can use.
Select the light from the 3D tab, and go to properties, to make some changes. In my case, I left the light type to infinite, made the shadow 25% soft, and lastly I alter the white color to something warmer. I also reposition the light angle through the gizmo manipulation in the document.
After lighting adjustments, feel free to play again with materials as well, since lighting is correlating with materials.
Test render:
3D rendering in Photoshop is just a matter of one click. You can have access either from the main bar, 3D – render 3D layer (alt + shift + ctrl + R), or by pressing the render icon which is located under the 3D tab. After that is a matter of seconds or minutes depending on the power of your machine and the complexity of the 3D scene, you are trying to render in Photoshop.

Let’s just make a quick test render of our scene to see the results.
Blend 3D with real image:
Now to be more interesting, in our shot we are going to blend our 3D model with a real picture. The way to do that is by adjusting our camera, to match the perspective and scale of our picture.
The author of the picture is Pexels at bixabay
First of all, drag and drop into the working document of Photoshop your picture, and make the necessary scale up or down and reposition your image, like I did in the following image.

After you have imported the real picture, select the camera (current view) and try to adjust the view of your 3D model, with the five camera icons. Finally, when you are happy with the view look of your 3D model, make another render inside Photoshop.

Conclusion:
In our 3D guitar model scene, we only make a few changes to the materials and the lighting for simplicity purposes. I am sure you could make a ton of adjustments, like adding extra textures for reflection, shine, etc. channels. Make more realistic lighting for your scene. Also, you could play with the environmental attributes, shadows in general, and much more.
For better results, of mixing 3D models with real images to look more realistic, despite the lighting setup, feel free to play with traditional color correction techniques inside Photoshop, like curves, levels, etc.
3D content in Photoshop has a lot to offer.


2 Responses