Deleting unecessary keyframes in Maya after key baking simulation, is a great way to reduce file size from your final FBX(s) format. Which is very important when you are dealing with a lot of animation clips, performance-oriented. And that’s the right approach we have to take, if we were careless in the first place. The right way to set keys in Maya.
Let’s say we are working on a 3D character animation. And we create all the animation we need for a singe shot, for exaple a hand-waving animation clip. And our goal on this example is to transfer the animation information to a game engine, such as Unity.
Note: The way to make that happen inside Unity, is to have separate FBX file for our geometry-character and a separate FBX file for our animation clip(s), and the right naming convention, which is important. I am assumed you are familiar with this approach. Although if you are not, I will post a step by step process in the near future.
So in order our animation to work on a game engine, like Unity, the animation has to be baked. So we need to bake our animation in Maya first, before we export it.
Some previous rigging articles about Maya you may find interesting:
- How to Fix Green Shader Issue in Reference Scene in Maya
- How to delete all bindpose and re-create a new one in Autodesk Maya
- Create auto rig controls in Maya with free Python script
Deleting Unnecessary Keyframes in Maya, Theory:
Let’s say we are done with our character animation keyframes, and we are ready for the key bake simulation phase.
Go to Key – Bake Simulation (square icon) (Animation module). And reset the settings from that new popup window, from Edit – Reset Settings.
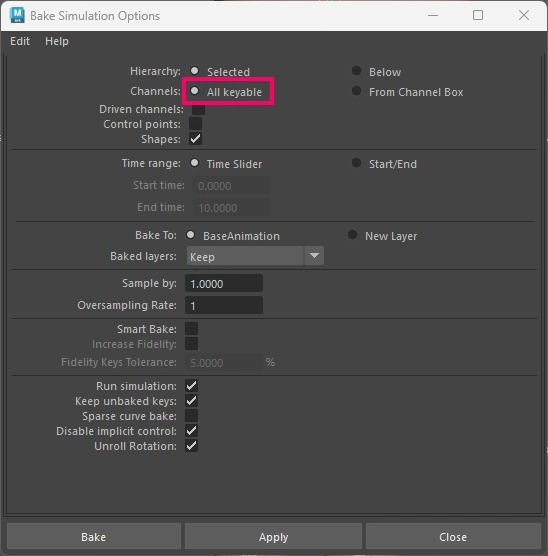
As you can see the Channels parament is set to All keyable.
So by default this process will add keys on all our selected joints in every visible attribute from the Channel Box (translate, rotation, scale-all axis). But in fact, we don’t really need all those unessesary keys, because they will increase our final FBX file size, as we mentioned earlier.
What we actually need is only those keys that moves through time (specific joints and specific attributes)
But let’s assume we don’t do it in the right way and we select All keyable option from the Bake Simulation Options and we bake it. And finally we export our animation FBX file.
How to clean that mess?
The answer is simple, by deleting the Static Channels for the whole joints hierarchy of our rig, from the Edit – Delete by Type – Static Channels. We have to do the same process for all exported FBX.
Deleting Unnecessary Keyframes in Maya, Example:
Let’s clear things up and see the whole process with an example.
The whole process:
- Create the animation, by setting keyframes
- Key bake simulation
- Export as an FBX
- Clean unnecassary keys form exported FBX
In this example we are going to use the following 3D model – Stickman. Link 1 and Link 2, if you want to check them out.
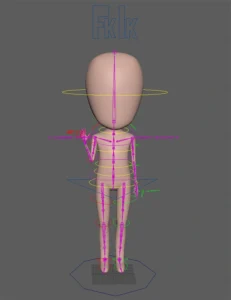
I have already created a very simple waving animation. So the first stage (create animation) has been done. I am sure you already created your animation as well, or at least been familiar with the process.
Let’s move to the second stage (key bake simulation).
Key bake simulation:
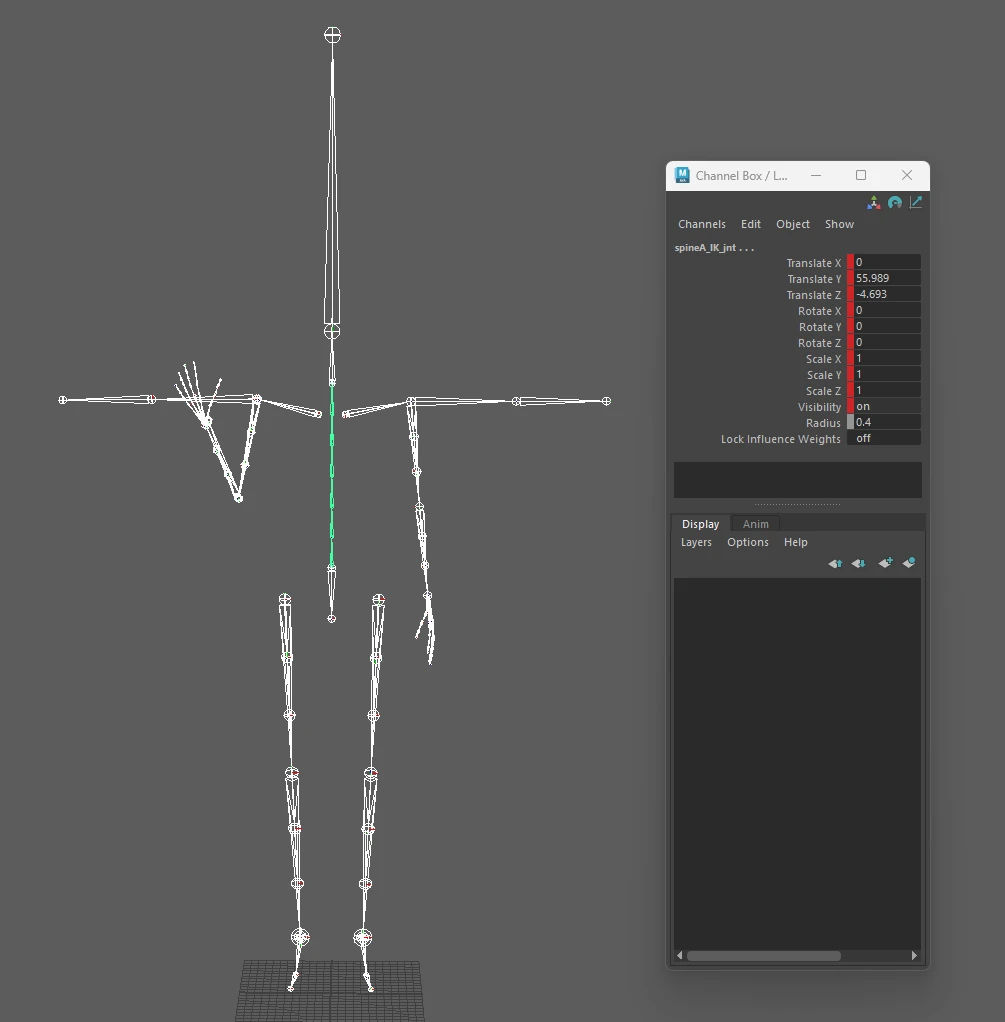
So in order to key bake simulation we have to select all the nessasary joints heirachy of our rig. I have created a set that includes of of my character joins in the Outliner, for easy access (how to create a set in Maya). But if you haven’t, just select all the joints of your character and go to Key – Bake Simulation (icon box), make sure you have reset the settings on that new popup window and click bake.
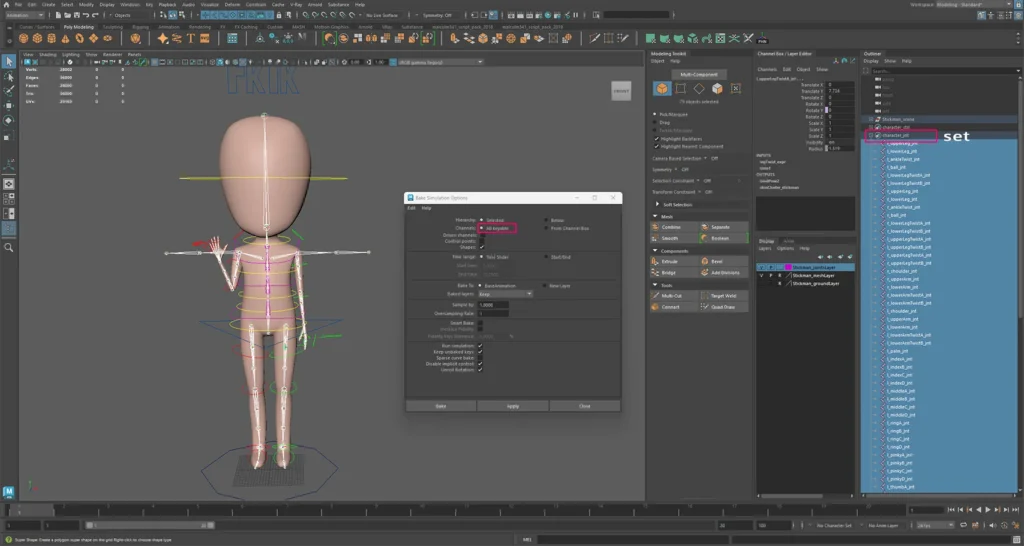
After you hit bake or apply, Maya will take some time, depending on the complexity and the amount of keyframes you are working on, to actually bake keys for every frame, on your current timeline. After the process has been completed, you will notice that Maya has but key for every frame of your animation (indicated by red lines, in the timeline).
Now we have baked keys, let’s jump to the next stage (Export as an FBX).
Export as an FBX:
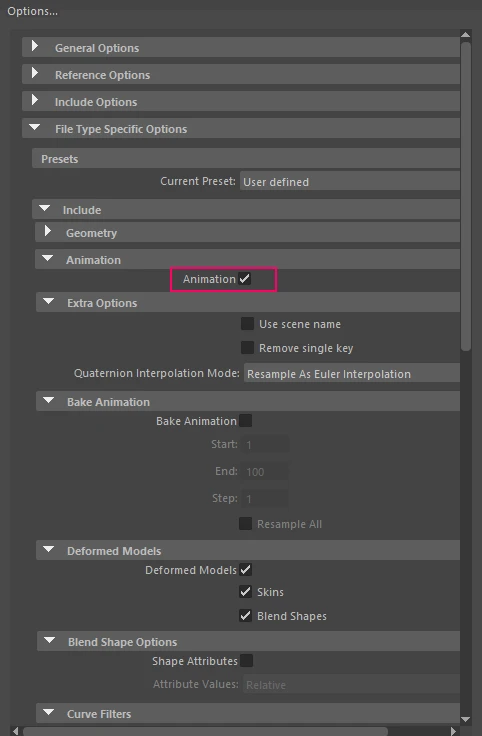
Once again, select all the nessasary joints heirachy of your rig and go to File – Export Selection (option box). Just make sure you are exporting an FBX file format and you have checked Animation, under File Type Specific Options – Include – Animation.
Now you have an FBX file format for your animation, on your choosen folder.
If you hover over that exported FBX file you can see the size of it (kb, mb, etc.). Or you can right-click on it and go to properties to see the file size instead.
In the next and final step, we are going to reduce dramatically the size of that file.
Clean unnecassary keys form exported FBX:
Import that animation FBX into Maya, by going to File – Import, or by drag and drop it into Maya.
At this point, since we had selected All keyable Channels option, in the bake simulation process, every joint has keys through the entirely choosen timeline. This cause the relative big file size of our FBX. Let’s fix that.
Select all the joints of your character, by selected the top node of your rig from the Outliner in Maya and go to Select – Hierachy from the main menu.
And while you have that selection, go to Edit – Delete by Type – Static Channels.
And while you have still that selection go to File – Export Selection, and re exprot that FBX.
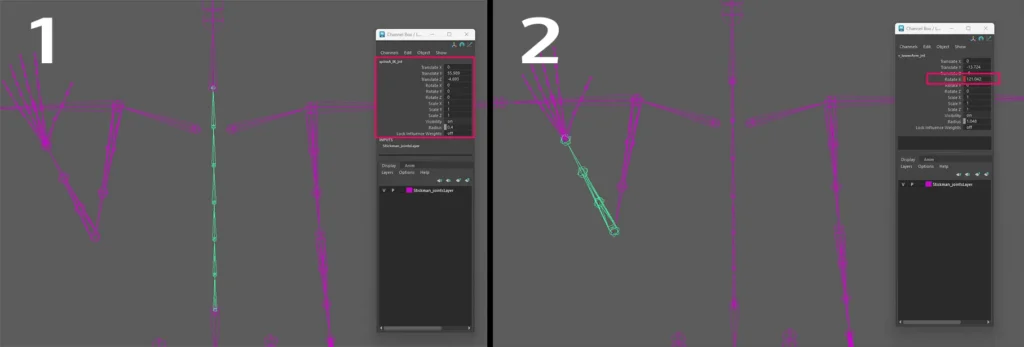
What deleting static channels did:
- deleted all those unnecessary keys from all selected joints, that haven’t any motion at all
- deleted all those unnecessary keys from all selected joints, and kept only that attribute(s) animated
In my case, the FBX file that had all that unessesary keys was about 750kb, and the file after cleaning up all those unessasary keys was about 220kb. So it’s a big diferente.


One Response