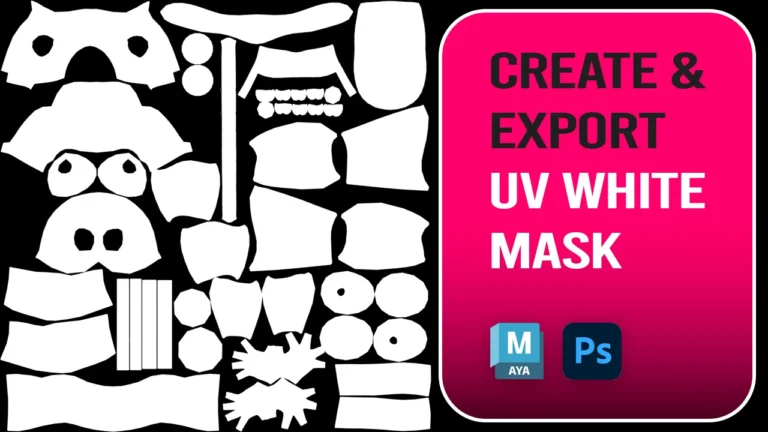
When working with 3D characters and textures, making adjustments to specific parts of a model can sometimes be time-consuming. Whether you want to change the skin colour, adjust the hue and saturation, or modify individual texture elements, having an easy way to isolate specific UV sections can make your workflow much faster.
In this tutorial, I’ll show you how to create and Export UV white masks from Maya to Photoshop, allowing you to select individual UV sections with just a few clicks.
We’ll cover two different workflows, using both V-Ray and Arnold renderers. Once exported, we’ll import the white masks into Photoshop and use them to make precise selections and non-destructive texture adjustments.
If you’re working with character texturing, props, or 3D asset creation, this is a useful technique to have in your workflow.
Let’s get started!
Feel free to check out the youtube version:
Two Ways to Create UV White Masks in Maya
There are two approaches you can use to create UV white masks in Maya:
- The simple method: Work directly in your existing scene by saving a separate draft version of your project.
- The advanced method: Use Render Layers to manage the process.
For this tutorial, I’ll use the first approach because it’s straightforward and easy to follow.
Before starting, I’ll also mention that I’ll only export UV white masks for the body parts in my scene, rather than the additional geometry. I’ll hide those extra objects to make sure the baking process works correctly.
One important thing to consider before exporting any texture maps is the UV layout of your model. Having consistent texel density across your geometry will help maintain consistent texture quality. If you haven’t checked yours yet, you might find my tutorial on how to achieve the same UV pixel density across multiple objects in Maya using the Texel Density Tool helpful.
Part 1: Creating UV White Masks with V-Ray
The first method to export UV masks from Maya uses V-Ray.
Step 1: Change the Render Engine
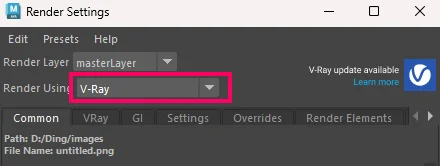
First, open the Render Settings in Maya and change the active renderer to V-Ray.
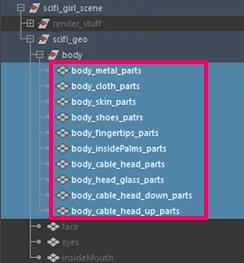
Next, select all the geometry you want to include in your UV white masks. In my example, I’m selecting only the character’s body parts.
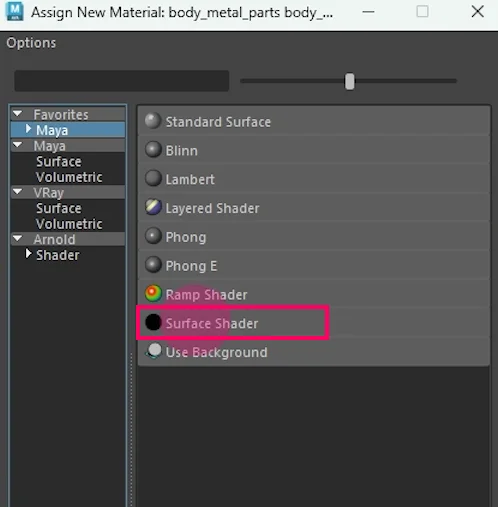
Right-click on the selected geometry and choose Assign New Material.
Step 2: Assign a Surface Shader
In the material selection window, choose Surface Shader.
Once the material is assigned, go to its Attribute Editor and change the Out Color to pure white.
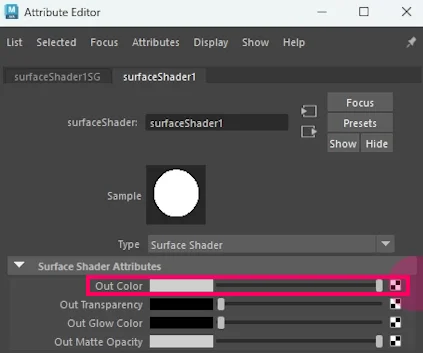
This will ensure that all the selected geometry is represented as white in our exported UV masks.
Step 3: Configure the V-Ray Baking Options
Now, switch to the Rendering module and navigate to:
Lighting/Shading → Show Default V-Ray Bake Options.
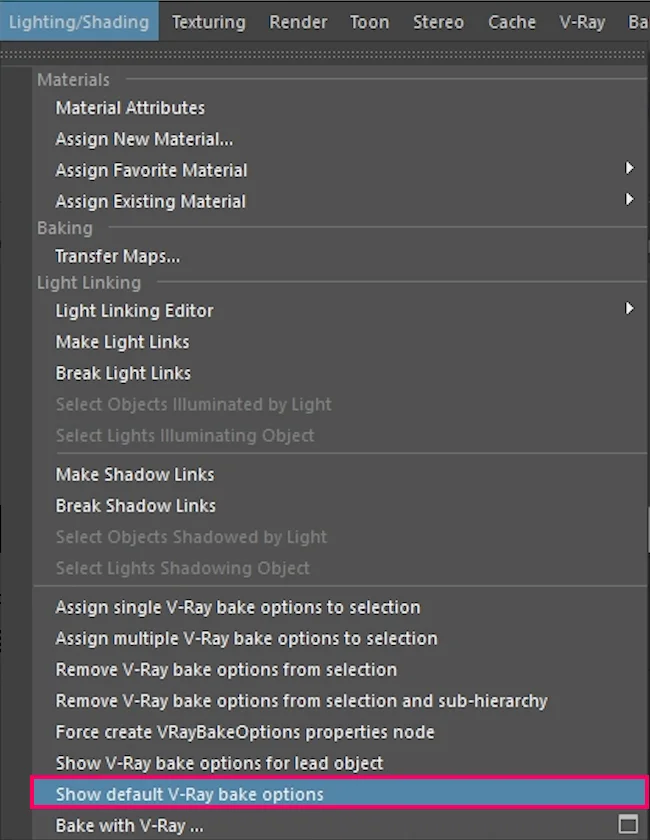
Here, you can configure the baking settings.
For this example, I’m using a resolution of 1024 × 1024 (1K), but you can choose a higher resolution, such as 2K or 4K, depending on your project requirements.
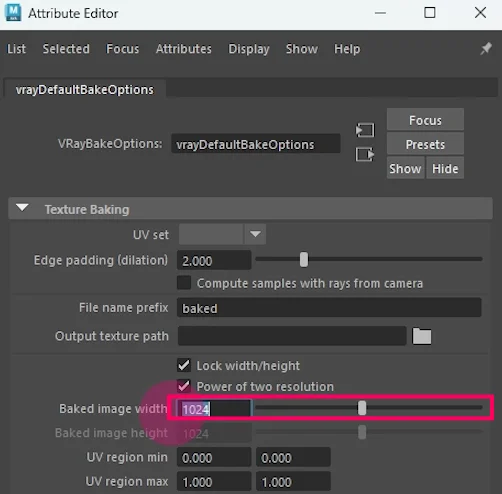
Choose your destination folder where you want Maya to save the exported UV white masks.
Step 4: Bake the UV White Masks
Once you’ve configured the settings, select all your geometry again and navigate to:
Lighting/Shading → Bake with V-Ray
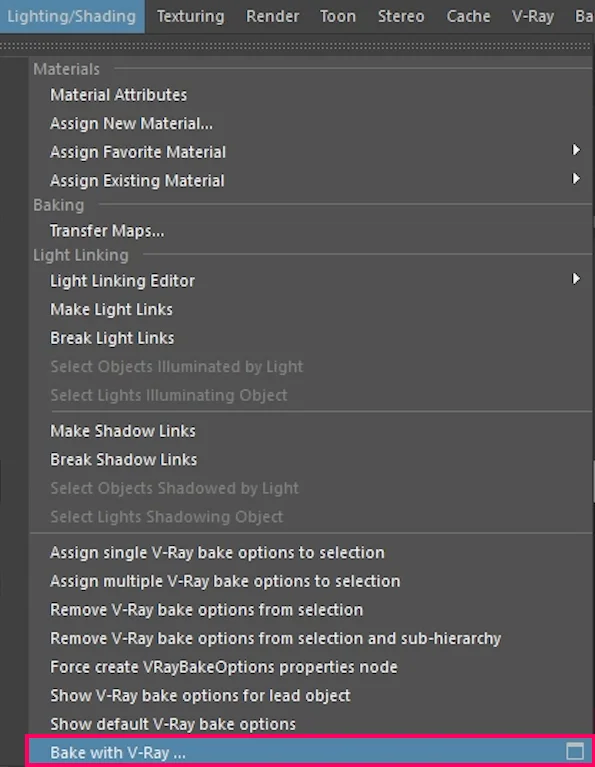
Browse to your destination folder once more, confirm the settings, and click Bake.
Maya will now start exporting your UV white masks.
The processing time depends on your computer’s performance and the resolution you’ve selected. A 1K texture should be relatively quick, while higher resolutions such as 2K and 4K will naturally take longer.
Once the process is complete, you should find your exported UV white masks in your chosen destination folder.
Here are my UV white masks:
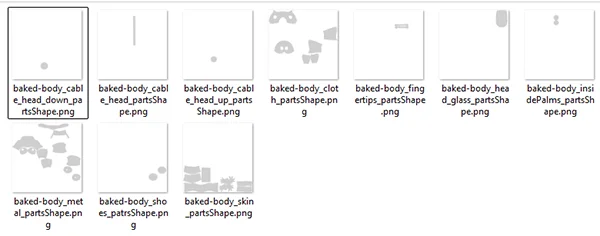
That’s the V-Ray workflow!
More Maya Texture Baking Techniques
If you’re interested in exploring other texture baking techniques in Maya, you might also want to check out my tutorial on how to bake an Ambient Occlusion texture map in Maya using V-Ray.
Ambient Occlusion maps are particularly useful for adding extra depth and detail to your colour textures. You can also combine them with your original textures in Photoshop to achieve more realistic results.
Part 2: Creating UV White Masks with Arnold
You can also export UV masks from Maya using Arnold.
Step 1: Assign an Arnold Flat Material
First, select all the body geometry you want to export.
Right-click and choose Assign New Material.
This time, instead of using a Surface Shader, select aiFlat.
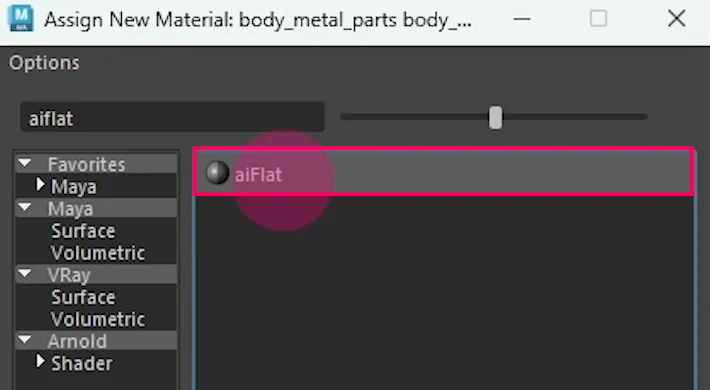
The aiFlat material is already white by default, which makes it a convenient option for this workflow.
Step 2: Open Arnold Utilities
Next, navigate to:
Arnold → Utilities → Render Selection to Texture
This will open the Arnold baking options.
Set your desired texture resolution. For this example, I’m using 1K again.
Choose your destination folder where you want to save the exported files.
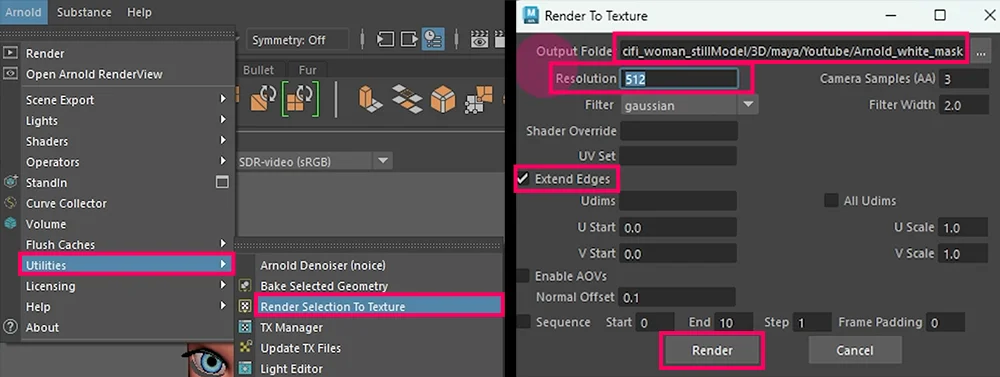
Note: Make sure you uncheck the Extend Edges option. This is important for keeping your exported white masks clean.
Step 3: Render the UV White Masks
Once everything is configured, click Render.
Maya will start processing the selected geometry and exporting the UV white masks.
As with V-Ray, the time required depends on your computer’s performance and the resolution you’ve chosen.
When the process is complete, you’ll find your exported masks saved as EXR image files in your destination folder.
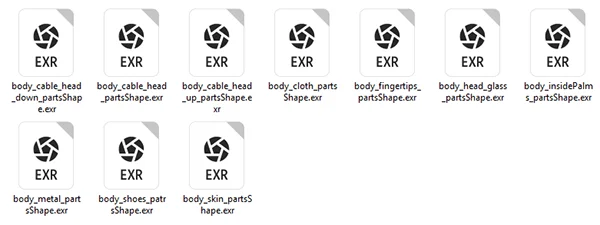
Now we have successfully created UV white masks using both V-Ray and Arnold!
Part 3: Importing UV White Masks into Photoshop
For the next part of the tutorial, I’ll use the UV white masks exported with V-Ray.
The process is essentially the same if you’re using Arnold.
Step 1: Import the White Masks
Open Adobe Photoshop and drag and drop all your exported UV white mask images into your project.
For better organization, select all the imported layers, group them together, and rename the group White Masks.
You can hide the group whenever you don’t need to use the masks.
Keeping everything organized will make it much easier to work with multiple UV sections.
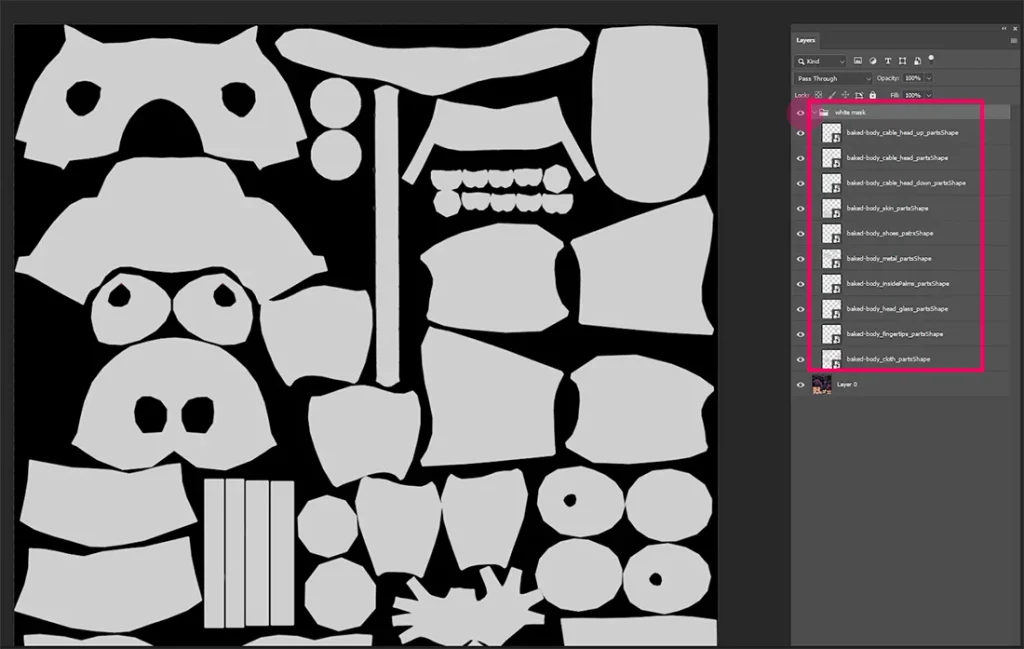
Step 2: Select Individual UV Sections
Now comes the useful part!
Let’s say I want to select only the skin section of my character.
First, locate the corresponding skin UV white mask layer in your White Masks group.
Hold down Ctrl (or Cmd on Mac) and left-click on the layer thumbnail.
Photoshop will automatically load the white areas of that mask as a selection.
You now have a precise selection of the corresponding UV section without having to manually select anything.
Note: Save-load selecion in Photoshop could work perfectly for those UV white masks.
Step 3: Apply Adjustments to Your Original Texture
With the selection active, go to your original texture layer.
Press:
Ctrl + J
This will duplicate the selected area onto a new layer.
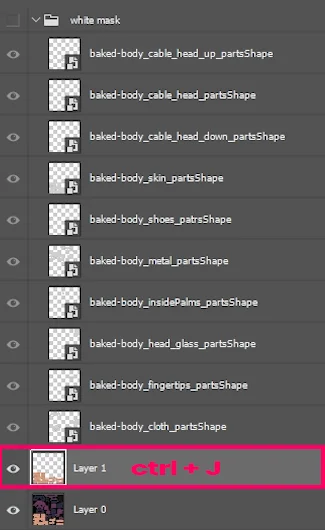
You can now isolate this layer and make adjustments without affecting the rest of your texture.
For example, let’s say I want to change the colour of the skin.
I can add a Hue/Saturation adjustment layer and modify the colour as needed.
As you can see, the adjustment only affects the selected skin section rather than the entire texture.
You can also add additional adjustments or effects depending on what you want to achieve.
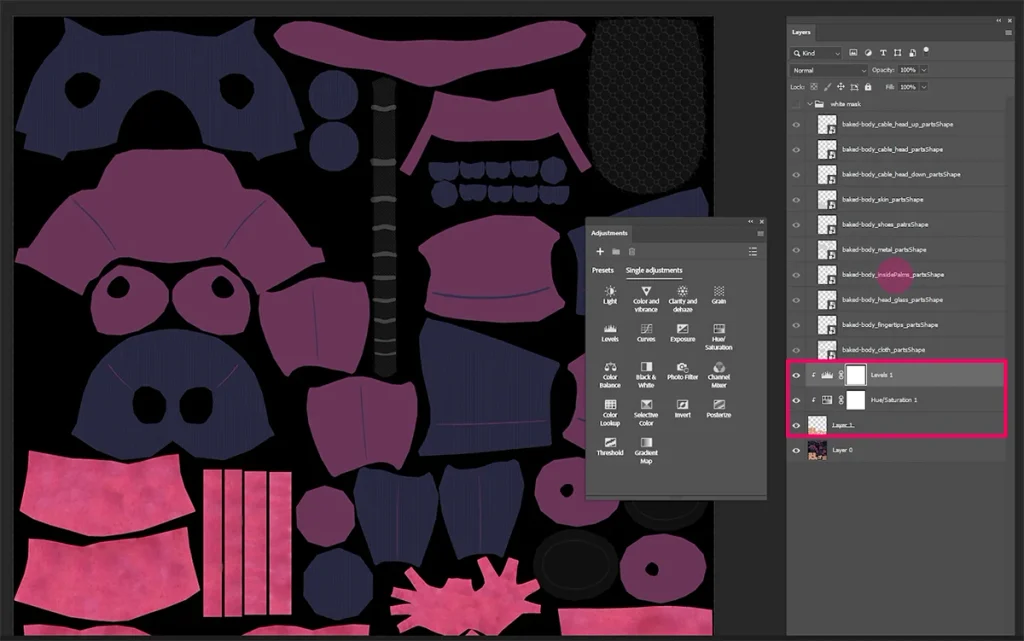
Step 4: Repeat the Process for Other UV Sections
The great thing about this technique is that you can repeat the exact same process for any other UV section.
Simply select the corresponding UV white mask layer, Ctrl/Cmd-click on its thumbnail, and use the resulting selection to isolate the desired area of your original texture.
This gives you a quick and flexible way to make targeted texture adjustments in Photoshop.
More Ways to Use Render Passes in Photoshop
Working with separate maps and render passes can give you much more flexibility during post-production.
For example, you can use a Z-Depth render pass to isolate areas of your scene based on their distance from the camera. This allows you to create depth-of-field effects and other depth-based adjustments directly in Photoshop.
If you’d like to explore this technique, check out my tutorial on how to render a Z-Depth pass in Maya using V-Ray and create a depth-of-field effect in Photoshop.
You can also take a similar approach with lighting. In another tutorial, I demonstrate how to export separate Light Select render passes in Maya using V-Ray, giving you more control over individual lights during post-production.
These techniques demonstrate how useful separate maps and render passes can be when you want more control over your final results.
Final Thoughts
Exporting UV masks from Maya is a simple way to improve your texturing workflow.
Creating UV white masks in Maya is a simple but extremely useful technique that can significantly improve your texturing workflow.
Whether you’re using V-Ray or Arnold, you can easily export individual UV masks and bring them into Photoshop for precise selections.
Instead of manually selecting UV islands or spending time creating masks by hand, you can use this workflow to isolate specific parts of your character and make texture adjustments much more efficiently.
The best part is that you can reuse the same technique for different materials and geometry, making it a flexible solution for various 3D texturing projects.
If you’re interested in improving your Maya workflow, I recommend exploring some of the other texture baking and render pass techniques I’ve covered on the blog as well.
I hope you found this tutorial helpful and easy to follow!
If you have any questions about the process, feel free to leave a comment below, and I’ll do my best to answer them.
Thank you for reading, and happy texturing!