
Adding a watermark to multiple images (bulk) in Photoshop has never been easier than now by using the Watermark 3 plugin. And the best part is free. You can download it from Adobe Cloud.
It’s fast, efficient, and as we said it’s completely free. Of course, there is a Pro version (paid), with more capabilities and options, if you are interested.
In a nutshell, the main difference between the free and paid versions is:
- In the paid version, we can export in many formats, than JPG which allows the free version.
- Also, in the paid version, we can resize our watermark with more options.
- And lastly, we can use actions in the paid version.
If the JPG option, which is the only image format that the free version allows to export is not a deal breaker for you, you will be just fine with the free version.
What is a Watermark and Why We Need It:
A watermark is an extra layer of text signature or our logo, that we put with consistency on top of our photos-images.
Basically, when we share our work online, either as a Photographer, Graphic Designer, Illustrator, 3D Artist, etc. we somehow need a layer of protection against theft in order to get the proper credit for our work.
Watermarks also act as a brand identity. When you share your work with others either online or offline, your logo or your text signature will be recognizable by others over time.
The watermark it can be discrete or not, depending on the purpose of it. For example, it can hover the whole image with a bit of transparency, so the image can be reasonably visible, or it can be as discrete as a small portion of the image in a corner.
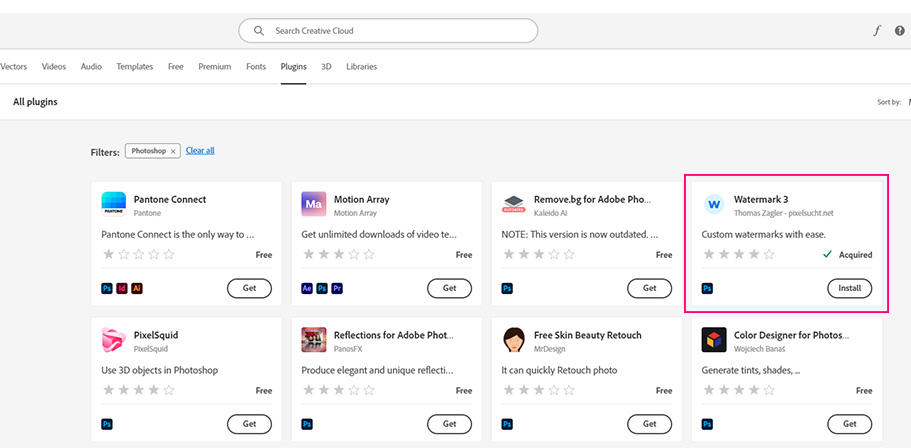
Download the Watermark 3 Plugin in Photoshop:
First of all, we need to download the Watermark 3 Photoshop plugin.
Open up Photoshop and go to Plugins – Browes Plugins. This will open the Creative Cloud Desktop application. Now, the results are already filtered by software “Photoshop”. Find and click on the install button below the plugin.
We can also navigate and find the plugin through web browsing, instead of using the Creative Cloud Desktop app. We can do so from here.
Finally, complete the installation. In order to activate it, just enter your email. After that, under the Plugins bar, in Photoshop you will see the Watermark 3 plugin.

Adding a Watermark to Multiple Images, in Action:
Now we have downloaded and installed Watermark 3, let’s see how we can add a watermark to multiple images in Photoshop.
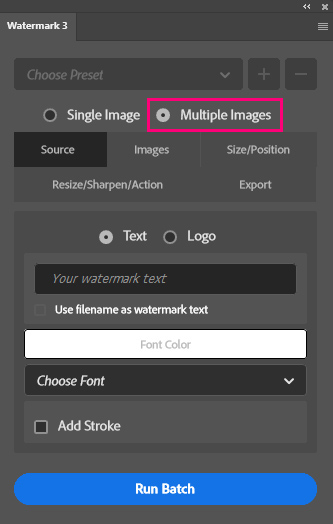
1 Step (Open the Watermark 3 plugin:):
Go to Plugins – Watermark 3. A new window, with a lot of options. Select the Multiple Images option.
In our example, we want to add a watermark in bulk, so there is no need for us to open all the images in Photoshop. Having no document opened in Photoshop will be fine.
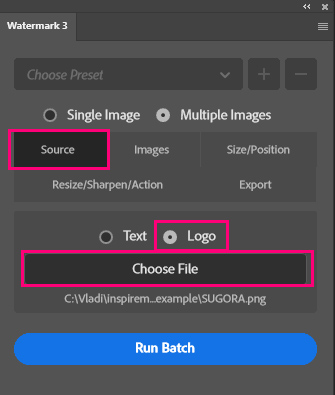
2 Step (Selecting watermark option):
As we already said, we can set as watermark either a text signature or our logo. In my case, I will choose the Logo option, which in my case is also a part of my logo.
So under the Source tab, select Logo, and click on the Choose file button.
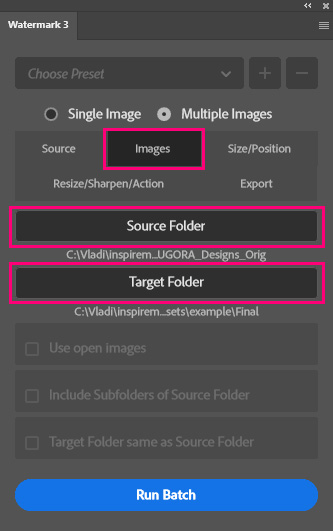
3 Step (Selecting folders):
Go to Images tab and select the Source Folder, in order to select the entire folder (where it contains all the images you want to add a watermark on).
After that, select the Target Folder and select a destination where the new images (added a watermark) will be saved.
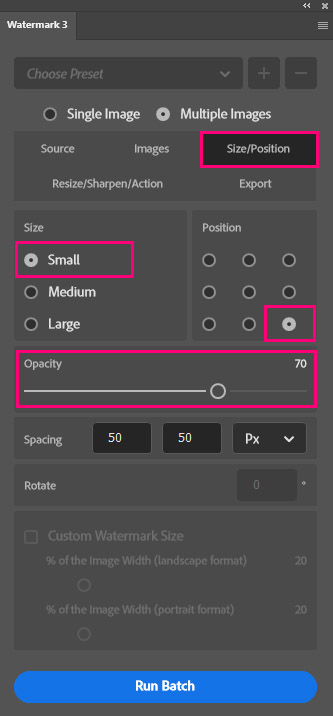
4 Step (Size-Position):
In the Size/Position tab, you can adjust as the name suggests the size and the position of the watermark, plus the opacity of it. Since those options are pretty much self-explanatory I won’t go into depth. My settings are below:
5 Step (Run Batch):
We are all set. We can hit the Run Batch button. After that Photoshop will automatically open each one of the images that was contained in the source folder, add the watermark, and close them. It will work like actions in Photoshop. Feel free to take a look at “The powerful function of Droplet in Photoshop” for that matter.
The time of the process depends on the value and the size of the images it has to process. When it’s done, Photoshop will show you a message that the batch run has been successful.
To see the new images with watermarks on them, just navigate to the new folder (target folder) we set previously.
You can see one example of the exported image below:

Conclusion:
Watermark 3 is a really useful plugin for adding watermarks with ease. As you can see, with a few clicks we exported our images with watermarks.
In our example, we added a watermark to multiply images. We could of course add a watermark in a single image as well.
Of course, there is other method as well, in order to add watermarks to your images.
- Create a watermark in Photoshop (old fashion way)
- Use an online platform
Thank you for reading up, see you in the next article.


2 Responses
Nice post! You have written useful and practical information. Take a look at my web blog FQ5 I’m sure you’ll find supplementry information about Airport Transfer you can gain new insights from.