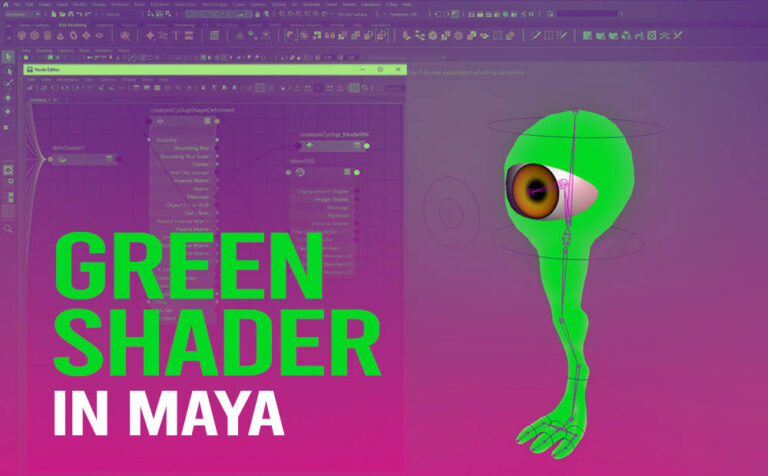
Fix the green shader issue in the reference scene in Maya, could be resolved pretty easily if we use the node editor, and make one connection.
Basically what we need to do, in order to fix the green shader issue is to reconnect the shape-deformed node with the shader that has the issue.
I am not sure if the following method is an official one, but at least it works for me every time. So I thought, I should share it, in case someone else bumps into that issue as well.
Feel free to watch the below video. For more information keep reading.
Some other Maya articles you may be interested:
- 10 General Tips and Tricks in Autodesk Maya
- Select Random Faces in Maya with Mel Script
- Free smooth skin weights tool in Maya (for fast and better results)
- How to delete all bindpose and re-create a new one in Autodesk Maya
What’s the issue with the green shader in Maya:
A green shader issue occurs when we are working with reference scenes in Maya and we decide we want to replace a material. As you can imagine that has some sort of complexity, and can be anticipated that could arise some issues. One of them is the green shader issue in Maya.
So we are working with at least two scenes:
- 3D model scene
- Rig scene
The model scene is referenced in the rig scene.
Feel free to learn more about creating file references in Maya from Autodesk.
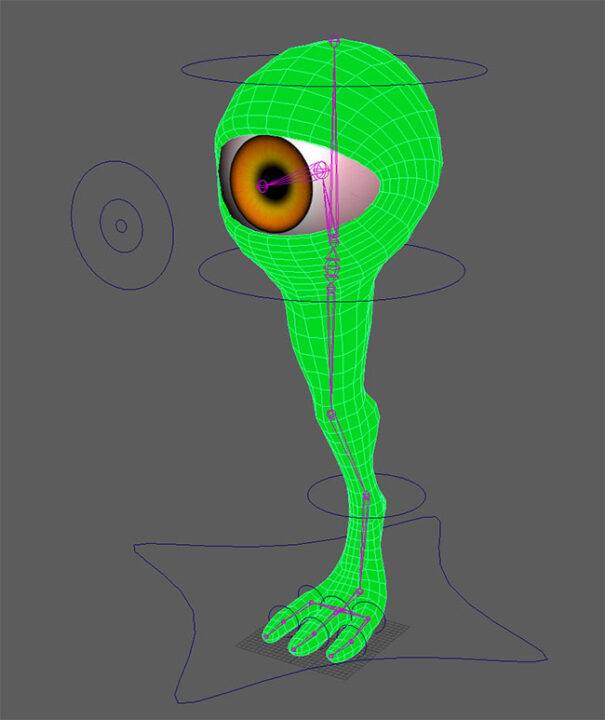
If we decide that we want to replace a shader-material in our model scene, and then “delete unused nodes” from the Hypershade, for organization purposes. After that, if we open the rig scene, the shader-material we had replaced will be shown as green color.
So the issue is that in the model scene, the material-shader looks ok but in the rig scene that contains the reference, the materials that have been changed it looks just green.
The reason that the shader is green in the rig scene is because the connection is wrong. The connection was supposed to be between the ShapeDeformed node and the Shader and not the Shape node and the Shader.
Just to clarify between those two nodes (ShapeDeformed node and Shape node):
The ShapeDeformed node is the shape that Maya creates when a geometry has bind skin on it. The Shape node is the node for the original geometry before we applied bind skin on it.
How to fix the green shader issue in Maya:
I assumed you already replaced one of your materials in the model scene in Maya, and you deleted unused nodes from Hypershade.
After that, you open up the rig scene that contains the reference (model scene), that has the green shader issue, and follow the steps below:
1 Step:
Select the object with the green material in Maya, either from the viewport or from the Outliner.
2 Step:
Open the Node Editor by going to Windows – Node Editor.
3 Step:
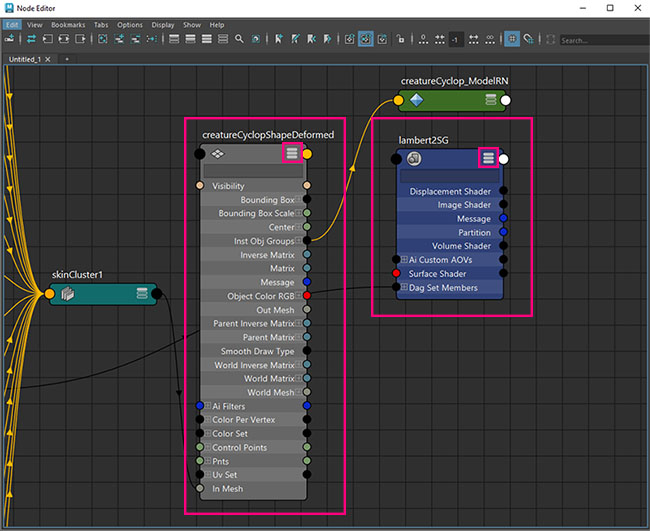
Click on the input and output connections icon in the Node Editor.

4 Step:
Expand both, the ShapeDeformed node and the Shader node by clicking a couple of times on the three horizontal lines icon in the upper right corner.
5 Step:
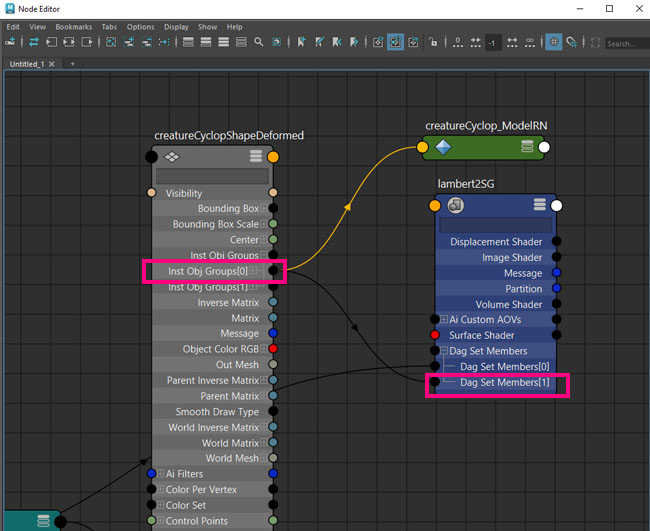
Connect the Inst Obj Groups 0 parament from the ShapeDeformed node to the Dag Set Members (1) parament from the shader.
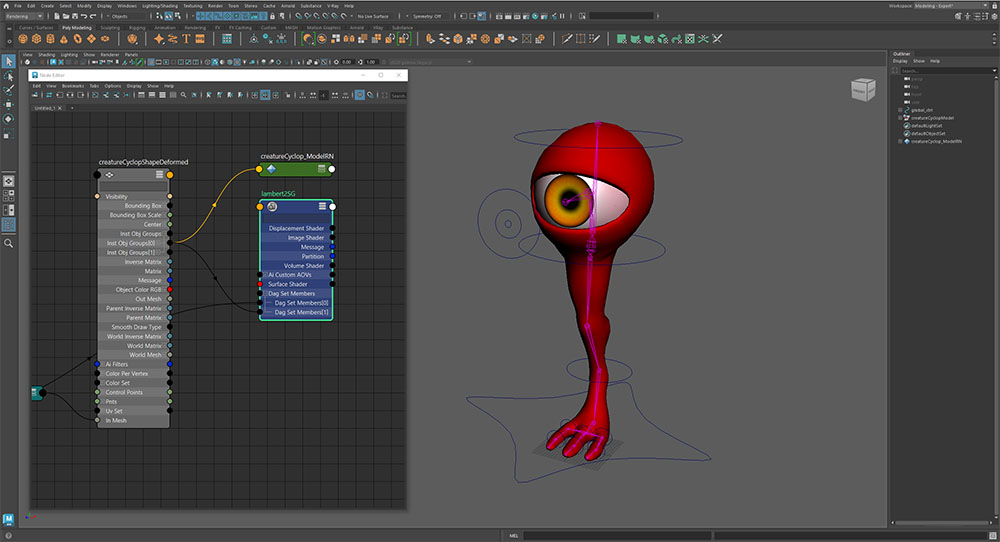
After that connection, the shader-material has no longer that green look. Problem solve.
A more automatic way to fix the same issue with python script is here. Plus it can also fix a bunch of objects with the same objects as well.





3 Responses
Thank you so much! This fixed my problem.