Using general tips and tricks in Autodesk Maya can be very helpful. It could save you time and effort, and boost your productivity.
In this article, we will cover 10 general tips and tricks in Maya. Here are all ten to make the navigation easier:
- Faster Loading of Maya
- Using the Search Tool in Maya
- Using Selection Mask in Maya
- Add Randomness to any Geometry in Maya
- Changing the background color of Maya viewport
- More Space to Work in Maya
- More Space to Work in Maya Through Monitor Upgrade
- Reducing the Resolution of Textures in the Viewport of Maya
- Using Attribute Spread Sheet in Maya
- Put any command or script on a shelf in Maya
Faster Loading of Maya:
The first general tips and tricks in Maya is to make Maya load faster.
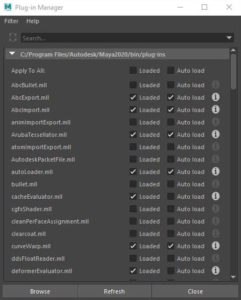
Faster loading Maya application can be achieved by unloading unnecessary plugins. Plugins that you don’t use in normal circumstances or at least all the time.
The process of unchecking plugins in Maya with the plugin managers is pretty straightforward.
Open up Maya, and go to Windows – Settings/Preferences – Plug-in Manager. Simply press the square box to check or uncheck any individual plugin, that you need or you don’t need accordingly. In that way, you can get a faster loading Maya experience.
Using the Search Tool in Maya:
As we all know Maya is quite a complex 3D application. If you are new to using it, it will probably intimidate you at a glance. Its UI is not the friendliest among other 3D applications. It has a bunch of commands and menus all over the place. That’s where the search tool comes in place.
We can have access to the search tool in Maya through two methods:
- Through the tool box. Usually on the left side of Maya UI.
- Through shortcut (ctrl+F).
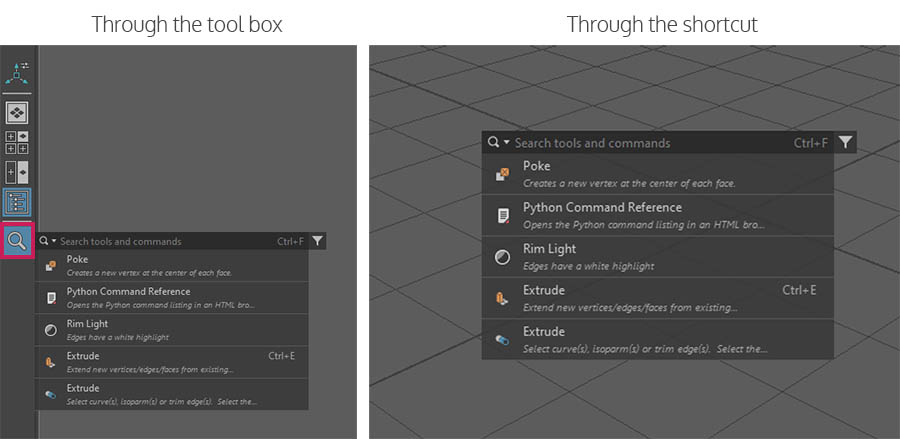
We can search a lot of things:
- Menus
- tools – commands
- any kind of object in our scene
- scripting language commands (Mel-Python)
Read more about the search tool in Maya.
Using Selection Mask in Maya:
Selection mask allow us to limit which kind of objects or components we can select, at any given time. As you can imagine, this allows us to work in any Maya scene with the freedom to not accidentally select any other objects we don’t want to.
Using selection mask on objects mode:
Let’s say, we want to drag a selection in our scene and be able to only select the surface type of geometry. As you can clearly see, there are also some lights and a camera in our scene. So to select only the surface objects we need to select surface objects and deselect everything else. Just make sure you have first selected, select by object type.

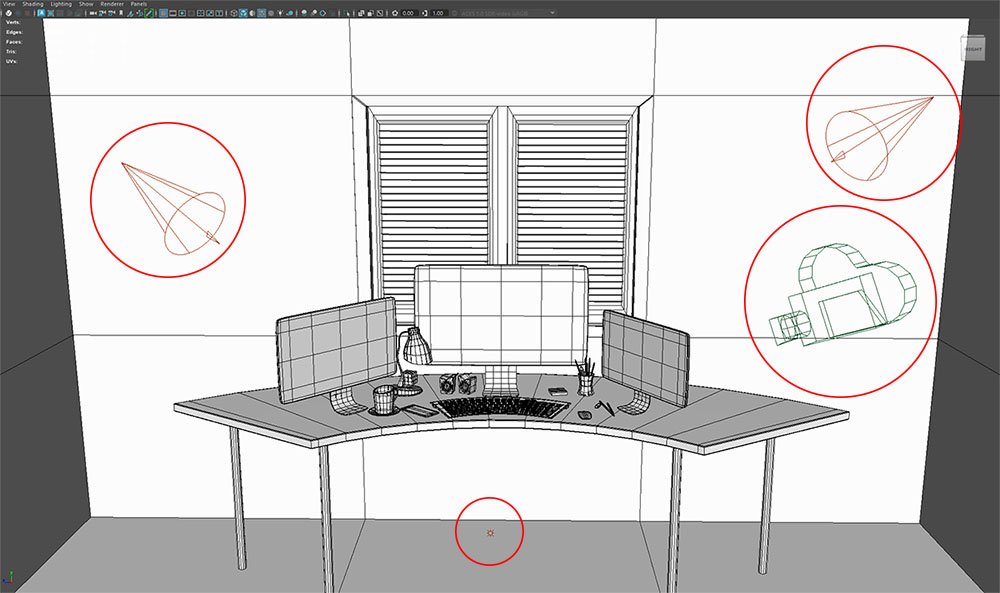
Using selection mask on components mode:
Let’s say, we want to select specific vertices from different objects in our scene.
Select your object, go to the selection mask in the main bar, and select point components. Just make sure you first selected, select by component type.

In that way, we managed to make a selection on a component level (vertices-points) between multiple objects.
If you want to know more about selection masks in Maya in general, feel free to visit the official Autodesk Maya page.
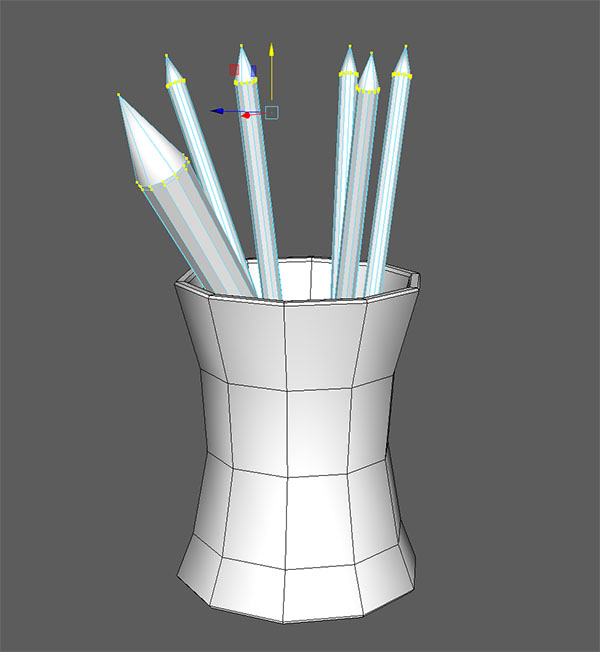
If you are interested in the above scene you can freely download it from here.
Add Randomness to any Geometry in Maya:
Adding randomness into any mesh in Maya is really useful. The reason is that when we create a 3d model it’s always perfect in a way. Every edge polygon etc it’s perfect. And that’s not the case in real life. In real life, every object has some variation of randomness on its surface. If your goal is to create something realistic you have to give it some kind of variation.
One way to do that inside Maya is through the Transform node, which can be located under Edit Mesh – Transform, from the Modeling module.
We can apply a transform node either in object mode or in component mode, depending on the situation.
Another way to apply randomness to an object in Maya is through Deform – Texture. We will cover this approach in a later article.
Changing the background color of Maya viewport:
Autodesk Maya gives us the option to change the background color of the viewport. We can do that either for personal preference, aesthetics, or for productivity (if we spend a lot of time working in Maya) it’s probably a good idea to make the background color a little darker to protect our eyes.
The background color of viewport in Maya by default has four color variations, dark gray, light gray, blue gradient, and black. We can navigate through those colors by pressing Alt + B.
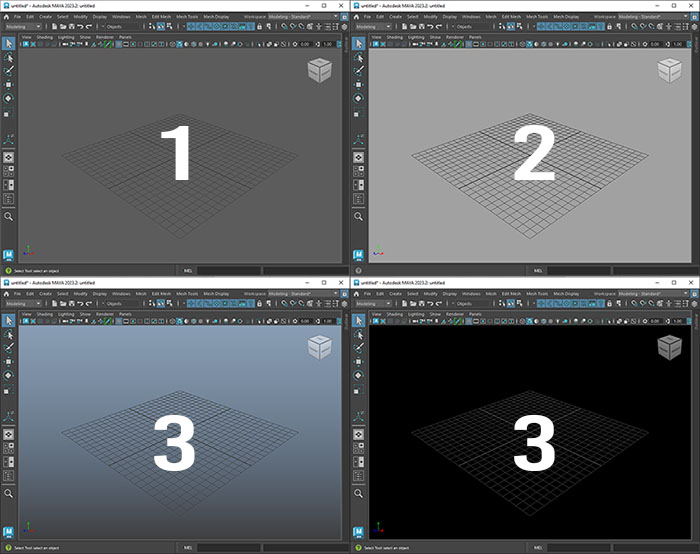
Additionally, Maya gives us the option to set a custom color or a gradient one for our viewport if we want to, which is great. To do so, just go to Window – Settings/Preferences. A new popup window appears.
Expand the 3D Views options. Now we can set either a solid color or a gradient one for our viewport. After you finish, just click on the Save button.

Note: Keep in mind, that if you press the shortcut (Alt + B) again to change the viewport background color, Maya will reset the colors to its default four colors.
More Space to Work in Maya:
Another general tips and tricks in Autodesk Maya is to have more space to work on.
Since Maya’s UI (User Interface) has a lot of buttons, panels, menus, etc. if you are working from a small monitor it could probably be an issue. At least it was for me. I started with a 24-inch monitor at Full HD resolution. And to be honest it was an issue.
So if you feel the same, Maya has covered us.
We have two options:
- Hide and show almost every piece of UI that Maya has individually
- Working on expert mode
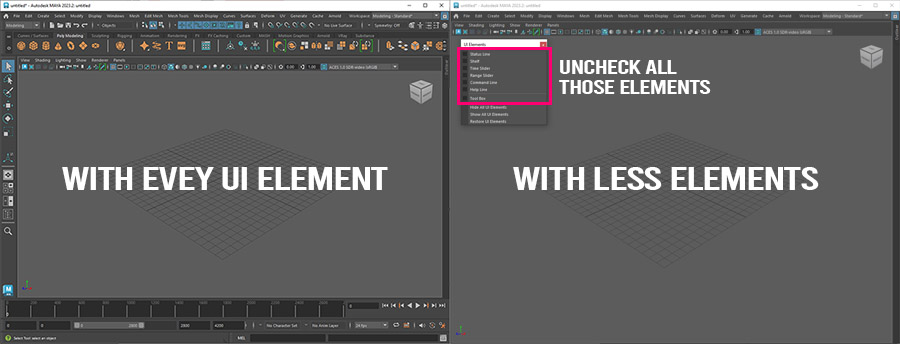
Hide and Show UI element in Maya:
We can Hide and show almost every UI element in Maya. To do so just go to Windows – UI Elements. From there, we can check or uncheck some UI Elements, so we can maximize our working space in Maya.
Expert Mode in Maya:
A quicker way to get the light UI version in Maya after unchecking all UI elements is with Expert Mode.
We can have access to expert mode in three different ways:
- Shortcut (Ctrl + space bar)
- Windows – UI Elements – Hide All UI Elements
- Windows – Workspaces – Modeling Expert
More Space to Work in Maya Through Monitor Upgrade:
Instead of hiding UI Elements in Maya in order to maximize our working space, we could upgrade our monitor.
Let’s say we are working on a 27-inch monitor with Full HD resolution. The real estate of working is less than if we are working on a 27-inch monitor with 2k (2560×1440) resolution. As a result, all icons and UI elements in Maya will be smaller, and we will have more space to work.
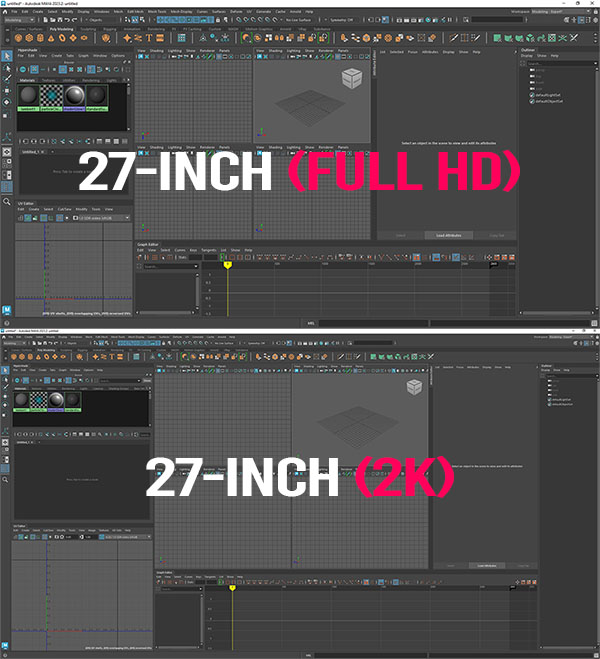
One step further will be to use a 4k monitor, to maximize our real estate even more.
However keep in mind that if you go to a 4k monitor you will probably have to adjust the interface scaling in Maya, from Preferences – Interface – Interface scaling. The reason for that is that all UI elements and icons in Maya will be too small to read.
If you go for a 2k resolution at 27-inch, that won’t be the case, since most users including myself find it as a sweat spot.
Reducing the Resolution of Textures in the Viewport of Maya:
The benefit of reducing the resolution of texture is for optimization purposes. Whenever you apply a texture inside Maya it’s loaded in the memory of your machine. The more textures you apply to your scene and the bigger they are, the quicker your machine will be out of memory.
If your scene has too many textures and each of them is 2k of resolution or even more, it could be very frustrating to navigate through your scene cause of the memory of your machine that has been used in order to display them through your monitor. In other words, you will have a tough time navigating the viewport in Maya. Likely for us, that’s exactly when the reduction resolution of textures takes place.
Using Attribute Spread Sheet in Maya:
Attribute spread sheet enhances your productivity and could save you a great deal of time, that you can spend on other areas of your project.
Attribute spread sheet is in spread sheet format, which means. Each object in the Attribute spread sheet is a row, and each attribute on the object is a column. With the Attribute spread sheet we can select multiple objects in our scene and change as many attributes as we want instantly in all selected objects.
The attributes we can change for the multiply objects could be almost anything, such as translation, visibility, cast shadows, intensity, etc.
Imagine if you have to change a single attribute for 100 objects or even more. It could be a very time-consuming and very tedious process if you had to change each of them individually. Likely Attribute spread sheet is here to help.
Put any command or script on a shelf in Maya:
And lastly, general tips and tricks in Maya is to make use of shelves.
Since Maya application runs entirely with Mel scripting, you can put every single command that Maya runs or a combination of them on a shelf, for easy access.
If you find for example that you use, like a lot, the commands: delete history, freeze transform, center to pivot when you working on the modeling process, you could put all three commands as one as a Mel script on a shelf in Maya, and reuse it with just one click.

- To put a single command on a shelf in Maya, just hover that command with your mouse from the right menu and press shift + ctrl. That particular command will be added as an icon to the current shelf in Maya.
- To put a combination of commands or scripts on a shelf in Maya, feel free to click here.
Note: If for any reason you delete the prefs folder under Documents – Maya – Version, all the additional commands you add on all shelves will be restored to default.


4 Responses