
In this step-by-step guide, we are going to explore how we can create and export a simple GIF file format in Adobe Photoshop in an old style.
By old style I mean, we are going to create a frame animation, instead of the new method of video timeline.
The new method is more advanced and can produce better and more sophisticated results, although it requires more time to do so. But to be honest, the frame animation is more than enough in order to create a GIF in Photoshop.
Graphics Interchange Format (GIF) is a very popular format for engaging purposes. The main purpose of a GIF image file is to have a motion on it. In other words, GIF we can have a basic movement into our image file. Which is not the case in any other image format, such as JPEG, PNG, TIFF, TARGA, etc.
We are going to create a simple GIF, so it can be easier to follow the entire process. Make no mistake, the same technique can be applied in order to create more complex GIF files in Photoshop as well.
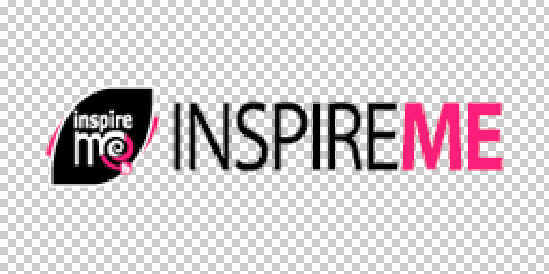
Just to have an idea of what we are going to create:

You can also watch a YouTube version of this article. Although if you want more info about it, keep reading.
Create a GIF in Photoshop (step-by-step):
1 Step (Create a new document):
Create a new document by going to File – New, and set the “right” dimensions for your document. Also, since we are going to upload our new GIF to the web, make sure the color mode is RGB.
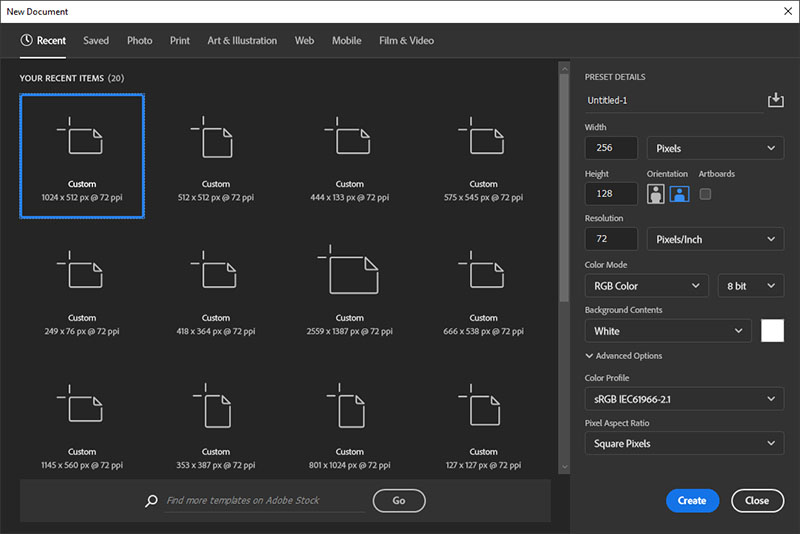
Note: Set the “right” dimensions: Since GIF files are meant to be uploaded on the web, it’s a good idea to have them pretty small, in order to not take much space.
Now we have our brand new document, let’s import all the necessary images for our GIF.
2 Step (Import your images-assets):
The most professional way to open all the necessary images-assets in a Photoshop document is through Load Files into Stack command. Which can be found under File – Scripts – Load Files ino Stack.
Note: Of course, we can just drag and drop all the images we need into Photoshop as well.
What it does basically is to import multiple images to a new Photoshop document as separate layers.
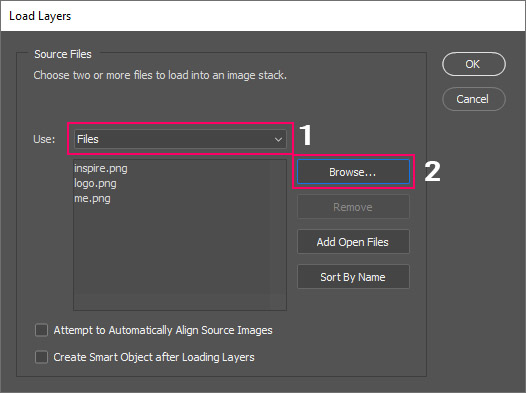
Use: We can choose to select individual files or a specific folder method, in order to import them into Photoshop. Browse and select your images-assets. And click ok.
Photoshop will take a few seconds (depending on the number of images we selected) and will automatically create a new document and import all the individual images as layers.
However, since we already created a new document on step 1, with the “right” dimensions for our new GIF file. We need to transfer those new layers from the new document to our first document. Just copy and paste them. Also, reposition them correctly, so your artwork makes sense.
If our assets were in Ai format (Adobe Illustrator) we could just copy-paste them directly from one application (Illustrator) to the other (Photoshop).
3 Step (Arrange layers):
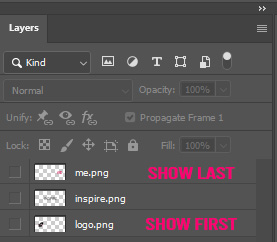
Make sure the order of the layers is correct in the Layers panel.
Arrange the layers in the order that you want them to appear in the GIF. Basically, the order will determine the sequence of our animation. The below layer will be the first one that will show up in the GIF animation, and the above one will be the last one.
4 Step (Create the animation frames):
In this step, we can actually create a GIF in Photoshop.
We need to open the timeline panel, by going to Window – Timeline.
- Click on the Create Frame Animation
- Click in the icon menu of the Timeline panel
- and select Make Frames from Layers
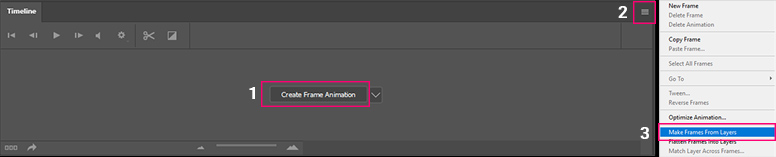
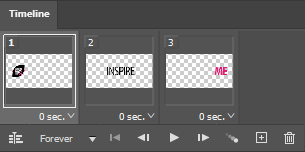
Photoshop will automatically create the animation frames for us in the order we determined in the previous step:
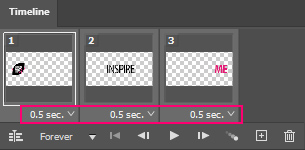
5 Step (Set the duration of each frame):
Set the duration for each frame by clicking on the time below each frame and adjusting it according to your preference. We can also multi-select all of them and apply the same duration for all of them. In my case, I set all three frames to 0.5sec.
6 Step (Preview your animation):
It’s time to play the animation.
Just press the Play button in the Timeline panel. At any point, we can make adjustments to the frame duration or the layer order if we need to.
7 Step (Export/save GIF):
If we are satisfied with our GIF animation, it’s time to save it.
Go to File – Export – Save for Web (Legacy).
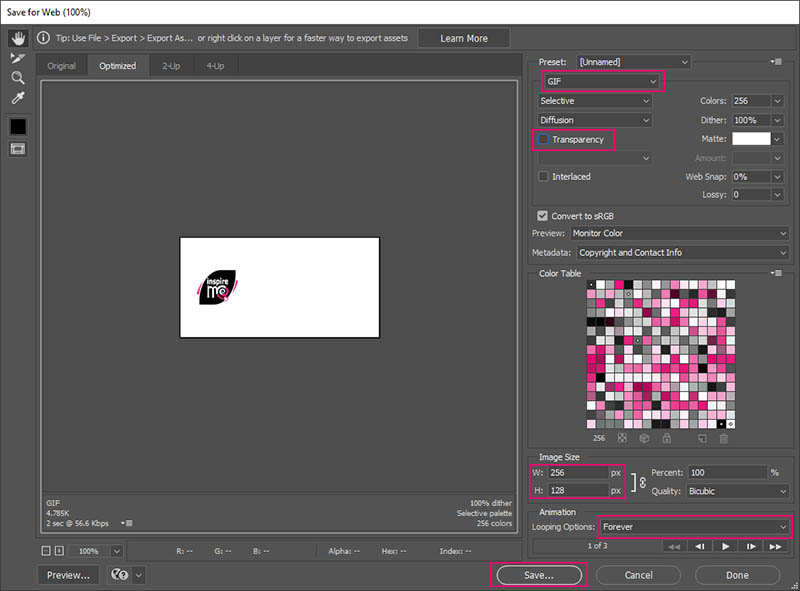
There are a lot of options in the Save window, feel free to play around with the setting a little bit, in order to get the best results. But just for now, just make sure you save it as a GIF format.
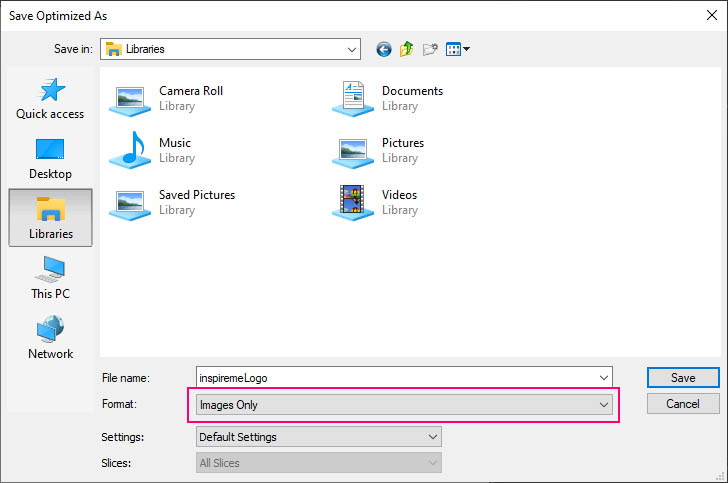
When you are ready, just press Save. A new popup window appears. Give it a name, and specify a destination folder. Before you hit Save, just make sure you set Images only in the format field.
Conclusion:
Creating a GIF in Photoshop is a fun and easy way to add animation to any visual content.
As I already said, that was a very simple and basic GIF. But again, you can use the same principles to make a much more complex and sophisticated one. For example, we could add more frames to our final GIF, add more variations of the frame duration, etc.
There are also free online platforms that you can use, to make your GIF files. However, if you want more advanced GIF animation, you probably want to create it by yourself.
You may also be interested to take a look at how to Create an animated GIF from a series of photos from the Official Adobe site.
Next time we will create a GIF file with the newest method (video timeline).


One Response