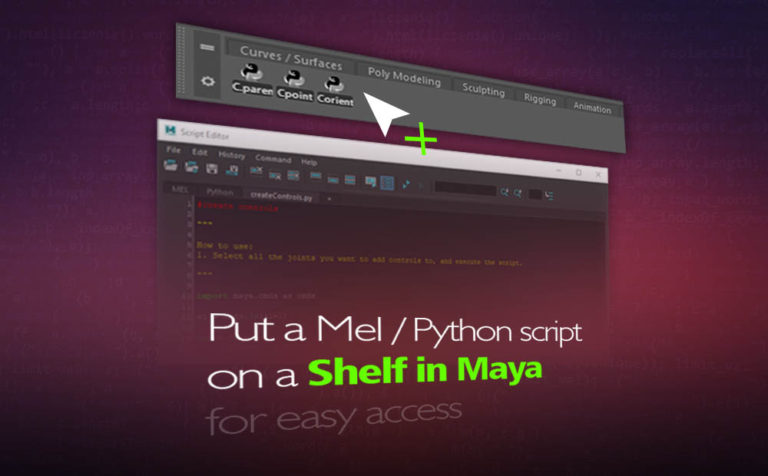
A good and easy way to reuse a script, either a Mel or Python script is to put them on a shelf in Maya. You could also make variations of a script and put all variations on a shelf in Maya. The main reason is when you need a particular script to run, you don’t need the extra time to locate it in your hard drive and run it. You could do that, the easy way, with just one click, which is to put it on a shelf.
Additionally, since Maya application runs entirely with Mel scripting, you could also put every single command that Maya runs or a combination of them on a shelf, for easy access. If you find for example that you use, like a lot, the command: delete history, freeze transform, center to pivot when you working on the modeling process, you could put all three commands as one as a Mel script on a shelf in Maya, and reuse it with just one click.
As you probably imagine, the time you are going to save for doing that, it’s depends on your workflow and your needs.
In this article we are going to explore how to:
- put a script on Maya shelf
- put variations of a script as a separate command on a shelf in Maya
- combining single commands as one piece of script and put it on a shelf in Maya
We are going to use as an example a free Python script that it’s generates auto control rig for your selected joints. You could download the Python script from the previous link.
Put a script on a shelf in Maya:
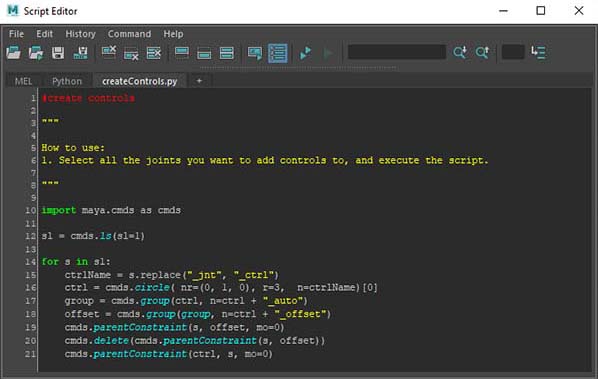
So we have loaded this awesome Python script inside Script Editor in Maya.
To put that script on a shelf:
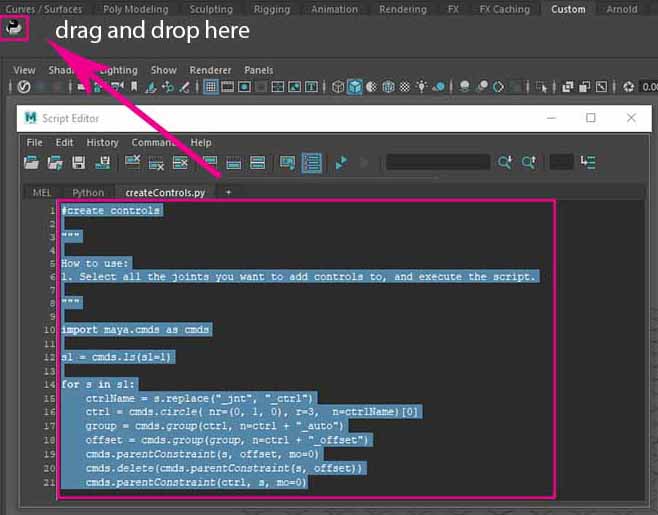
- one way is to just highlight all the lines of the script in the Script Editor, either by dragging a selection from the left upper corner to the right down corner or by pressing ctrl + A to automatically select the whole line of Python codes for you.
- After you highlight the whole script in Script Editor, drag and drop it into any shelf in Maya.
- Maya with a popup window asks you, what type of script is that. In this case, is a Python script. So, click on the Python script option.
After that, the script has been added to your chosen shelf.
For organization purposes, it’s a good time to rename your new script on that shelf, so later on you can identify it easily.
To rename the script icon:
- right-click on the new script icon and from the new drop-down menu choose to edit. The Shelf Editor window appears.
- go to the Shelves tab and in the section Icon Label put a name for your script.
- Click on the save all shelves in the left lower corner to close the windows, and is all good to go.
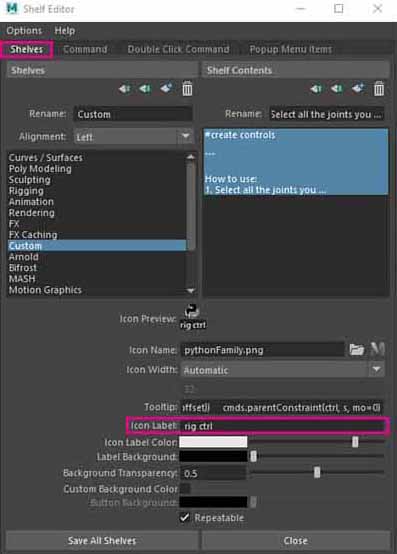
Note: You could also create an icon and connect it with that script (in the icon name section – Shelf Editor – Shelves tab). So, it would be more recognizable for future use.
Put variations of script on a shelf in Maya:
Before we actually make variations of this script and put them as a separate script on a shelf, it’s really important to know that the script really does, right!
This script creates automatic controllers for your selected joints in Maya and makes the necessary constrain connection between the joints and the controller. In Maya, there are many types of constraints, such as a parent, point, orient, etc. If you are not quite familiar with constraints in Maya, you can visit the official Autodesk site for further information regarding this specific subject.
So, it’s quite logical if we want the variation of this script to happen on the constraint type, right! It could be on other aspects as well. But let’s keep it simple, and just make the variation of the script happen on the constraints level only.
Note: if you are interested in how this specific script works, as I have already mentioned you can visit the auto control rig for your selected joints for more information.
Variation of the script:
Let’s say for example we want three variations of this specific script on the constrained type:
- parent constrain
- point constrain
- orient constrain
The way to do that is to change each time the type of constraint and then put it on the shelf.
So, in this script, I have to change the last line of code which is, cmds.parentConstraint(ctrl, s, mo=0), for parent constrain leave it that way. Highlight all the script and drag and drop it on a shelf (rename it properly, something like: C_parent). For point constrain would be: cmds.pointConstraint(ctrl, s, mo=0) and for orient constrain would be: cmds.orientConstraint(ctrl, s, mo=0) accordingly.
#create controls

"""

How to use:
1. Select all the joints you want to add controls to, and execute the script.

"""

import maya.cmds as cmds

sl = cmds.ls(sl=1)

for s in sl:
    ctrlName = s.replace("_jnt", "_ctrl")
    ctrl = cmds.circle( nr=(0, 1, 0), r=3,  n=ctrlName)[0]
    group = cmds.group(ctrl, n=ctrl + "_auto")
    offset = cmds.group(group, n=ctrl + "_offset")
    cmds.parentConstraint(s, offset, mo=0)
    cmds.delete(cmds.parentConstraint(s, offset))
    cmds.parentConstraint(ctrl, s, mo=0)
Now every time we want to use a specific type of constraint for this script, we just have to click on the specific variation of the script we have just created and put it on the shelf in Maya.
Combining single commands as one piece of script and putting it on a shelf in Maya:
As I have already mentioned, Maya runs entirely with Mel scripting. That means every command in Maya is a Mel script and you can verify it, by opening the Script Editor and running random commands in Maya. You will notice, Maya interprets those commands as Mel scripting.
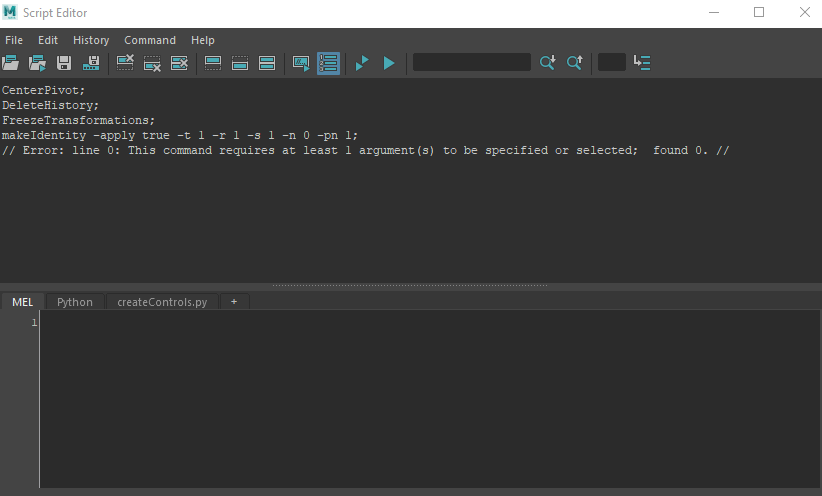
In the modeling process in Maya, I found myself using these three commands (delete history, freeze transform, center to pivot) all the time. Let’s combine the three commands to be one piece of script and put it on a shelf.
Open up Script Editor, and press all these three commands (icons) one by one. The result will be Maya interpreting those commands as a Mel script. Each line of code, it’s pretty much self-explanatory, of what it does, right! Highlight and copy the first three lines of code and paste them in the Mel section down below.

After that, once again highlight these three commands from the section down below and drag and drop them on a shelf, to create the new combined Mel script command. Congratulation you have combined three commands as one through Mel scripting.


10 Responses