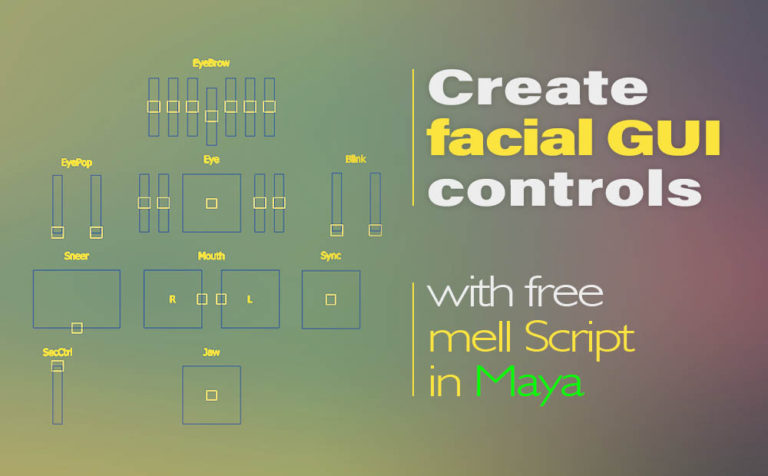
Create facial GUI (Graphic User Interface) controls with this awesome and free Mel script in Maya. Make your custom facial controllers with a few clicks. If you are doing a lot of custom facial rigging in Maya, you should definitely take a look at this Mel script.
Download the Mel script of create facial GUI controls in Maya. The creator of this simple yet very productive script is Vijay Lakshmanan.
Basically, the ideal workflow for the facial rig is to be controlled through GUI (Graphic User Interface) so the life of the animator who will be responsible to bring the character to life would be easier.
Let’s assume you have a facial rig built all with joints in Maya. The next step would be to control all those joints with curve controllers, right! The final step would be to control all those controllers with GUI system. You could either directly connect (parent) those controllers to each other or you can make the connections with the set driven key.
Note: You could neglect the step of creating curve controllers for your joints and just connect the GUI controllers with your joints. Although creating controllers that control the joints before GUI is an extra step of flexibility, you may or not want it in a specific project.
Related post about rigging with scripts in Maya that can save you a lot of time:
- Create auto rig controls in Maya with free Python script
- Joint splitter mel script tool for Maya (time-saver for rigging)
- Python script for mirror cluster deformer in Autodesk Maya
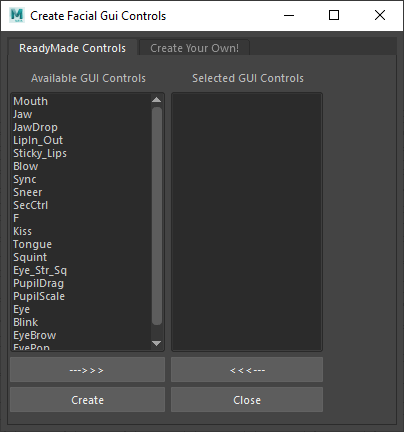
What facial GUI controls script does:
Essentially, this Mel script creates automatic curve controllers with the proper hierarchy group nodes for you to use to speed up your process of facial rigging in Maya. This script has a window interface that can make your life concerning the process of rigging easier.
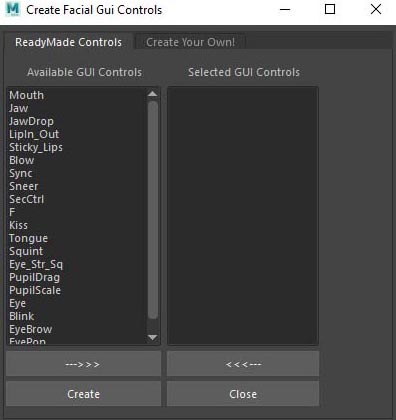
The window interface has two options for using this script:
- ready-made controls
- create your own controls
You can either use a pre-existing control, or you can create a new one on your own with the help of this script, which I found very thoughtful.
Here are a few pre-existing controls you can use with this script.
• mouth • jaw • jaw-drop • sticky_lips • blow • sync • sneer • kiss • tongue.
The full list is bigger.
How to install and run the facial GUI controls script:
The installation for this script is pretty easy.
You just copy the FacialGUI Mel script file you have downloaded into Maya’s script directory. Location: Documents\maya\version*\scripts.
Since we have copied the script intro Maya script directory, now it’s time to run the script for the first time.
So, open up the script editor in Maya and, and go to file – open script. Locate Maya’s script directory you had copied the script and click on it.
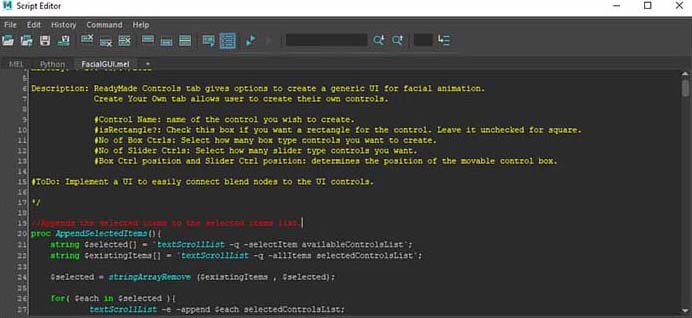
Note: You can find some basic information about the script in the yellow code lines.
As we have the script loaded in the script editor in Maya, press ctrl + enter to actually run the script. The facial GUI controls script appears.
How the facial GUI controls script works, with an example:
Let’s find out in this example how to create a jaw GUI control for a character.
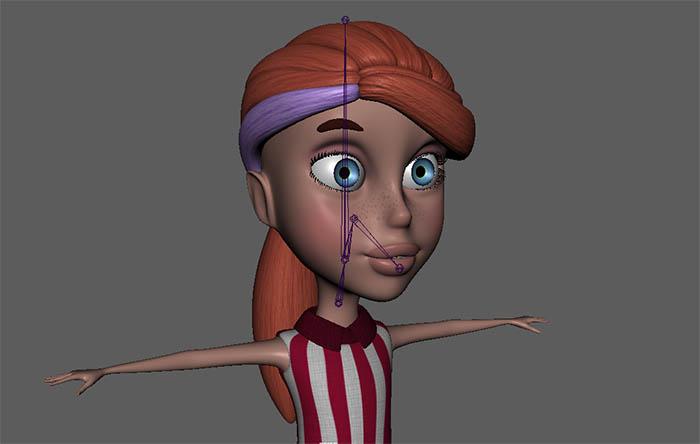
We will be working on this character.
Creating the GUI controller:
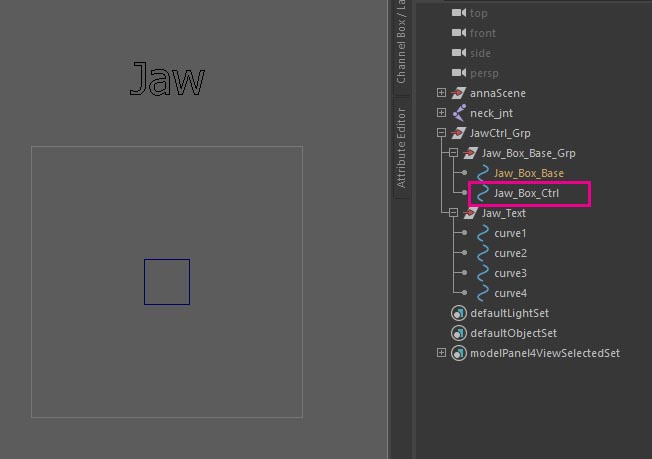
As you can see, I have already created some joints to support the area of the jaw. So let’s really quickly open up and run the script, so we can see the window GUI. Select the “Jaw” controller and press the arrow to the right bottom, so it moves to the right side of the window. Finally, press creates, so the controller will be generated in your scene.
Near the center of your scene (0, 0, 0) the new jaw controllers have been created. As you select the top node of the hierarchy of the control, move it anywhere in your scene you feel comfortable with. As you can see there are a lot of nodes that have been created for the jaw controller. Although there is only one node we care about, which is the Jaw_Box_ctrl. This is the node we would animate.
Making the connection:
Let’s make the connection in order for the jaw_Box_Ctrl to have an effect in the area of the jaw. And the way we will do that is with set driven key.
Creating an extra level of control:
But before we do that, let’s really quickly create a controller that will control the jaw_jnt. And then we will connect that controller with the Jaw GUI controller with the set-driven key in Maya.
The reason for that is because the jaw_jnt and really any joints we create, after placing them in the 3d space they have values in the translate channels which is not good for rigging purposes. So it’s better to create an additional controller that will have all clean the translate values.
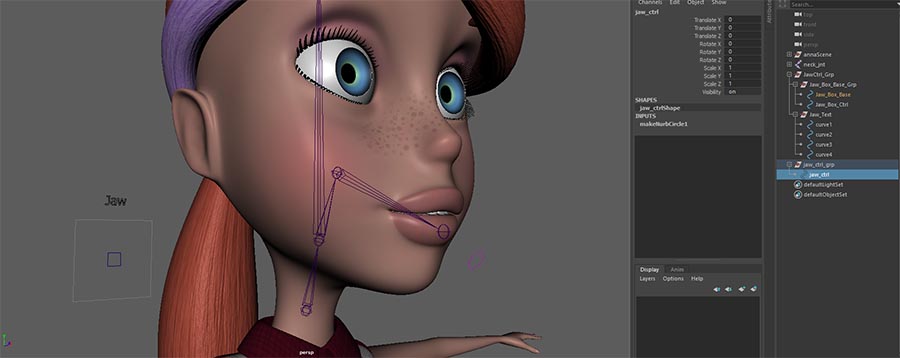
The way I created the jaw_ctrl is really simple.
- create a circle nurbs primitive object (rename – jaw_ctrl)
- press ctrl + G as you have selected the circle nurbs to create a group node (rename – jaw_ctrl_grp)
- reposition the jaw_ctrl_grp group to be alighted with the jaw_jnt, in other words to have the same pivot
- select the jaw_ctrl and then the jaw_jnt with this order and apply an orient constrain
Making the connection with set driven key:
Now we have the extra level of control for the jaw, it’s time to make the connection between that control (jaw_ctrl) and the jaw_Box_Ctrl (GUI controller).
Since our GUI jaw controller is flat square, it means that we have four options of translation (up, down, left, right). So we are going to hook up the up and down in other words, Translate +Y and -Y from the Jaw_Box_Ctrl to the rotation -X and +X of the jaw_ctrl accordingly. And the left and right, in other words, Translate -X and +X from the Jaw_Box_Ctrl to the rotation -Y and +Y of the jaw_ctrl accordingly. The driver object will be the Jaw_Box_Ctrl and the driven the jaw_ctrl.
Since I am not going to do step by step of the demonstration how the set-driven key works if you are not already familiar with this technique, I highly suggest visiting the official Autodesk site for more information about this specific subject.
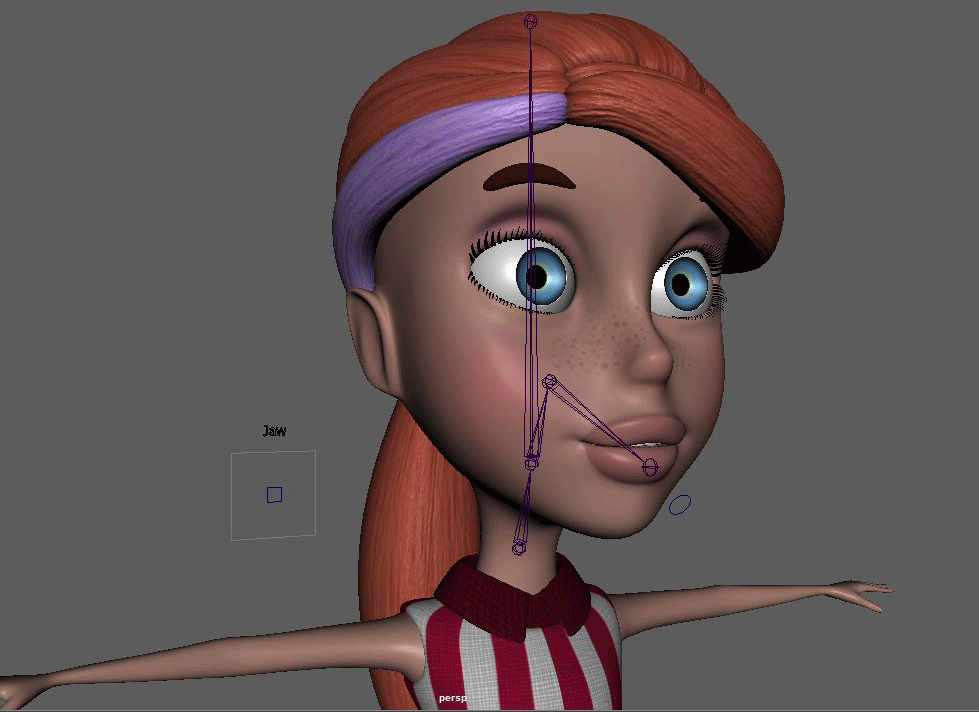
After the process of set driven key, and moving the Jaw_Box_Ctrl, you will have something similar as a result:
Conclusion:
In our example, we only used one GUI controller, the jaw controller. We could have built all facial GUI controllers for this character with that script.
Also in our example, we used for connecting the extra level of control with the GUI control the set-driven key technique. We could also use the connection editor approach. Although, I found more flexible the former approach because you can have more precise results.
If you find yourself using the “create facial GUI controls” script a lot in the process of rigging in Maya feel free to put the script on a shelf so you can have easy access to it just with one click.
Lastly, as we said, the window interface for this script has two options for using the script. Ready-made controls and create your own controls. One thing that it’s missing is to have the ability to save your own new controller and use them as a preset.
If you are interested, feel free to check out this particular 3D Anna cartoon model:
- Anna Cartoon Rigged | Rigged version (Cgtrader – platform)
- Cartoon Anna| Still version (Cgtrader – platform)
- Anna Cartoon Rigged | Rigged version (Turbosquid – platform)
- Anna Cartoon | Still version (Turbosquid – platform)


4 Responses