joint splitter mel script tool for Maya can be very handy in your toolbelt if you working a lot with rigging. It could save you a lot of time. It’s very easy to use and it’s absolutely free.
Download the script
The creator of this awesome script is Brian Escribano.
Another great tool for rigging purposes is this time a python script for mirror cluster deformer.
Some awesome sources to learn more about rigging with Maya besides of course YouTube which is basically free is, Pluralsight, Lynda. Both of them are paid sources of learning. With a little searching inside those platforms, you can find great material for learning rigging techniques.
What the joint splitter script does!
What this script does, is adds additional joints between a joint chain. The script has also an interface to make your life easier. It has a few paraments you could alter like, the type of hierarchy, quantity of joints, and joint slider control.
Why use the joint splitter mel script tool for Maya!
So, why use the script, right!
If you decide to split a joint in Maya with the built-in tools such as insert joints, you quickly realize that Maya can insert new joints between joints but it’s not very productive. For two main reasons.
- insert a single joint at a time
- not precisely (in half of the joint)
With the following script, you don’t have those limitations.
How the joint splitter script works!
Now we know what the script does, we have to import and execute the script inside Maya.
Running the script:
Like running any script, you open the script editor in Maya, and locate and load the script. Automatically the script will be executed.

A new window pops up with a few options.
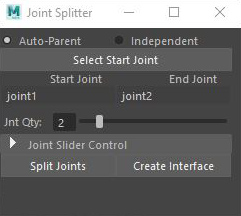
Paraments of the script:
Auto-parent / independent: choose the right option for your specific need. Choose Auto-Parent when you want to split joints and those new joints want to be children of the root joint. Choose independent if you want those new joints after the split to be independent, not to be children of the root joint.
Select start joint: As you can imagine you have to select a joint in order to use the script. Choose the joint you want to split and press the button “select start joint“
Jnt Qty: It means joint quantity. It’s the number of new joints it will generate after you execute the script.
Note: Although the quantity slider seems to go up to 10, actually it could go up to 50, which is the maximum number of joints the script could create.
Split joints / Create interface: Basically are two different modes. If you press split joints, the script will generate the new joints after the split and remove the old joint you have chosen as a start joint. On the other hand, if you press create interface mode, the script will generate the new joints without removing the start joint, plus it will create locator controls for all the new joints.
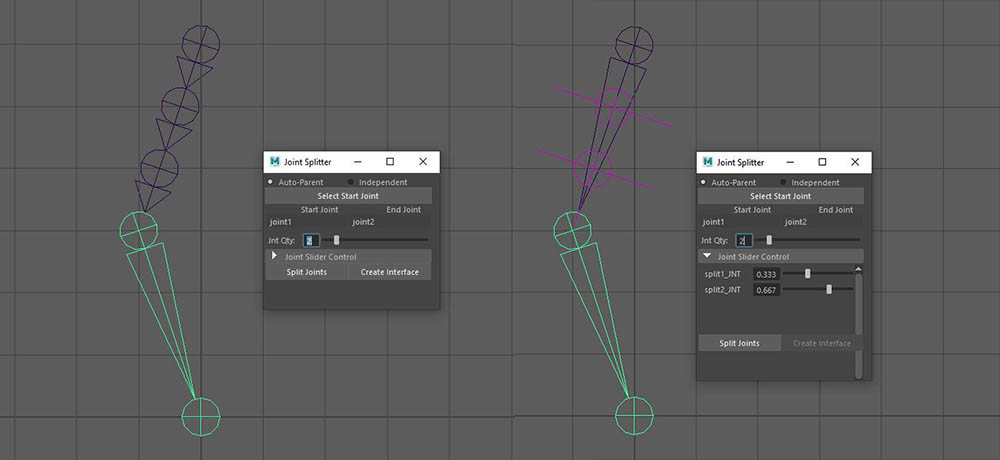
Joint slider control: It has only use if you choose the create interface mode. It allows you to position the locator controls along the joint.
Put the script on a shelf for quick access:
If you use the script a lot in your workflow, it’s probably a good idea to make a button with it and put it in the shelf editor to make it easily accessible, every time you will need it. For a more detailed article about putting a script on a shelf, click here. In other cases keep reading.
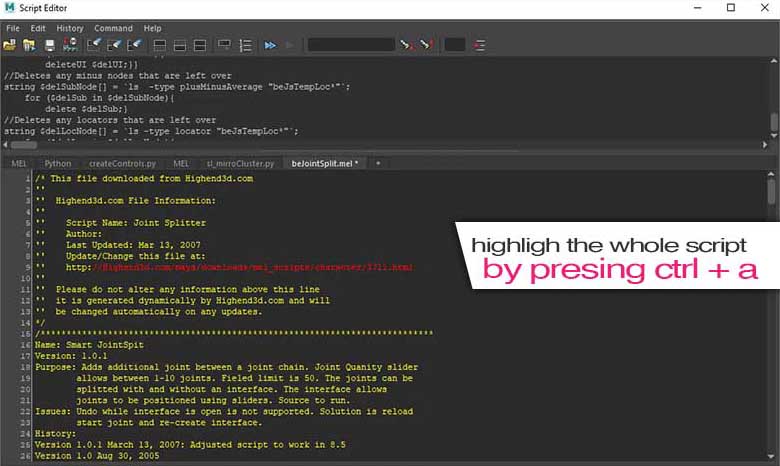
Open up the script editor. I assume you already loaded the joint splitter script. Highlight the whole script by pressing ctrl + a and drag and drop it at any shelf tab you prefer. It seems to be more appropriate to put it either on the rigging or custom shelf tab. But it’s up to you.

That’s all
As you can imagine the script is pretty straightforward, with a few options to choose from. If you work with a lot of rigging in Maya, it’s probably a good idea to have the script under your belt. Also, it’s a good idea to make the extra effort if you find yourself using the script a lot to put it on a shelf, for easy access.
Let me know if you find it useful, or if you have any questions at all.


6 Responses
i want it as a student, learning things these days to get a job