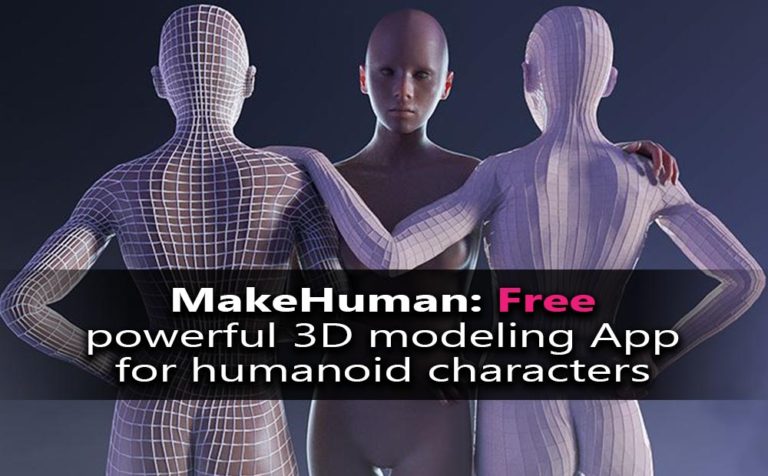
Creating 3d characters with Makehuman software, which is surprisingly free.
Makehuman is software for humanoid characters. Is a great way to start your character concept for 3D purpose. It’s a completely free open source piece of software that can do many things in a short time.
Is not only for modeling* purpose. You can also use it for materials, pose, and rendering.
*When I said modeling, I was not referred to a polygon modeling technics. More like overall adjustments of forms with sliders, which is extremely fast.
Of course, you can export the final character that you develop inside Makehuman to another 3D software, like Autodesk Maya, 3ds Max, Cinema4D and so forth, through export file formats such as DAE, FBX, OBJ, STL.
Makehuman is a completely free, open source, innovative and professional software for the modeling of a 3-Dimensional humanoid character
Makehuman
The software is compatible with the three main operating systems (Windows, Mac, Linux)
You could download a stable version of Makehuman from here.
Creating 3d characters inside Makehuman software:
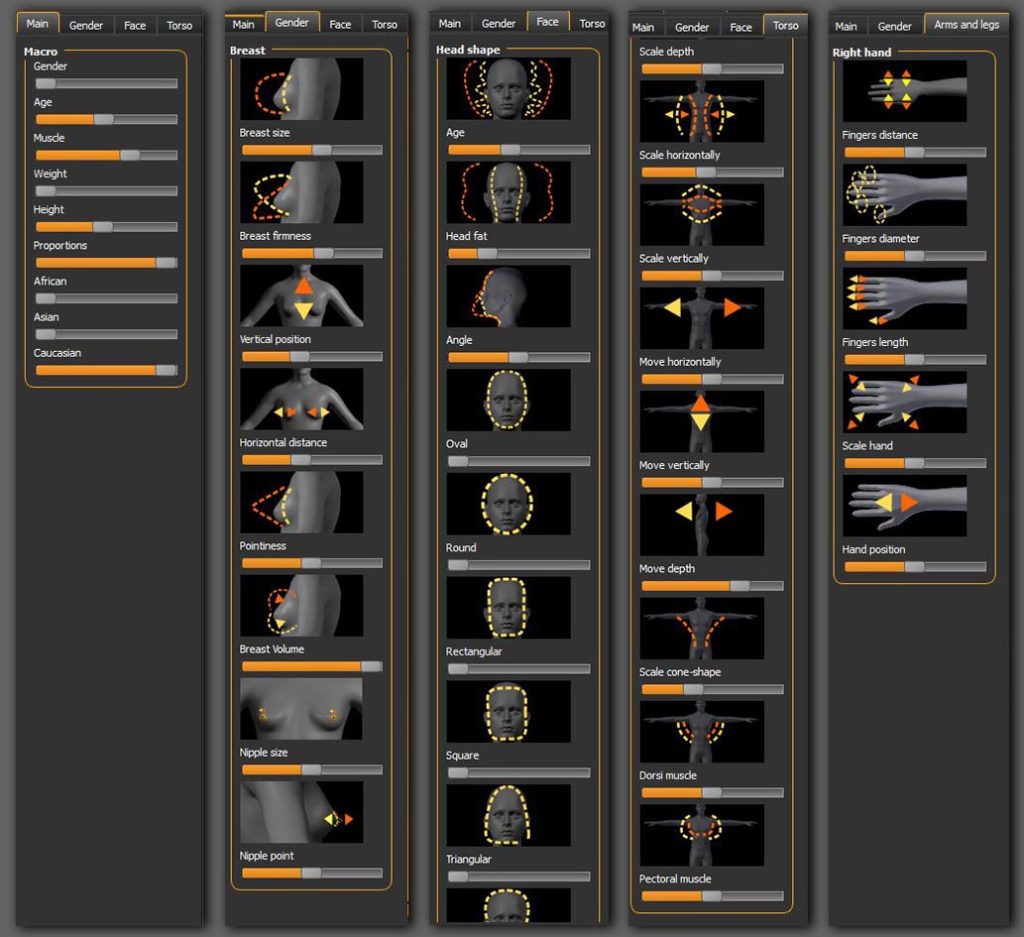
Makehuman is basically two things:
• a preset library. Which means, it has already a library for things like skin, eye color, cloth, etc. which you can apply to your model.
• slider adjustment software. Which means you have the ability to adjust any number of sliders to affect your model.
UI (User Interface):
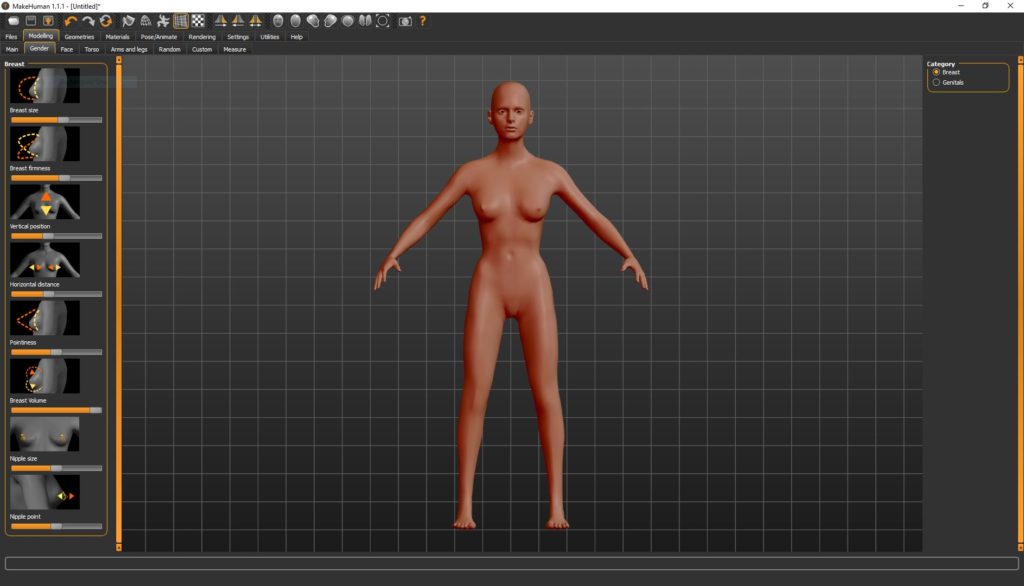
The UI of the software is more than decent, also quite responsive. It has a bunch of buttons and tabs, although don’t let them intimidate you. Is quite simple as you start playing with it. As every 3D package, it has the pre-made orthographic views suck as a front, back, left, right, top, bottom, and perspective – orthographic as well. Additional, wireframe view, smooth subdivision, texture view, and symmetry tools.
Additional, it’s come with black theme UI, which is good for the eyes 🙂
It’s always good practice to get your hands dirty in order to master any tool in your way. Therefore, I will make a small demonstration of a simple character I manage to create with the software, so you could understand the main steps.
Creating 3d characters, with an example:
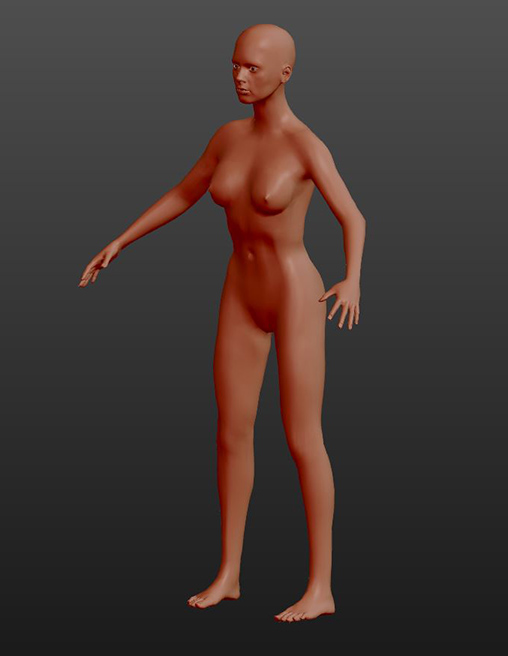
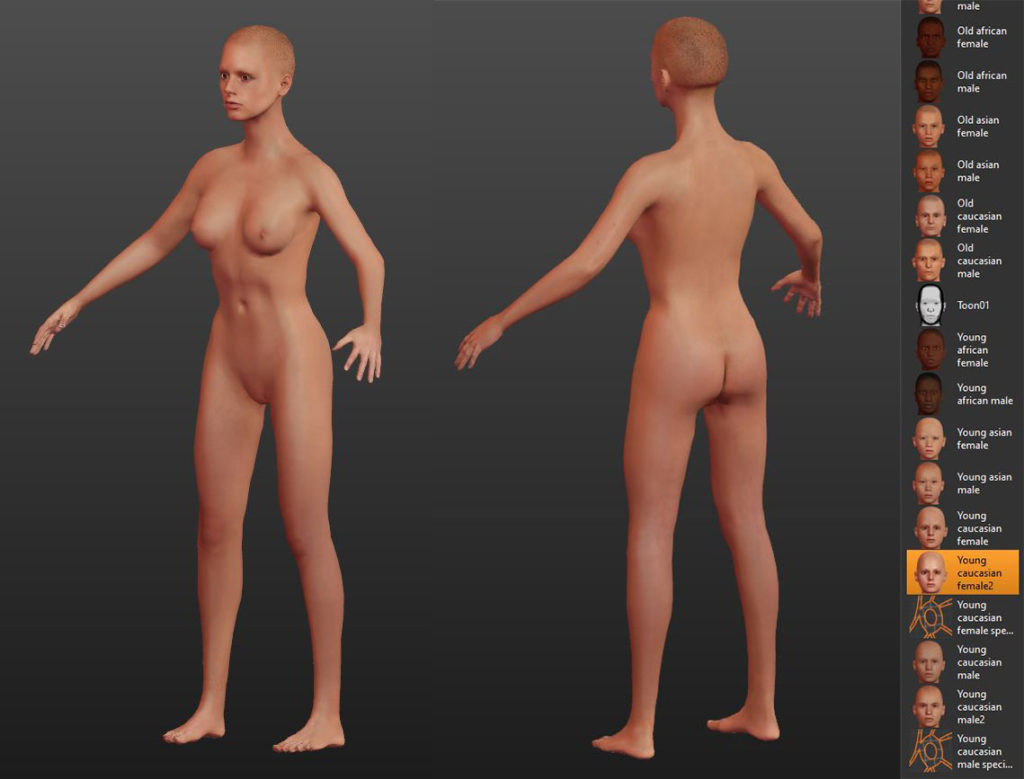
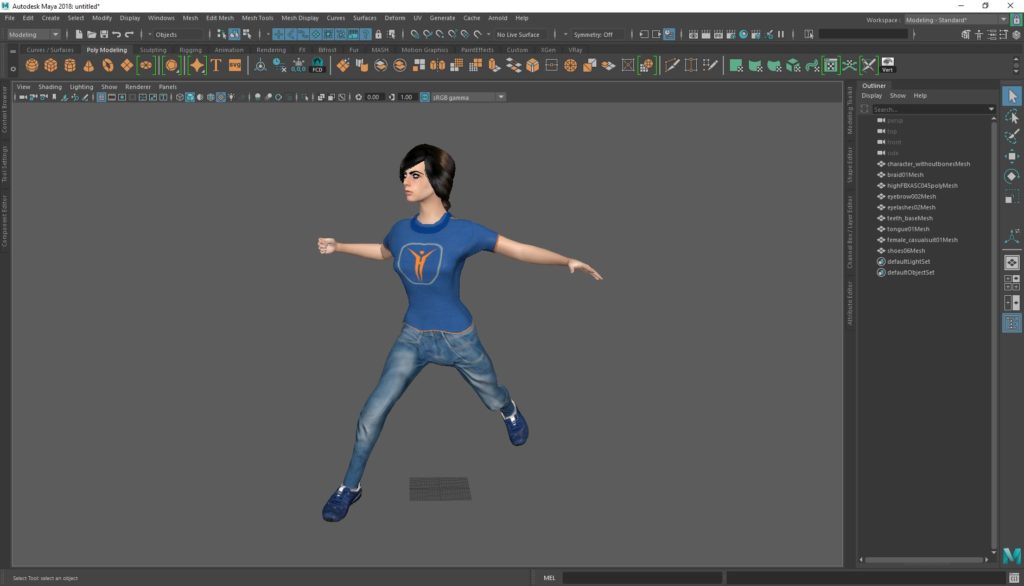
First of all, we want to give our character a proper form. I decided to create a female character, so I am giving my character female features. Playing with the followed slider in the “modeling” section i came up with something like that.
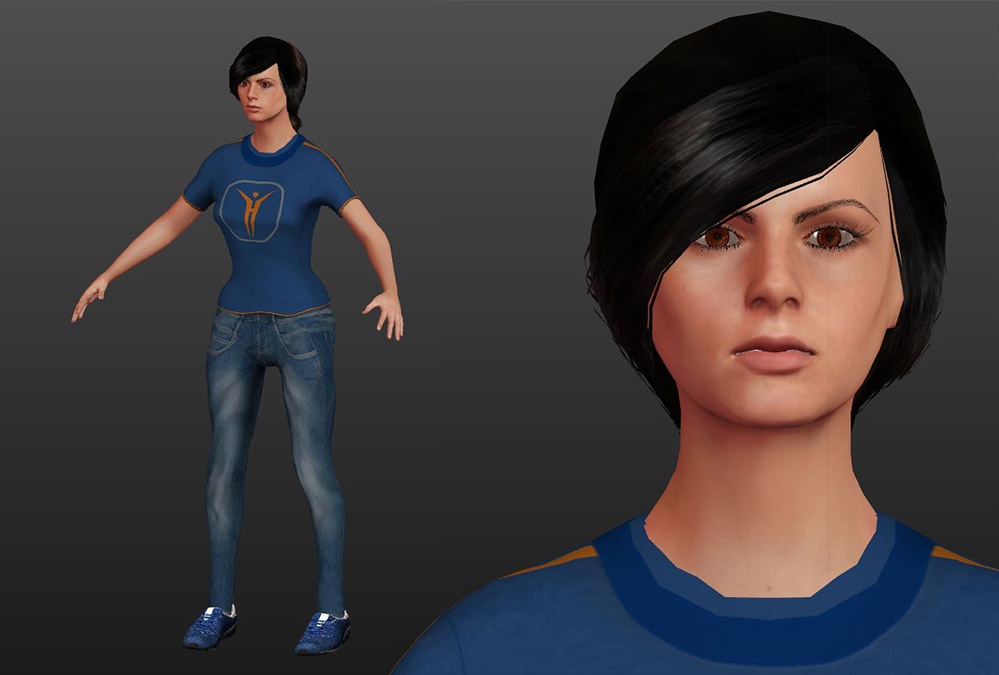
The next step is to give our character a skin tone (material). The great things about MakeHuman is that already has a big library of material presets we can choose from. Therefore from “material” section, I chose the Young Caucasian Female2, which you can see as a result in the image below.
At this point is probably a good idea to put some clothes on her. Also to give her some hair and other female features such as eyelashes, eyebrows as well. And we will do that from the “geometries” section – tab.
We have finished the modeling process of our first character. As you can see with a few sliders we came up with a full textured character that we can use inside other 3D software or just render it inside MakeHuman.
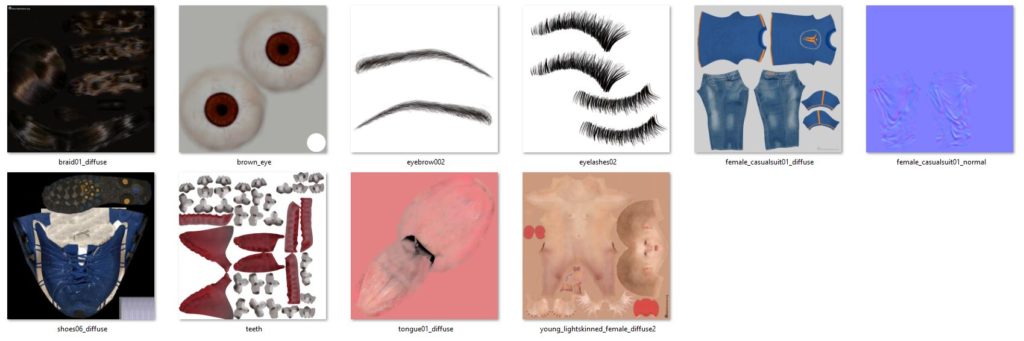
*Every piece of geometry inside MakeHuman when you create it has it’s own UV, which is time saver for 3D Artist. All the below Uvs was created by the software.
The rendering process inside Makehuman is straightforward. Just go to the “rendering” tab and set your desired resolution. There are two rendering methods, “quick” and “advanced. The quick method is quite simple and really fast, the last one is more time consuming but has better results.
If you want to go further and use some other powerful features such as pose/animate you can follow read the rest of the post.
Pose / animate:
At this stage, let’s find out how MakeHuman software for humanoid characters has been used for pose / animation purpose.
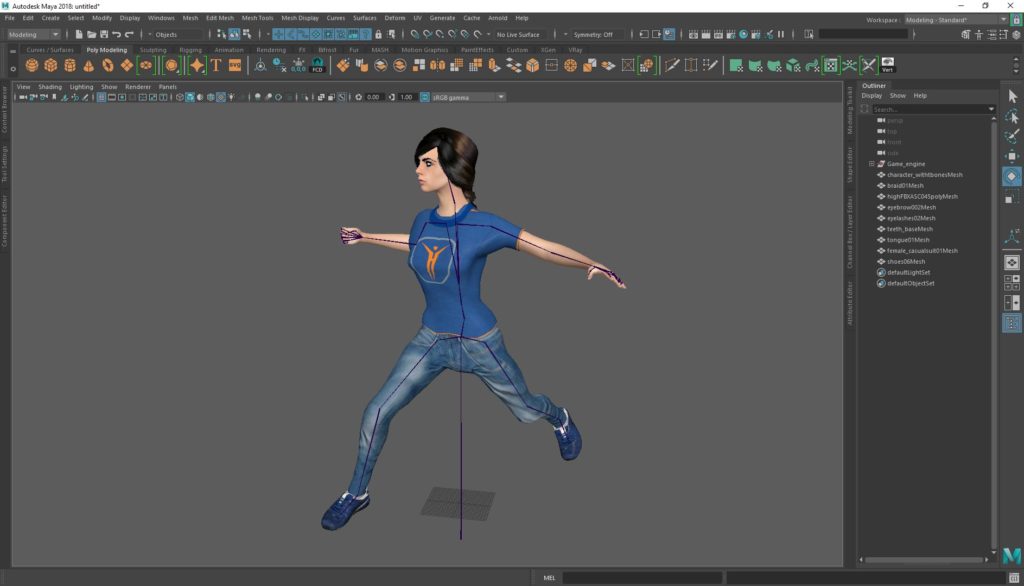
So far, we have created a full textured character in a very short time. But our character has no bones yet. Although at this point we can make some poses without bones. But if your main goal is to take the whole concept outside the software you have to give your character model bones.
If you just want to use the character inside the software the process is like this:
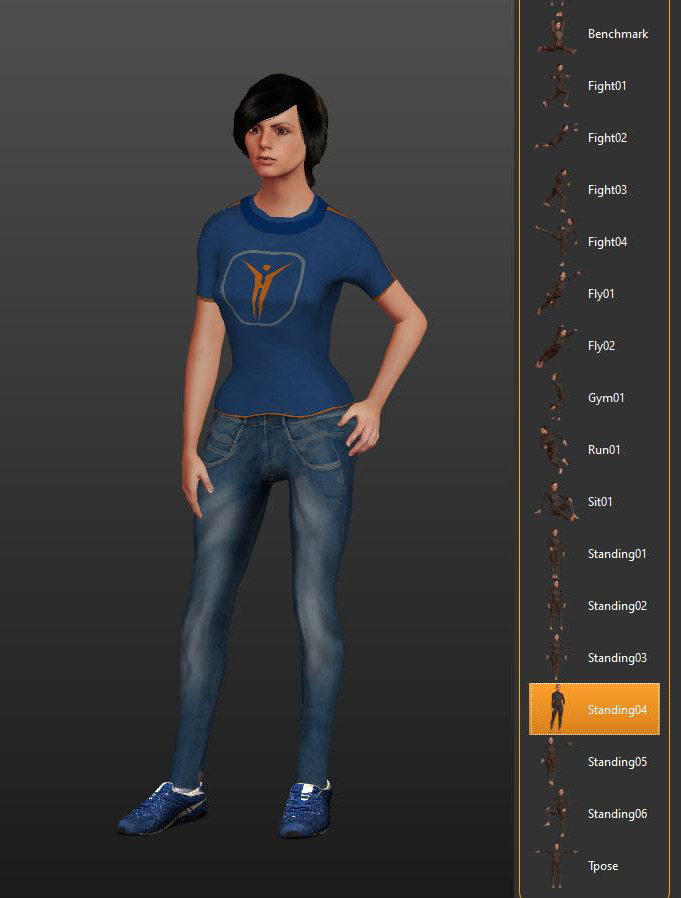
Go to “pose/animate” tab and in the pose sub-tab choose from the right column the desire pose for you model, like i did in the below image.
At this point, if you want to export the model to use it let’s say inside Autodesk Maya, the character will transfer correctly with all textures, all UVs, and with the current pose, but that’s it. You will not have the flexibility to adjust the pose with bones or to use it inside a game engine like Unity with the bones set. You will have to re-create the bones setup by yourself.
On the other hand, if your goal is to export the whole character in another 3D package, then you could just with one click give your character bones. Isn’t that amazing 🙂
Summary:
As we said, MakeHuman is software for humanoid characters. Besides modeling, we can use it for materials, poses, and rendering purposes as well.
MakeHuman for creating 3d characters is quite an interesting piece of software. Is very easy to use and also extremely fast to produce characters. It has powerful pose/animate features which they can give you with simple clicks a bone structure in which otherwise would be time-consuming to make it by yourself.
The small demonstration it was more like to give you a taste of the things you can do with the software, to intrigue you in other words.
So, give it a try and make some practice. It certainty worth the time 🙂
Another great free software/platform but this time for a general-purpose is Clara, you can found more about it here.


2 Responses
thats cool
I am glad you like the post