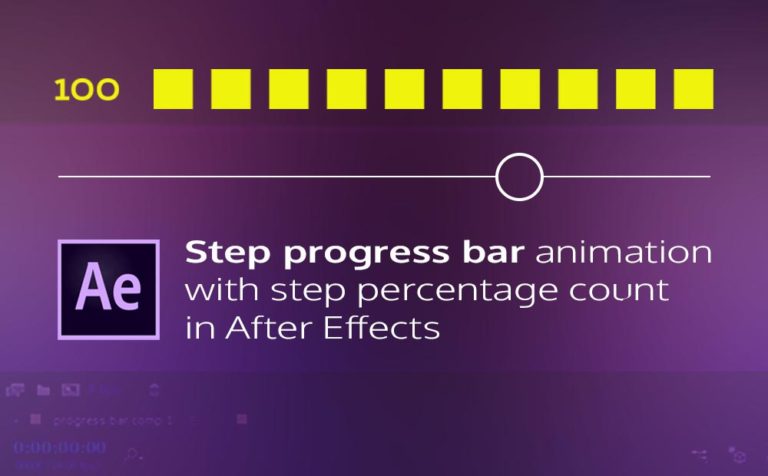
Step progress bar in After Effects looks like an old-style of graphics, but with the expansion of infographics nowadays it’s quite popular once again.
In this article we are going to see, how we can create a step progress bar with a step percentage count in After Effects.
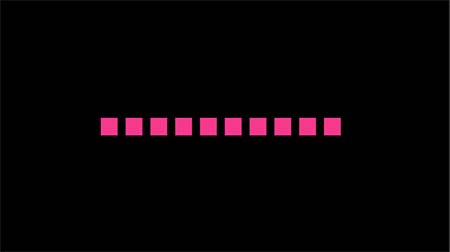
So, the kind of progress bar we are trying to accomplish is this one:
Related post for progress bar in After Effects:
- How to create a simple progress bar – infographics element in After Effects
- How to create a presentation of progress bar infographics in After Effects
Create the progress bar element (Step 1):
Let’s get started by creating the line which will represent the base of our progress bar.
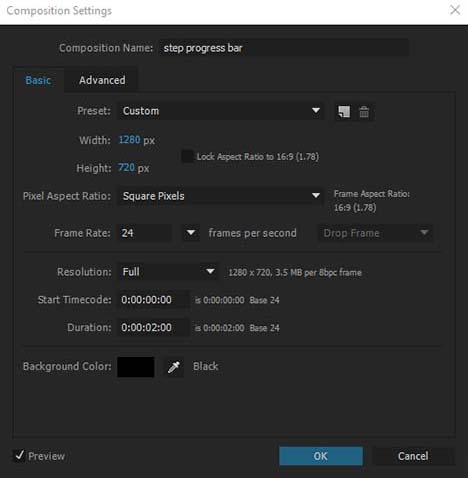
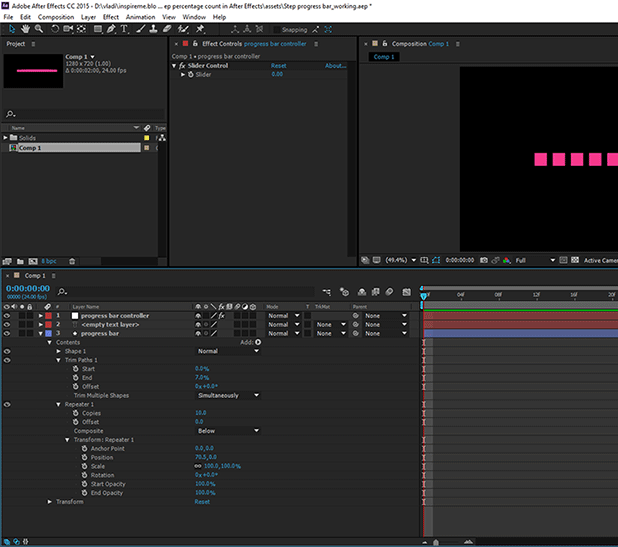
Open up After Effects and really quickly create a new composition. Doesn’t really matter the settings. Although you can see mine in the image below:
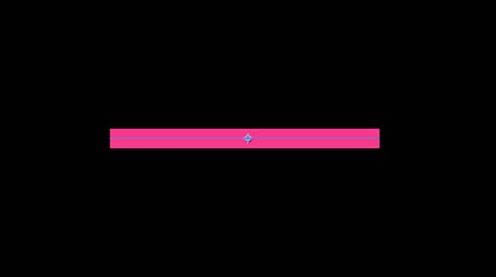
Select the pen tool (G) and create a line. Try to create it in the middle of your canva. Then, as you have selected the new shape layer you just created with the pen tool, set the fill layer to none and choose a color for the stroke. Also, make the stroke width around 50 pixels or so. Lastly, rename this new shape layer to “progress bar”.

Adding two attributes, trim paths, and repeater (Step 2):
Trim paths:
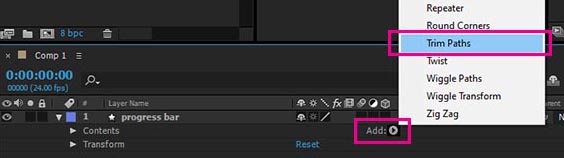
Basically, when we deal with progress bar animation in After Effects we always add trim path attribute in a shape layer (renamed progress bar), so we can, later on, animate the End attribute of the trim path over time to have the effect of progressing from 0 to 100 value or so. In this article we are not going to animate the End attribute, instead, we will use the trim path as a static creation method.
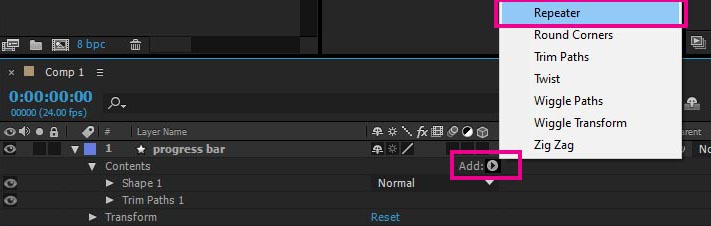
Select the progress bar layer and expand it once, and click on the add button icon to add a trim paths attribute.
At this point, we leave it as it is, with no further adjusting the settings of it. We will do that after we add the repeater attribute as well in step 4.
Repeater:
The repeater attribute will be used to actually animate our step progress bar, specifically the copies attribute.
So, once again select the progress bar layer and expand it, and click on the add button icon and this time add a repeater attribute.
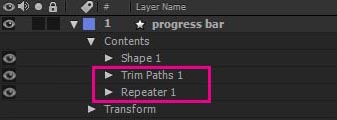
Now we have added both attributes in our progress bar layer, in the next step we will adjust some of their settings so it will look more like a step progress bar.
Adjusting the settings of the trim path and repeater attributes (Step 3):
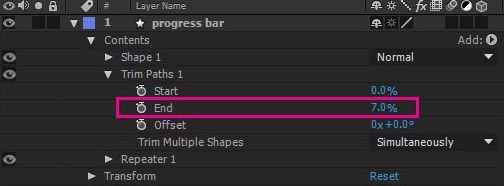
Let’s start with the trim path attribute. As we said, we are going to use the End attribute as a static creation method.
Expand the trim path, and set the End to something like 7%.
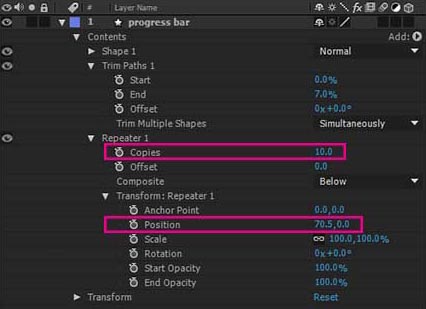
Now, for the repeater attribute. As we working on a step progress bar, it’s logical that we need to have each “block – small part of the progress bar” separate in equal distance, right! In our example, we will use the maximum block of parts to be 10. So it will need 10 blocks to make a hundred (the full step progress bar). Likewise, the percentage count which we will add in the next step will also increase by 10 overtime, so it could be consistent with the graphic of the progress bar.
Expand the repeater attribute, and set the copies to 10. Also, expand the Transform: Repeater attribute and set the position for the X-Axis to 70.5. In that way, the progress bar will be more centered in our composition.
At this point without animation, we have something like this:
Create the percentage count element (Step 4):
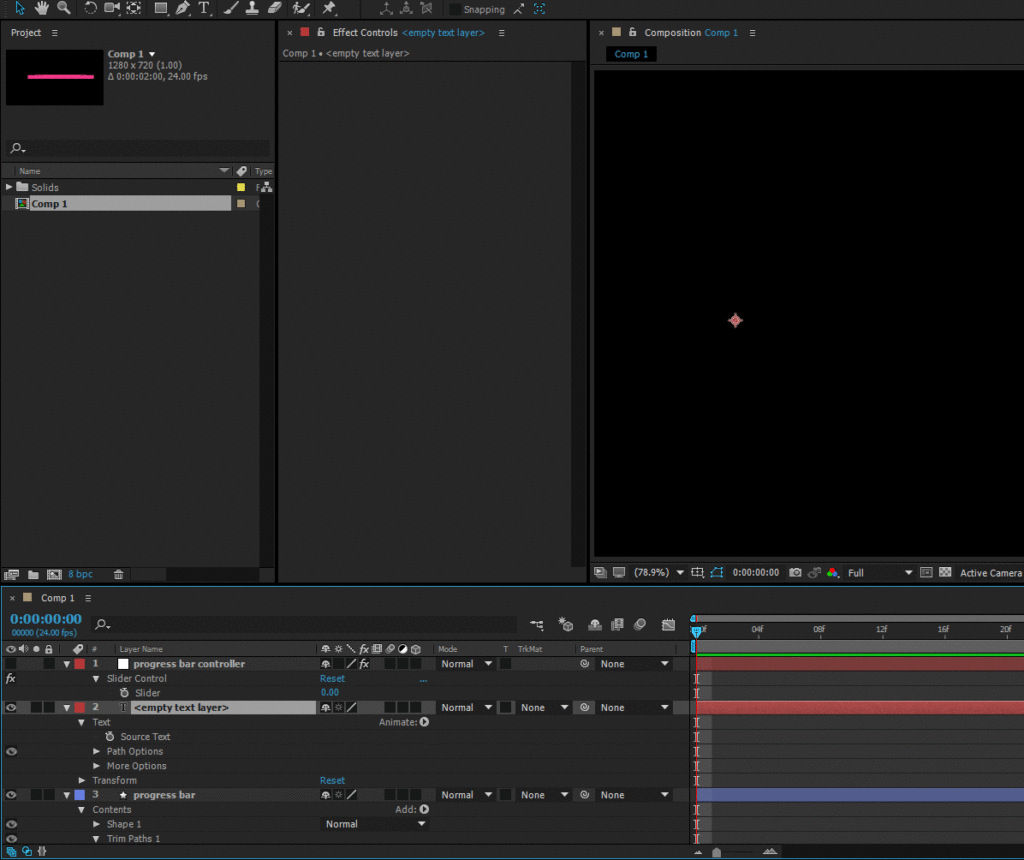
Select the type tool (ctrl + T) and just click once in your After Effects canva, anywhere it’s doesn’t matter, to close the command click anywhere in your layer area. Also, don’t type anything at all. We will reposition it later on.
We are not going to do anything with it just yet. In the next step, when we will create the null object, we will connect them together.
Create the controller for the progress bar and percentage count (Step 5):
The controller we want to create will control both the progress bar and percentage count at the same time – simultaneously. Two birds with one stone, right! And we are going to achieve it by creating a null object and add on it a slider control, which in the next step we will hook up – link with both progress bar and percentage count with a simple expression.
But first let’s create the null object, right!
Go to Layer – new – null object. A null object has been created and centered in our canva of After Effects. There is no need to move it or do anything with it. Just rename it “progress bar controller”.
For adding the slider control, select the progress bar controller (null object) and go to Effects & Presets, and type slider. Under Expression controls, you can locate the specific effect. Double-click or just drag and drop it into your null layer.
Link the controller with the step progress bar and percentage count (Step 6):
Now we have all parts in place (progress bar, percentage count, and progress bar controller) it’s time to create the necessary connection between them.
The goal here is to hook up both the progress bar and percentage count specific paraments on those layers into that slider. So, when we move the slider it will have an equal effect on both layers simultaneously. Let’s start with the progress bar connection.
Progress bar connection:
Expand the progress bar layer until you find the repeater section and expand it as well. In the copies attribute, Alt + Left-click on the stop-watch icon, the value will turn red, which is an indicator you are in expression mode. Don’t write anything, just click and drag a connection from the little symbol which looks like this one “@” to the slider control in our null object. To do that you have first to select the progress bar controller (null object) and then as the progress bar has already been expanded make the connection between them.
After that, a connection has been established. To verify the connection select the progress bar controller and play with its slider control, to see the results.

Percentage number connection:
This time expand the percentage count layer until you find the text section and expand it as well. There is a source text attribute. Alt + Left-click on the stop-watch icon like we did with the progress bar above. The expression icons appear once again under the source text attribute. Select the progress bar controller and again make the connection with the help of the “@” icon from the source text parament to the slider control of the progress bar controller layer.
After that, the second connection has been established as well. Both elements (progress bar and percentage count) are connected to the slider control. To verify it, select the progress bar controller and play with the slider to see the results. Feel free to reposition the percentage count on the left side of our progress bar.
Issue A (increasing by ten):
At this point for the percentage count layer we have the below expression:
thisComp.layer("progress bar controller").effect("Slider Control")("Slider")If you select the slider control from the progress bar and try to play with it, you will realize that it’s not working properly. As we said, our percentage count will be increasing by ten over time, which is not the case at the moment. To accomplish it, just put *10 at the end of the already existing expression for the percentage count. So the expression would be:
thisComp.layer("progress bar controller").effect("Slider Control")("Slider") *10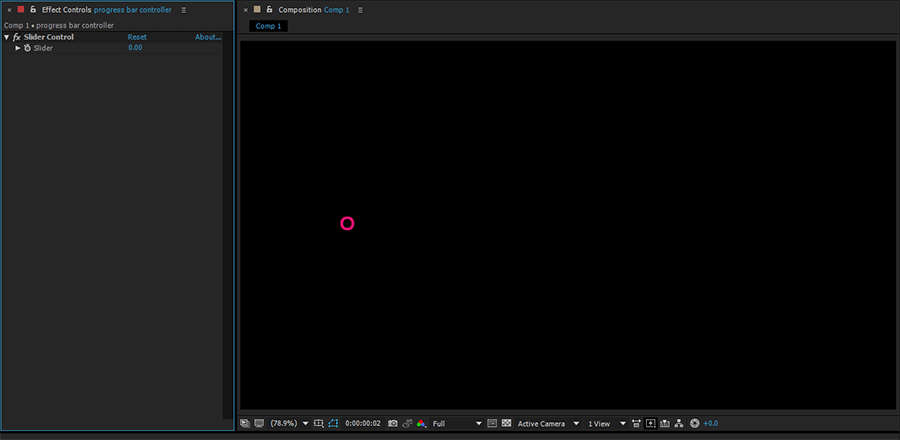
Issue B (decimal point):
If you try to animate your progress bar controller – slider control you will realize the percentage count seems to be animating correctly, but there is a decimal point on it. The way to solve that issue is by adjusting the expression of the percentage count element itself.
Expand the percentage count layer until the source text section. At this point our expression for this attribute is like this:
thisComp.layer("progress bar controller").effect("Slider Control")("Slider") *10The way to remove the decimal point you have to add a simple function at the start of this line of expression and to add extra parenthesis after the Math.round function and at the end of it as well. As you guessed, the function is Math.round. Is a function that makes a decimal point number to be a whole number.
So our new expression for the percentage count would be:
Math.round(thisComp.layer("progress bar controller").effect("Slider Control")("Slider")) *10Conclusion:
In this article we saw, how we can create a step progress bar with a step percentage count in After Effects. Controlling both elements with one controller and simple expressions.
In our example of the step progress bar in After Effects, we used 10 blocks – pieces for the whole progress bar and increased the percentage count by ten. We could really use any number we wanted to, and adjust properly the expression for the percentage count. For example, if we used 20 blocks for the whole progress bar, the expression for the percentage count would be, after adjusting the issue with the decimal point:
Math.round(thisComp.layer("progress bar controller").effect("Slider Control")("Slider")) *20I hope you found it interesting, let me know if you have any questions related to this topic.


2 Responses