JPEG artifacts removal AI tool in Photoshop really gives us great results with just one click. It gives our low-resolution image a quick enhancement of resolution, which is great. That otherwise will require a lot of time on our part to achieve the same results.
The use of JPEG artifacts removal filter in Photoshop is to simple making our images look sharper and eliminating any artifacts caused by the compression process. Which leads to an overall better image quality.
Since the name suggested is for JPEG image format, does this mean that we can’t use it for other image formats such as PNG!
The answer is no. We can use this great AI filter that Photoshop has to offer in almost any image format. My guess is that Adobe gave that name (JPEG), since it is known that every time we save a JPEG image format, each time it’s losing some quality. JPEG artifacts removal filter comes to restore that lost quality.
Using JPEG artifacts removal filter in Photoshop:
The process of using this AI filter is really simple.
1 Step:
Open up your low-quality image in Photoshop.
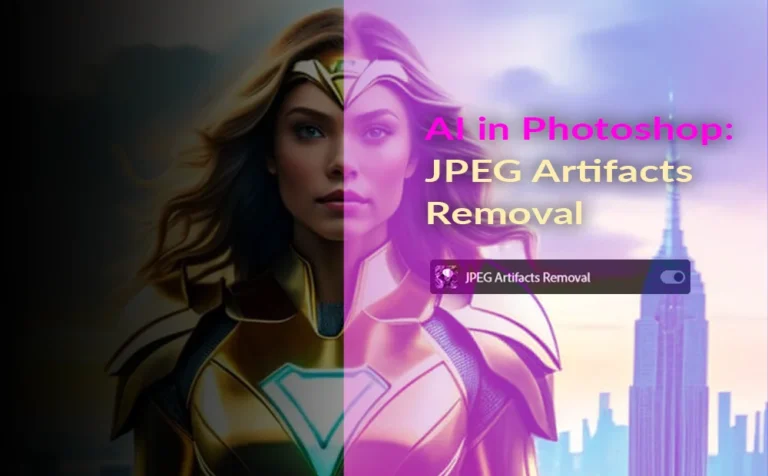
I have just downloaded this awesome superhero girl picture from the web in low quality on purpose.

There are clearly some artifacts all over this picture.
2 Step:
Go to Filter – Neural Filters – JPEG AArtifacts Removal.
If this filter is gray, you have to download it first. Just click on the little cloud icon next to it.
3 Step:
After you download it, let’s activate it, just with one click (as I promise). So click on the small on-off bar next to it.
4 Step:
This AI filter doesn’t have much of options to play with. There is only one. The strength of the effect. I set mine to High, for stronger effect. Immediately after we turned it on, the effect has taken effect.
We can turn on-off the visibility of our new effects, so we can clearly see the result by the small icon below:

5 Step:
Now if we are happy with our result, of reducing the artifacts on our image, it’s time to apply the effect to our image.
To do so, we have to specify the output.
I like to set the output to “New layer masked”. In that way, I have more flexibility and control over the applied effect with masking if I decide to make some adjustments later on.


I hope you find it useful and take advantage of it.