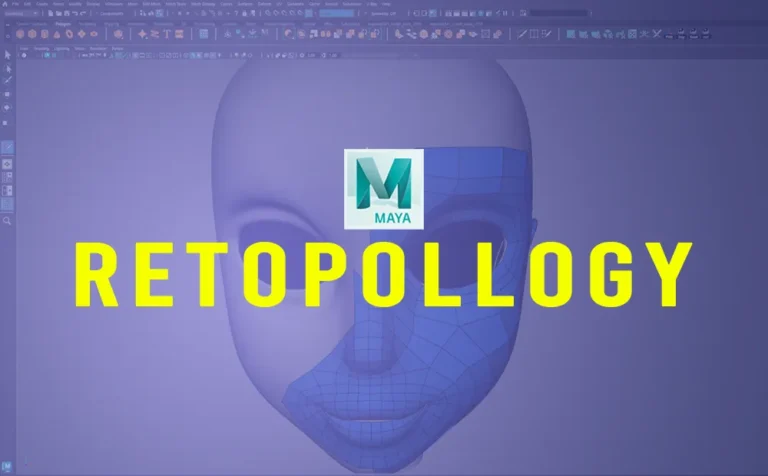
Retopology is a crucial process in 3D modeling, especially for 3D game assets, animation, and VFX. Maya offers an array of tools and workflows that significantly streamline the retopology process. In this article, we will explore some effective tricks to achieve clean and optimized topology.
1. Using the Remesh and Retopologize Tool:
Maya 2023 introduces enhancements to the Remesh and Retopologize tools, making them more efficient than ever. Here’s how to use them effectively:
- Select your high-poly mesh and navigate to Mesh > Remesh to create an even triangulated surface.
- Then, use Mesh > Retopologize to convert the mesh into a clean quad-based topology.
- Adjust the Target Face Count and Hard Edge Preservation settings to control edge flow and polycount.
2. Quad Draw for Manual Retopology:
When automated methods don’t provide the desired results, the Quad Draw tool (under the Modeling Toolkit) is an excellent choice:
- Create a live surface by selecting the high-poly mesh and clicking Make Live.
- Use Quad Draw to manually place points and create polygons, ensuring optimal edge loops for animation and deformation.
- Hold Shift to relax topology and optimize edge spacing.
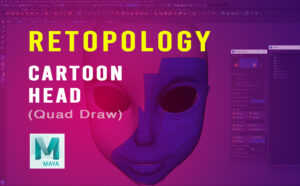
Read more about this method from an older post “Retopology Cartoon Head in Maya (Quad Draw Tool)”.
3. Optimizing Edge Loops for Animation:
For animated character models, ensure:
- Circular edge loops around eyes, mouth, and joints for better deformations.
- Evenly spaced polygons to avoid stretching or pinching during animation.
- A denser topology in areas that require more detail and flexibility.
4. Reducing Polycount with the Reduce Tool:
If a model is too dense, use Mesh > Reduce:
- Use Preserve Hard Edges to keep sharp corners intact.
- Adjust the Reduction Percentage while maintaining shape fidelity.
5. Exporting for Game Engines:
When finalizing a retopologized mesh for game engines like Unreal or Unity:
- Ensure proper Normal and Tangent Space settings.
- Use Mesh Cleanup to detect non-manifold geometry or floating vertices.
- Export as FBX with optimized UVs and textures.
6. Bonus Tip (Using Zbrush):
Retopology in Zbrush, can make the process simple and fast. By using the topology brush in Zbrush, you can draw lines and that lines will determinate your new topology.
Eventhough this approach is not extremely accurate, it’s gives fantastic starting point results.
Read more about this method from an older article “Retopology Cartoon Head in Zbrush (Topology Brush)”.
Conclusion:
Maya enhanced retopology tools offer a robust workflow for creating clean, optimized topology. Whether you prefer automated solutions like Retopologize, manual control with Quad Draw, or a hybrid approach, these tricks will help streamline your modeling pipeline.
Mastering retopology is essential for any 3D artist aiming to create high-quality assets for games, animation, or VFX. With these Maya tricks, you can ensure your models are both efficient and production-ready.


19 Responses
Why go for MP3 conversion? It’s a total lifesaver! You can listen offline anywhere—no internet, no problem. It saves your data since MP3s are way lighter than streaming videos. Plus, you can whip up custom playlists for workouts, study sessions, or road trips. Just imagine turning a motivational speech or a chill lo-fi track into a file you can play anytime. But here’s the deal: keep it legit by only converting content with the creator’s permission or stuff labeled free, like Creative Commons, and support artists by buying their work when you can!
https://youtubemp3.blog/
https://youtubemp3.blog/
Why go for MP3 conversion? It’s a total lifesaver! You can listen offline anywhere—no internet, no problem. It saves your data since MP3s are way lighter than streaming videos. Plus, you can whip up custom playlists for workouts, study sessions, or road trips.
https://youtubemp3.blog/
Great guide on Maya retopology! The Quad Draw tip is super helpful for clean topology. Really useful for my 3D workflow. Thanks!
Great tips! The Quad Draw method sounds super helpful for clean topology. Using ZBrush too is a cool quick alternative. Really useful insights for improving my 3D workflow!
嘿,博主!这期关于Maya retopology的文章简直太及时了!Quad Draw和Zbrush拓扑笔的介绍特别有用,感觉一下子就清晰了。不过我对Reduce Tool的Preserve Hard Edges选项有点好奇,具体在哪些场景下效果最好?还有 exporting part,提到Normal和Tangent Space,但没细说怎么调,有点小困惑。期待未来能有更深入的分享,比如不同模型类型的拓扑策略!继续加油,你的教程超棒的!
Wow, Maya’s new tools sound super handy! I remember when I wrestled with retopology—it was a whole process! Using the Remesh tool really helped me clean up my models without much fuss. Can’t wait to give these tricks a try!
Wow, this is like a mini-masterclass on retopology! I totally vibe with the quad draw tool—it’s such a lifesaver for clean topology. Just remember to chill out a bit while doing it, or you’ll end up overdoing it. 😅
Oh man, I love using the Remesh tool! It really saves me time when I’m working on a high-poly model. Just wish it was a bit more user-friendly, you know?
Quad Draw is a lifesaver! I spent ages trying to get a clean topology before I found it. It’s like magic how easy it is once you get the hang of it.
Those edge loop tips are super helpful. I’ve been wondering how to avoid weird deformations around the joints in my character models.
Haha, I always forget to check for floating vertices! That cleanup step is essential, otherwise it can mess up your exports.
Using Zbrush for retopology sounds legit. I appreciate the thought of drawing your lines; I might give that a shot soon!
Wow, this is a goldmine of info! I’ve been struggling with retopology in Maya, and this just made everything feel way less daunting. Can’t wait to try out that Quad Draw tip, it’s always been a bit of a mystery to me! Thanks for sharing!
Haha, this Maya retopology guide is like a lifesaver but for polygon counts, not data usage! 😂 The Quad Draw tool sounds amazing – finally a way to topology without turning my models into rubber ducks. And ZBrush? Now I have another excuse to download more software (and coffee!). The Preserve Hard Edges tip is gold, perfect for when my characters jawline is clearly defined and says, Dont mess with me! Just a quick note: maybe add a warning for beginners – using Retopologize might result in perfectly smooth, featureless avatars. Great work, though! Now I can blame the tools if my topology still looks like spaghetti. Keep em coming!
Undead Corridor — Tight hallways, louder heartbeats. Clear wave after wave in claustrophobic arenas, using smart kiting, ammo discipline, and on-the-fly upgrades to keep the horde at bay. Learn spawn timings, hold angles, and rotate between choke points to survive longer each attempt. Challenge: 10 waves without going down—share the board.
Undead Corridor — Tight hallways, louder heartbeats. Clear wave after wave in claustrophobic arenas, using smart kiting, ammo discipline, and on-the-fly upgrades to keep the horde at bay. Learn spawn timings, hold angles, and rotate between choke points to survive longer each attempt. Challenge: 10 waves without going down—share the board.
Undead Corridor — Tight hallways, louder heartbeats. Clear wave after wave in claustrophobic arenas, using smart kiting, ammo discipline, and on-the-fly upgrades to keep the horde at bay. Learn spawn timings, hold angles, and rotate between choke points to survive longer each attempt. Challenge: 10 waves without going down—share the board.
Undead Corridor — Tight hallways, louder heartbeats. Clear wave after wave in claustrophobic arenas, using smart kiting, ammo discipline, and on-the-fly upgrades to keep the horde at bay. Learn spawn timings, hold angles, and rotate between choke points to survive longer each attempt. Challenge: 10 waves without going down—share the board.