Having the same UV pixel density across multiple objects in Maya is crucial to the texturing process. One way to do that is by using the Texel Density Tool in UV Editor.
Your 3D model must have the same UV pixel density, in order to avoid quality issues on textures. You don’t want some parts of your model to appear sharper and some others more blurred in a texture-quality manner. Ideal, you want your entire 3D model to appear with the same quality.
One way to check it is through a checker map, that you can apply in your model, or just activating it through UV Editor in Maya.
Same UV pixel density is also crucial for baking texture stuff as well, like baking ambient occlusion texture map.
in the following image the left one is with bad pixel density and the right one is with good one.
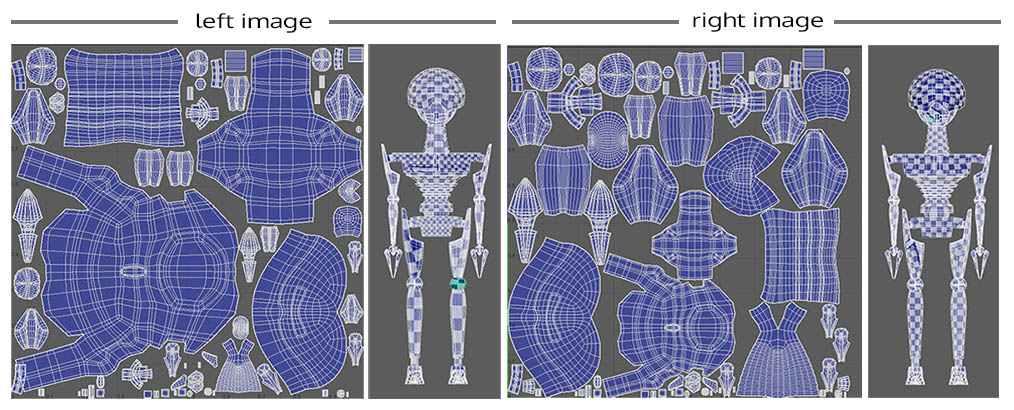
As you can clearly see in the left image, there are some UVs that are much bigger than others (for example, look at the torso and the leg, not consistent at all). That UVs will have much more pixel information than the small ones. And that’s the issue.
In contrast to the right image, the same big UVs aren’t that big anymore. There is consistency throughout our entire 3D model.
Let’s start our scene from the left image in order to get the right image result.
Same UV pixel density in Maya:
Open up your 3D model in Maya.
Open up the UV Editor window in Maya – Windows – Modeling Editors – UV Editor.
Activate the UV Toolkit by going to Tools – Show UV Toolkit.
Select all the pieces of your 3D model.
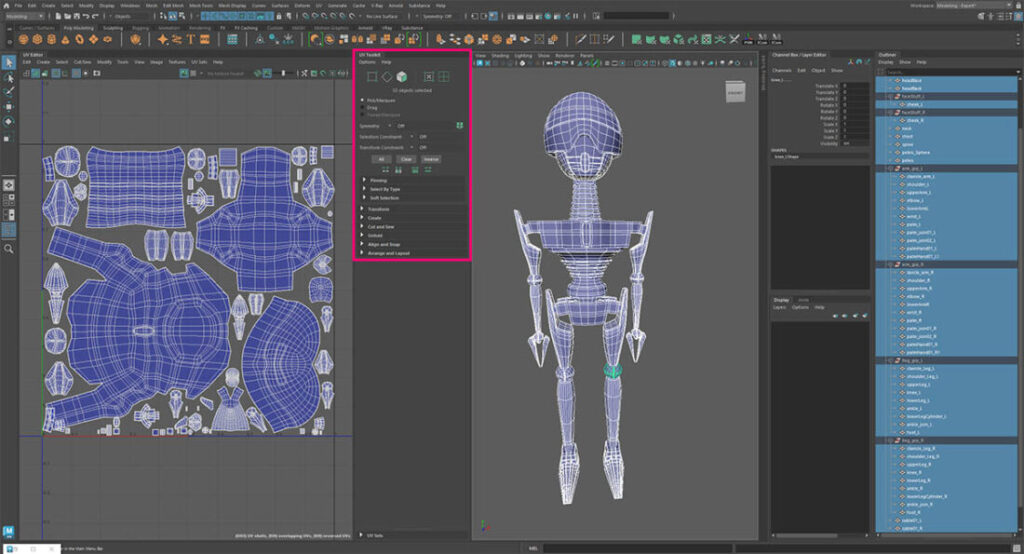
Expand the Transform tab and locate and click on the Get button next to Texel Density (p/unit). After that click on the Set button.
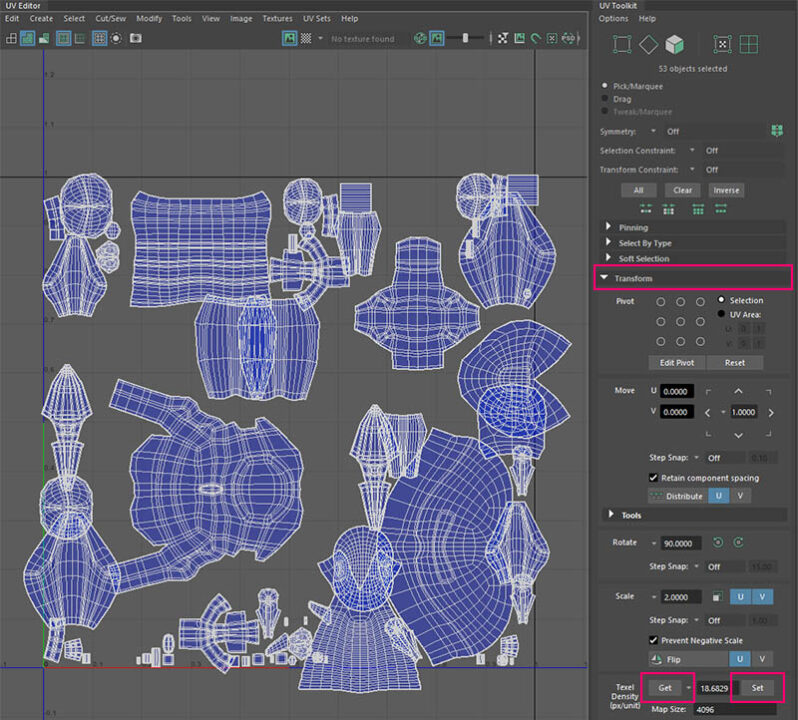
Maya has automatically applied to all our selected objects the same pixel density. Now we won’t have any issues in the texturing process down the line, which is great.
Besides that Maya rearrange our UVs we are good to go.
We can layout properly our UVs in two ways:
- manually, by dragging every UV piece and basically making the puzzle for ourselves or
- automatically, by using the Layout tool by going to Modify – Layout.
I chose to layout my UVs in an automatic way.
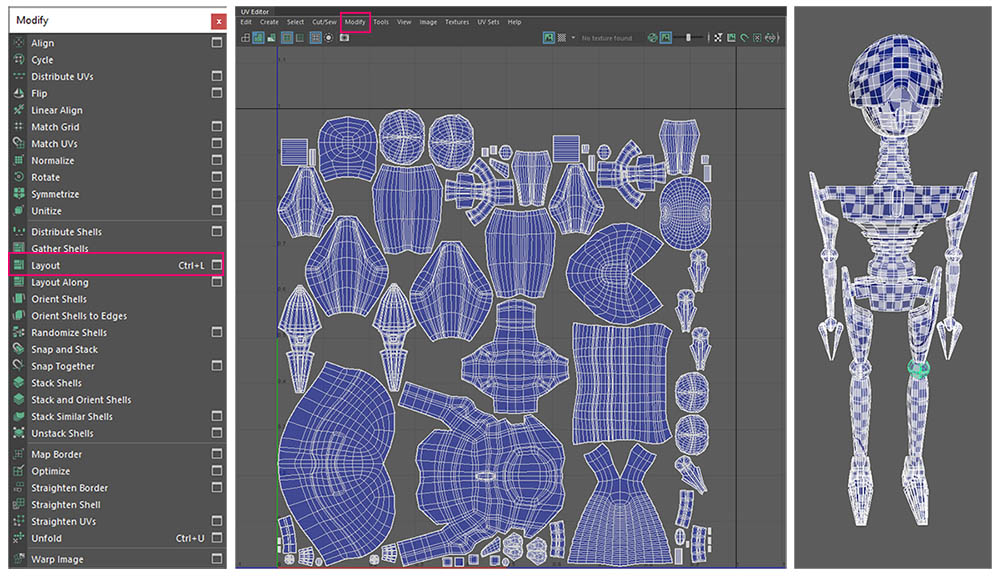
As you can see from the image above, there is consistency of UVs throughout our entire 3D model. The checker map seems to have the size throughout our entire model.
After we accomplish that, then we can proceed to the next task, which is the texturing process.
Some other UV-relative articles we want to check out:

