Converting a texture to geometry in Maya is an interesting technique we should definitely need to grasp, cause it saves us a lot of time, in the modeling process. The command is through Modify – Convert – Texture to Geometry.
This technique allows us to apply an image texture to a plane geometry and then convert that texture to an actual geometry through a command in Maya. After that, we can manually clean our new geometry and we can extrude that geometry to get some thickness, so it could be an actual 3D object. Apparently, it could save us a lot of time when we work on a modeling task inside Maya.
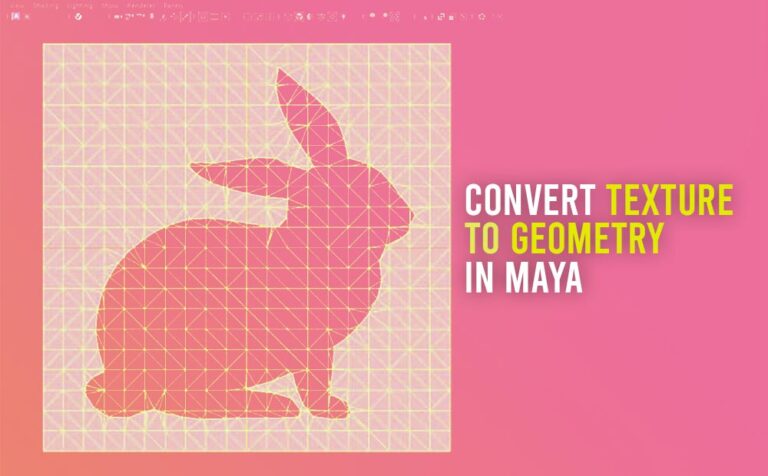
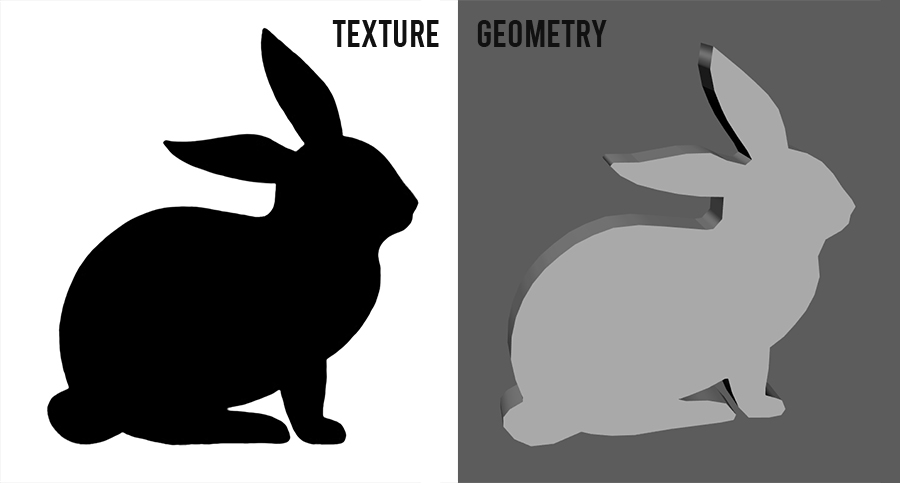
You can see, the final result we are trying to accomplish in this article down below:
Feel free to watch the video below. For more info keep reading.
Prepare our scene for the conversion:
What we are going to need in our Maya scene, is a simple polygonal plane, a material applied to it, and a texture file. Let’s get started.
Create a polygonal plane:
Go to Create – Polygon Primitives – Plane (check box). In the new popup window, set the parament of our new plane to width: 10, Height: 10, Width – Height divisions: 20.
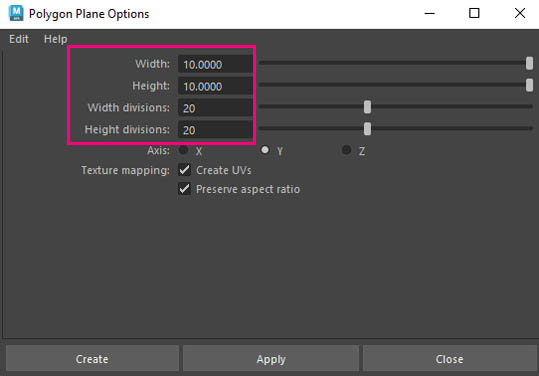
Note: The number of subdivisions we set for our polygon plane, later on, will determine the accuracy of our new converted geometry. Don’t delete the history of the polygon plane. In that way we can always increase or decrease the subdivisions along the way, if we need to.
Assign a lambert material on it:
We need to assign a new lambert material to it.
Select our new polygon plane through Maya scene or Outliner and right-click and select Assign Favorite Material – Lambert.
Note: It doesn’t really matter, what material we chose to assign in our geometry. I chose Lambert because of its simplicity.
Assign a texture file to color slot:
Lastly, even though is not really necessary for the actual conversion in the later step, It will visually help, if we connect our texture to our Lamber material (color slot). The same texture we are going to use for the actual conversion from texture to geometry.
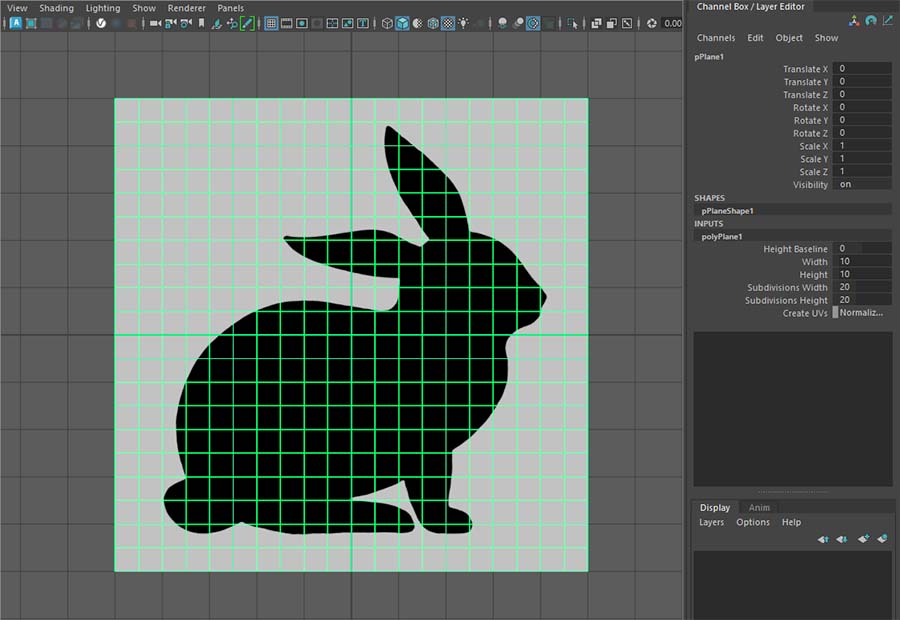
To do so, select our new plane geometry, open up the Attribute Editor, and go to the Material tab. Left-click on the little checkboard icon on the right. A new window appears, search for the File node and click on it. In the Image Name section, navigate to your texture file and select it.

In order to see the result in the viewport of Maya just press 6 (shortcut of Hardware Texturing).
The preparation is finished. In the next part, we will actually convert our rabbit texture file into geometry in Maya.
How to convert a texture to geometry in Maya:
Step 1:
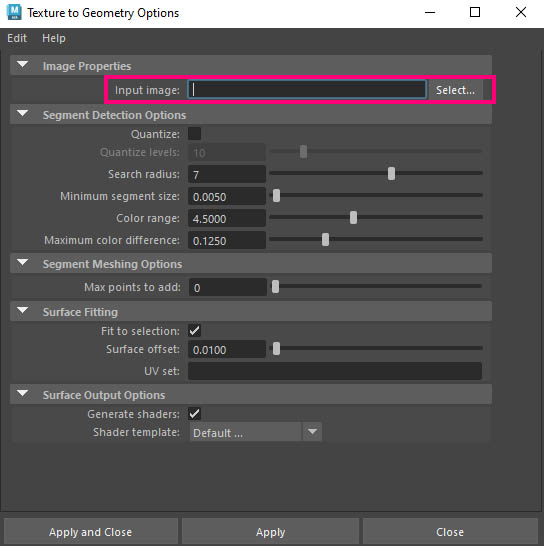
Select the plane geometry either from Maya viewport or from Outliner and go to Modify – Convert – Texture to Geometry (option box).
In the Input image section, just locate your texture file and select it. After that just click apply or apply and close. In my case, since I was getting pretty good results I haven’t really changed any other settings. If you need to, feel free to play with the other settings.
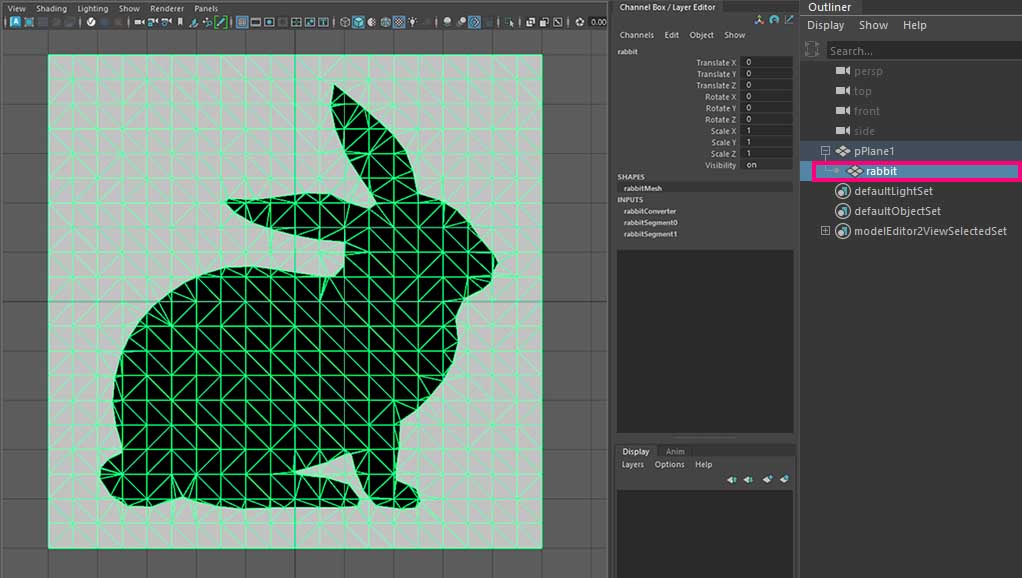
After the command has been completed, a new node below our original geometry has been created in Outliner. That is actually the converted geometry from our texture.
You could also take a look at the official Autodesk site for Converting texture to geometry.
Step 2:
Now we have completed the conversion from a texture to geometry, it’s time to clean our geometry. And the simple way to do that is by using Hypershade in Maya.
The reason we will use the Hypershade, is because it gives us the choice to make a selection through a material. We don’t want to spend a great deal of time by selecting each and every polygon we want to delete, in order to have only the rabbit geometry left.
So open up the Hypershade by going to Windows – Rendering Editors – Hypershade. As you can see there are two extra materials. RabbitConverterShader0 and RabbitConverterShader1. Go over the white material (RabbitConverterShader0) and select it and right-click and select, select objects with material.
You can see in the viewport that all the geometry with that particular material has been selected. Just press delete. In that way, we left with only the black material (RabbitConverterShader1), which is what we wanted.
Step 3:
Select the rabbit geometry from Outliner and press ctrl+P in order to ungroup it. Hide the original plane geometry, in order to see clearly our new rabbit geometry.
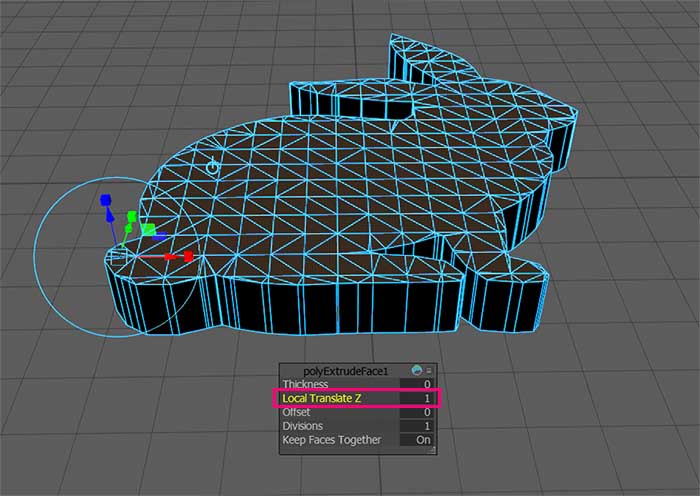
Lastly, as we said, we want to give it some sort of depth in order to be a real 3D object, and the way to do that is through extruding.
So select the rabbit geometry and go to Edit Mesh – Extrude. Set the Local Translate Z parament to something like 1.
That was it. We converted a texture to geometry, without any modeling skills.


