How to create a turntable in Maya for a 3D character for presentation purposes. simple steps you can follow through.
Since this article is more from a technical perspective, for how you basically create a turntable in Maya, I won’t go into much detail about the renderer and the lighting I have used for exporting my turntable.
To get a better understanding of what a turntable is, you can take a look at the following video.
The way we did, it was actually pretty simple. We made two separate renders. One only with the master layer and one only with the wireframe. We put them together in After Effect, and that was it, pretty much. This was a combination of master and wireframe render passes.
In this article we will explore how to create a turntable by animating our 3D character. If you want to create a turntable by animating the camera around your model, you may find this python script just great for doing so. Since it will automatic the whole process.
What’s a turntable:
A turntable is a short video. Basically used for characters and props, so your viewer has a much better understanding of your 3D model, in contrast with a single static image in many cases.
You can export many kinds of turntables for your 3D model. It doesn’t only have to be a final render of your model. You could also, export a wireframe, a specific render pass (such as an ambient occlusion), or you can mix things up a little bit (final render with a wireframe, for instance).
Remember a turntable is a visual presentation of your model with the purpose of your viewer-client to see your model from all the possible angles, in order to better understand it.
Create a turntable in Maya:
We will be working on the following scene:
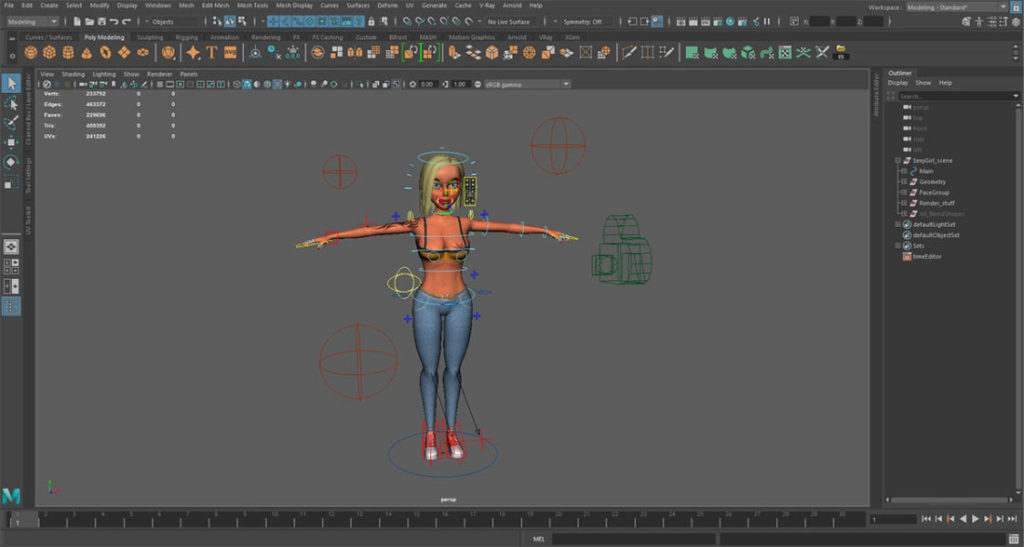
If you are interested in the above 3D model and want to check it out, you can do it at Turbosquid and Cgtrader for the rigged version and Turbosquid and Cgtrader for non rigged version accordingly.
As you can see, in my scene, except for the model I have other stuff like lights and a camera. This particular 3D model is already rigged, that’s why you see all those curve shapes in the viewport of Maya. It doesn’t really matter if your model is rigged or not, just make sure it is in a position, probably in a T-pose, so your model could be properly visible to your viewer.
If you haven’t already a camera and lights in your scene, just create them. The lights you are going to create depend on the renderer you are going to use. For this article, I have used the V-ray renderer, so all three of my lights were V-ray sphere lights.
Create the animation of the turntable:
Instead of creating a nurb circle and attaching our camera to it, we will create our turntable in a much simpler way.
For a rigged model, like I have in my scene if you have a global controller for your entire character, you should just animate that controller, see the image below:
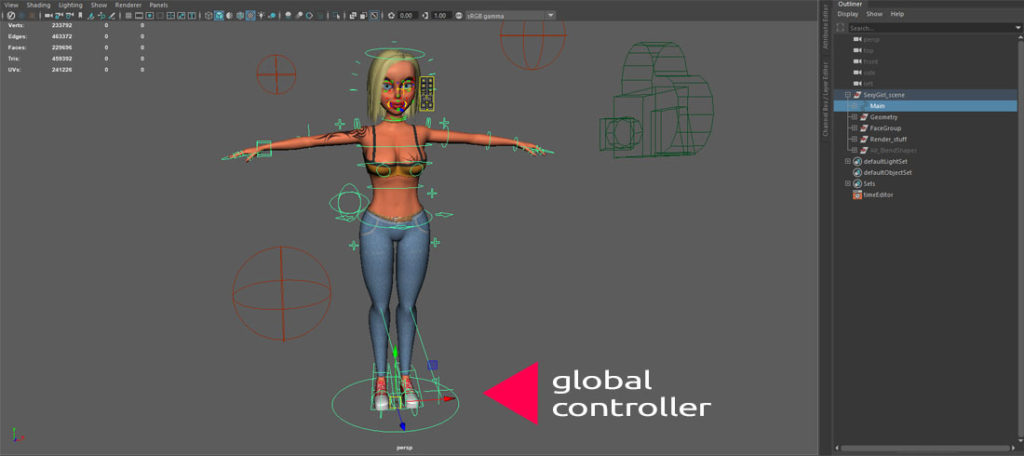
For not rigged models, just animate the parent group, which contains all of your geometry.
I will cover the first method since my rigged character model does have a global controller.
The process is the following:
- select your global controller
- open up the channel box
- go to frame 1 and set a key (with zero value) to rotate Y parament
- go to frame 72 and set another key with Rotate Y (-360 value)
- open up Graph Editor and select the Rotate Y curve, right-click – tangents – Linear
- set your timeline in Maya minus one frame, so set it to be from 1 to 71

1 Note: We choose a negative value for the rotation parament since we want the turntable animation to be clockwise.
2. Note: We set the tangents for our Rotate Y parament to be linear because we didn’t want our timeline to have some easy in and easy out.
3. Note: The reduction of the timeline by one frame was because, if we haven’t done that, the start frame and the last frame would be the same. And if we have rendered it our and played our turntable we would be noticed some delay, between the last frame and the first one, again because they were the same.
In the following post, we are going to see, how we can export a turntable from Maya as a sequence of images



2 Responses