
Exporting an ambient occlusion texture map from Zbrush and later on using that map to add more shadow details to your color texture map is a very good idea, and we should definitely have it under our belt.
Ambient occlusion is a technique used to simulate subtle shadows that occur between nearby objects. Basically, is a grayscale image that we can use as an extra layer in Editing Software such as Photoshop to enhance our final texture, to give it more depth.
I have divided this article into three parts:
- One thing to be aware of before exporting an FBX from a 3D software to Zbrush, if you are going to subdivide your model in Zbrush, before the baking ambient occlusion process.
- How to export-bake an ambient occlusion map from Zbrush (step by step)
- How to combine an ambient occlusion with a texture map in Adobe Photoshop.
You may find the following relevant topics interested:
- Render an ambient occlusion (Dirt) render pass in Maya – Vray
- How to bake Ambient Occlusion texture map in Maya – Vray
One thing to be aware of before exporting an ambient occlusion map from Zbrush:
The only thing to watch out for is that sometimes depending on our 3D model, we may have to make some adjustments to our 3D model before we export it as an FBX from a 3D software such as Autodesk Maya and send it to Zbrush. We need to do that, in order to get the best results in the final process of exporting an ambient occlusion map.
And the reason for that is the subdivision process in Zbrush.
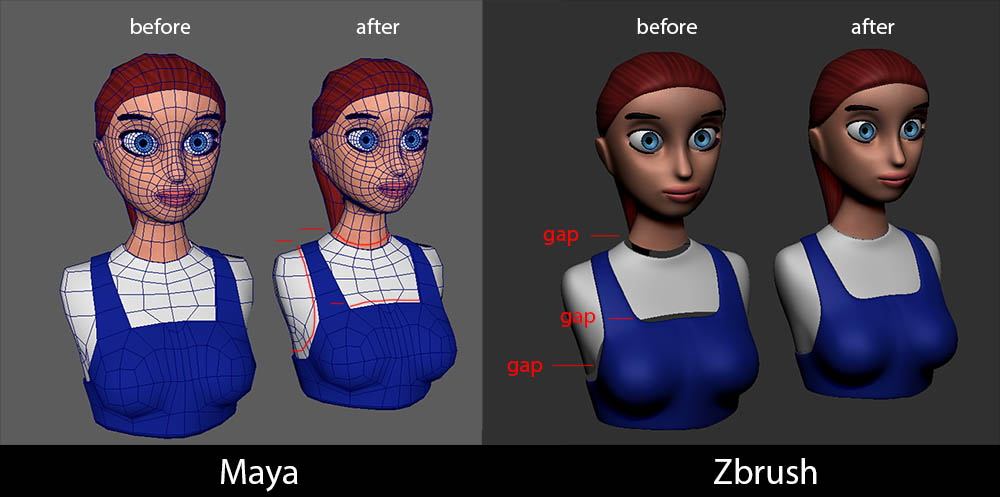
If you subdivide a low-poly 3D model inside Zbrush, depending on the topology of the model and the architecture of the mesh, it may subdivide by leaving a lot of gaps between the mesh. In order to solve that issue, we have to add some extra edge loops in the areas where we think the gaps will occur. And we should do that before we finally send it to Zbrush as an FBX file.
Before and after added extra edge loops in the areas where the gaps will occur.
We will be working on the following low-poly avatar, which is a part of a 3D avatar collection two separate products if you are interested in taking a look.

- nine VR female avatar characters model – Turbosquid
- 20 male-female VR character avatars – Turbosquid
- nine VR female avatar characters model – cgtrader
- 20 male-female VR character avatars – cgtrader
That being said, let’s just jump on the actual process of exporting an ambient occlusion texture map from Zbrush with the above 3D model. We will be working in Maya – Zbrush.
How to export an ambient occlusion texture from Zbrush:
Even though the process of exporting an ambient occlusion texture map from Zbrugh is pretty much a straightforward process there are several steps to follow. So let’s get to it.
Prepare your 3D model (Step 1):
Two things:
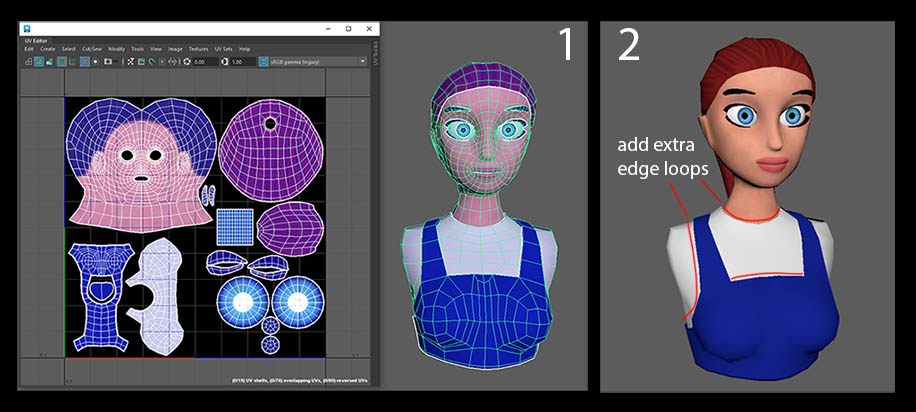
- Make sure your 3D model has proper UV mapping (not overlapping, all in the square 0-1, etc.) since ambient occlusion relies on UVs.
- Add extra edge loops in your models, in the areas that may leave gaps after subdividing your model in Zbrush. In order to do it properly, feel free to export your model as FBX in Zbrush and, quickly subdivide it in Zbrush, so you can see the areas that leave gaps. After that, go back to your 3D software put those extra edge loops where your model needs them, and final export to Zbrush.
Export your 3D model from Maya to Zbrush (Step 2):
Select your model and go to File – Export Selection. A new popup window appears. Choose the FBX file format, enter a name for your model, specify where the file will be saved, and click export selection.
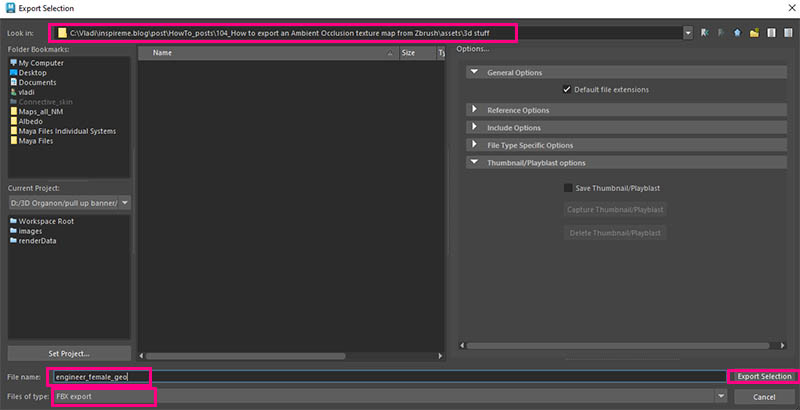
Note: There are a lot of FBX export options. Since it’s out of the scope of this article, feel free to take a close look at their official site for in-depth information about the subject.
Load your 3D model in Zbrush (Step 3):
Now we have checked our model has proper UVs and we have added extra edge loops where they may need it, also we have exported it as an FBX file format, it’s time to load our model to Zbrush.
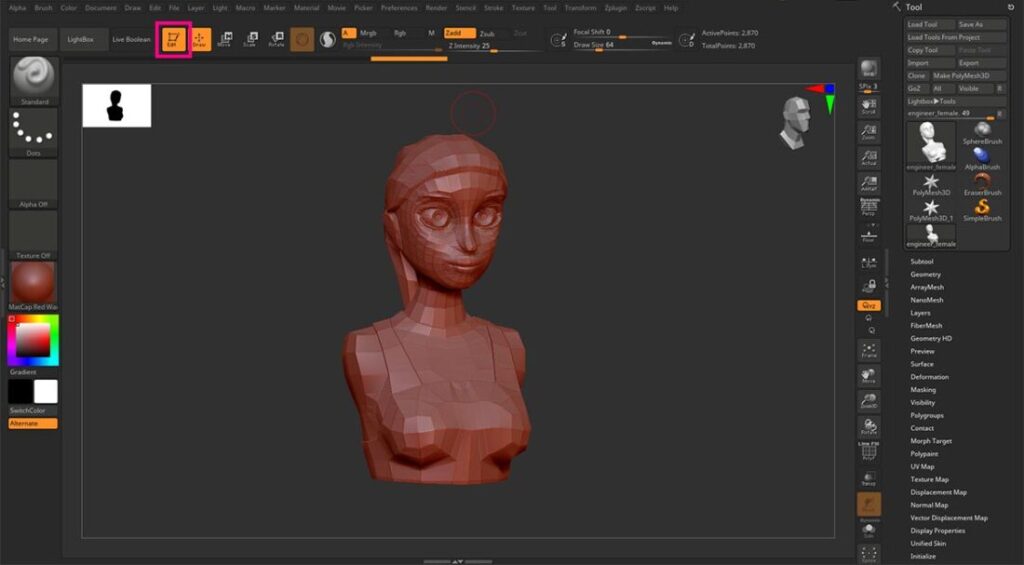
Open up Zbrush go to the Zbrush tool palette, and click on the import option. Find the location of the FBX file you want to import and click open.
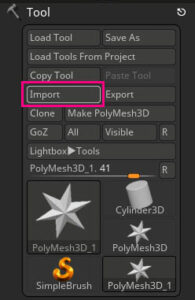
In the FBX import options popup windows, just click OK.
Now we have our model imported into Zbrush and it’s already selected as Ztool. In order to put it in Zbrush scene, just click and drag anywhere in the scene until you see your model. After that, press “T” shorcut of Edit. Now we can navigate to our model.
Subdivide your 3D model before ambient occlusion, if you need (Step 4):
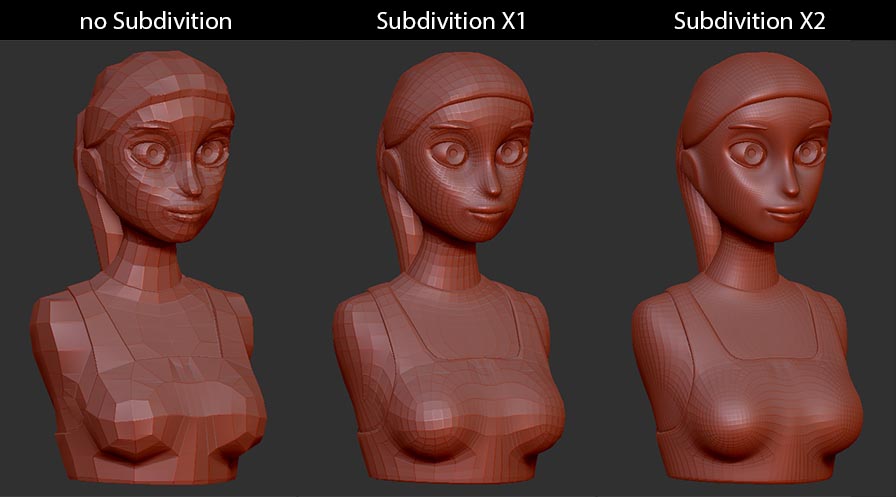
If we want better results for our ambient occlusion texture map, we have to subdivide our model a few times. Preferably about 2-3 times, is more than enough in most of the cases. Of course, it depends on the use case of your model. If you for example want your low-poly model to be part of a low-poly game. In that scenario is preferable to not subdivide at all and bake the ambient occlusion straight away.
But for our example let’s say we want to subdivide it a bit. Since we already put some extra edge loops for not leave a gap after the subdividing process.
To subdivide a geometry inside Zbrush, just press Ctrl + D. Each time you press them, you subdivide the model, one time. So if we want to subdivide it two times, we need to press Ctrl + D, two times.
Bake Ambient Occlusion in Zbrush, general settings (Step 5):
In Zbrush baking ambient occlusion is done by using a built-in plugin.
Go to the main bar of Zbrush and click on the ZPlugin – Multi Map Exporter. This is a pretty powerful tool for exporting various texture maps, including ambient occlusion. In this case, we want to bake an ambient occlusion map. So we want to click on the ambient occlusion option.

In this “general” tab, all the settings are common through all the texture maps we can create. like the size, the border, and the option of SubTools, if we want to check it. But since our model is in one piece, and does not consist of other meshes, we going to leave that option unchecked.
Bake Ambient Occlusion in Zbrush, actual settings (Step 6):
We can find the actual settings for the ambient occlusion or any other specific texture map a little below in the same palette, by pressing the texture map we are interested in. Generally, I leave those settings in tack, since they already produce great results most of the time. Feel free to experiment a little bit with those settings in order to produce the best possible results.
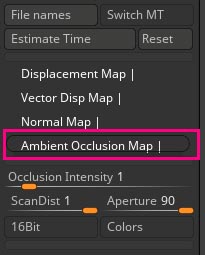
If you want to find out more about all those settings, you can just press ctrl and hover over the specific option with your mouse.
This applies to all options-settings in Zbrush, you can hover any given option by pressing ctrl and see more about the option-tool you are interested in.
Click the “Create All Maps” button. A new popup window appears, so we can give our new map a name, choose a file format, and specify its location. Zbrush will start working on your request and generate the ambient occlusion map for you.
The time of baking is basically depending on two paraments:
- if our model has been subdivided and how many times (if it’s not subdivided it will be much faster, if it is it will be slower)
- the capabilities of your machine. If you have a fast CPU your baking will be faster.
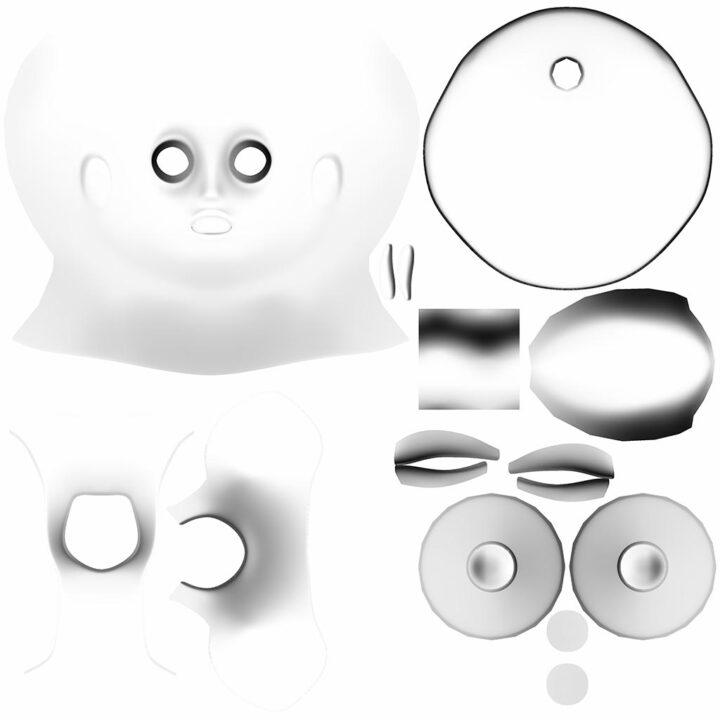
My ambient occlusion looks like this:
Combine the ambient occlusion with our color map in Photoshop:
Now we have successfully exported an ambient occlusion map from Zbrush, we probably want to combine it with our texture map, and the way to do that is through Editing software such as Adobe Photoshop
Steps:
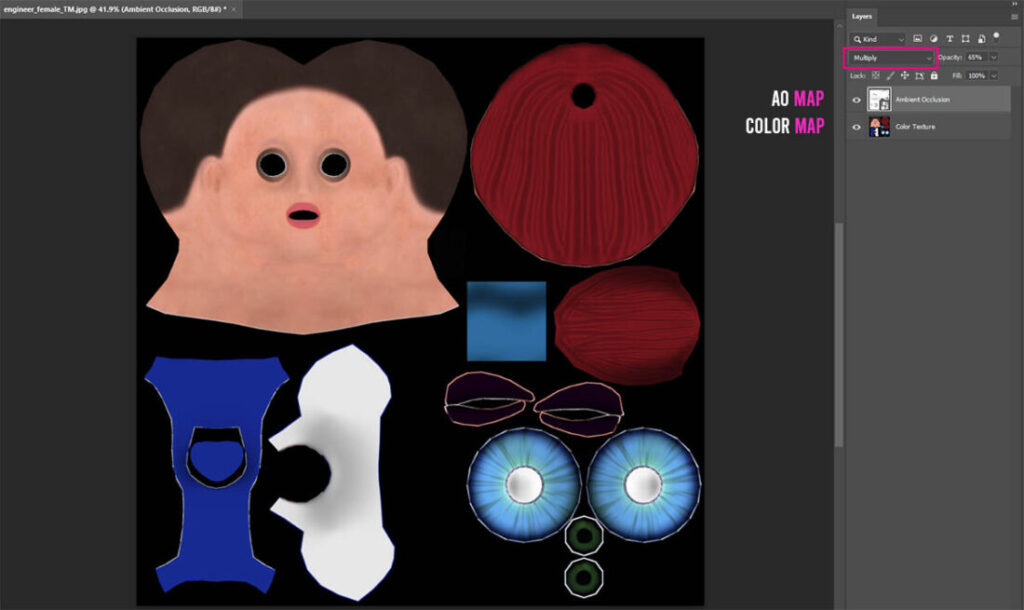
- Open up Photoshop with your color texture map
- Drag and drop your ambient occlusion map we just baked in Zbrush above the color texture
- Set the Blending Mode of your ambient occlusion map in Multiply mode
- Adjust the opacity of the ambient occlusion depending on your specific needs
- Export the new combined texture file as a new file
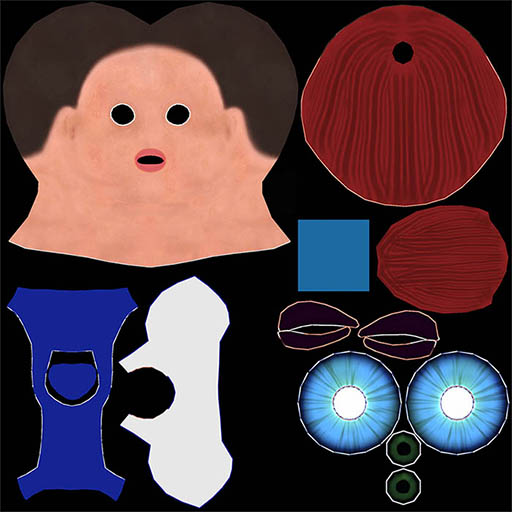
You can see the comparison between and after the ambient occlusion effect, in the image below:

Conclusion:
Even though this article may seem long, baking an ambient occlusion map in Zbrush is a pretty straightforward process, especially if you are doing it many times. Combining an ambient occlusion with your color texture map is a great way to add depth to your textures.
If you are dealing with game engines like Unity or Unreal, you can have an ambient occlusion map as a separate texture map and just connect it into the right parament of your material, and have full control over it.
Thanks for reading up and see you in the next article.


3 Responses