
Render an ambient occlusion pass in Maya and V-ray with a few simple steps. The ambient occlusion when using V-ray is called Dirt pass.
Ambient occlusion is a technique used to simulate subtle shadows that occur between nearby objects. Basically, is a grayscale image that we can use as a render pass in Editing Software to enhance our final image or video.
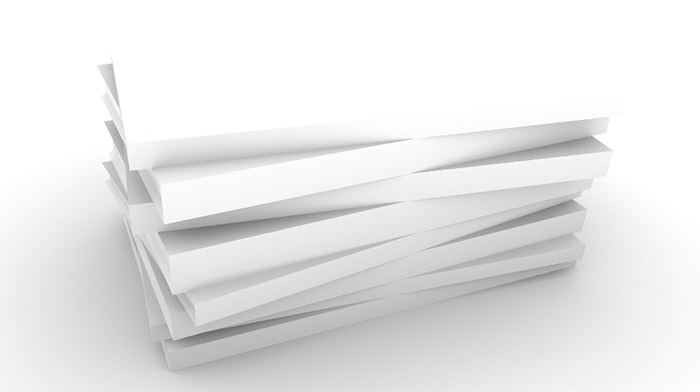
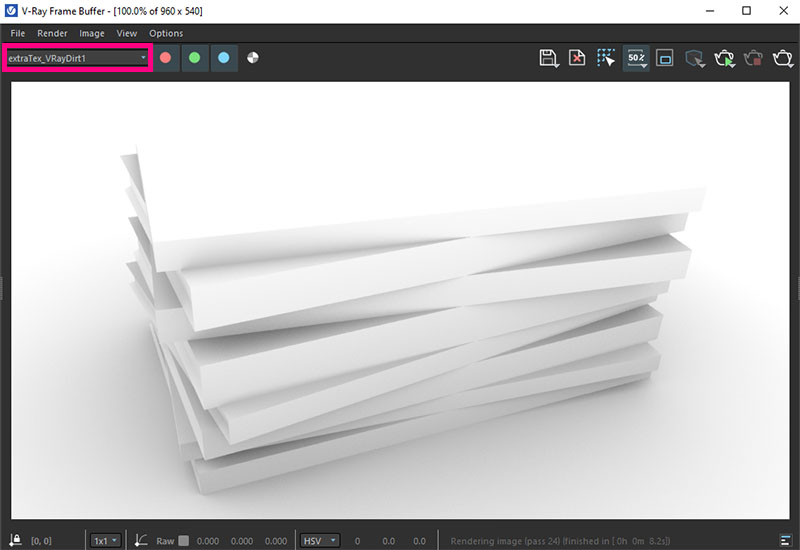
The image below is an ambient occlusion render pass from Maya-Vray. Actually is from the project we will be working on, to demonstrate the ambient occlusion technique.
It could definitely give some extra realism to our 3D scenes. By rendering an ambient occlusion pass, we have more control over the final output in Editing Software such as Photoshop. For example, we can lower or increase the opacity of our Ambient occlusion layer, we can change the blending mode, color, etc.
Note: If we deal with 3D animation instead of a single image, we can still render an ambient occlusion render pass. But instead of using Photoshop for the final composition, we need to use Video Editing software, such as After Effects.
In this article, we will find out, how we can render an ambient occlusion render pass in Maya with V-ray renderer. Additionally, we will make the final composition (with ambient occlusion pass) in Photoshop.
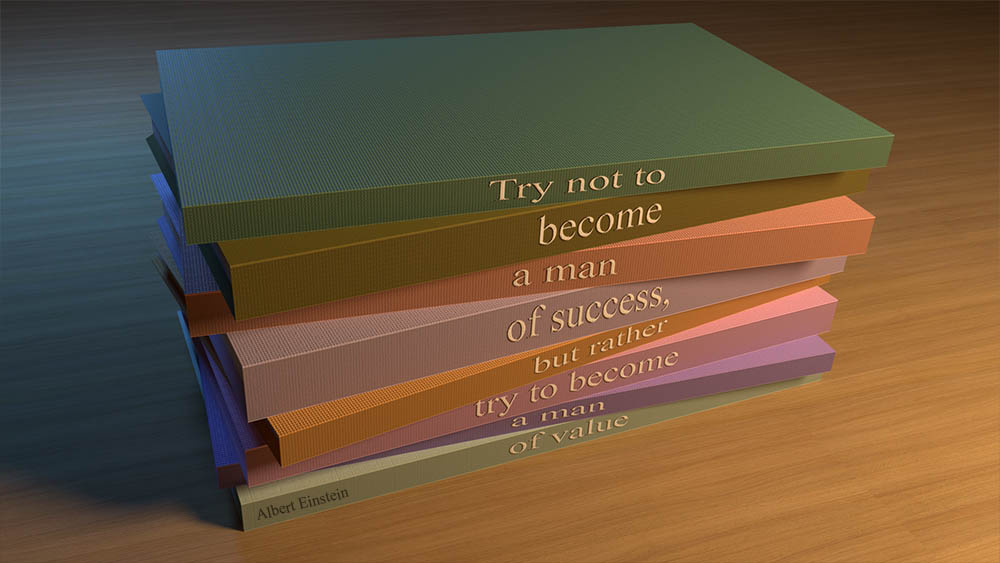
We can see the final result (with ambient occlusion pass) in the image below:
All steps:
- Prepare the scene for the V-ray renderer
- Add an ambient occlusion pass
- The setting of the VRay Dirt node
- Render an ambient occlusion in Maya
- Final composition in Photoshop
Relevant articles:
- Render a Z-depth render pass in Maya – Vray
- Export separate light render pass in Maya with V-Ray renderer
- How to bake Ambient Occlusion texture map in Maya – Vray
Prepare the scene for the V-ray renderer:
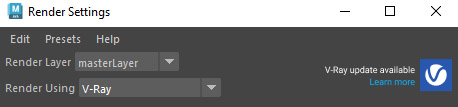
Before we add the ambient occlusion render pass in V-ray, we should probably change the Renderer in Maya to a V-ray renderer, from the Render Setting window.
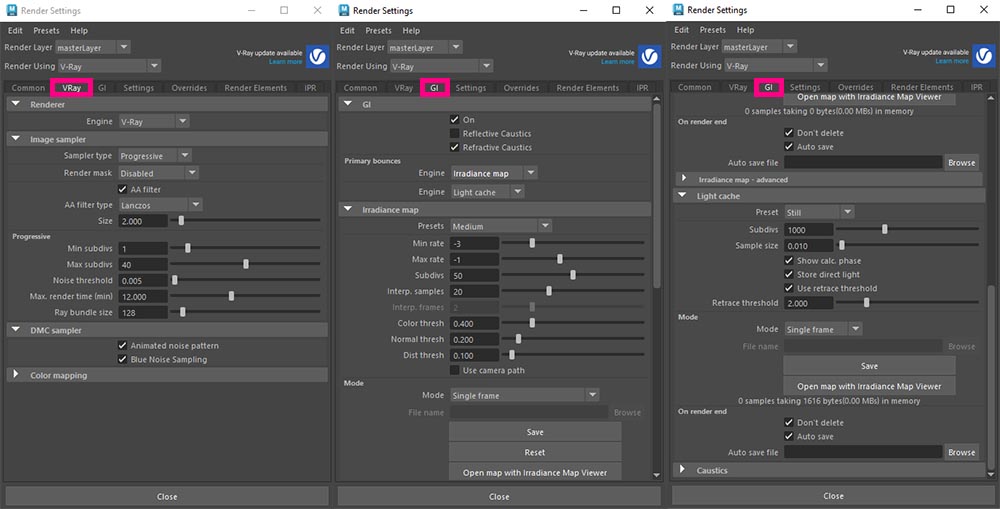
I am not going into details, about what the right V-ray settings are, since every scene is different, and something that would work for me, could not work for your scene. To give you and idea, the setting I used is below:
If you are not familiar with the V-ray renderer inside Maya, feel free to take a look at their official documentation for that matter.
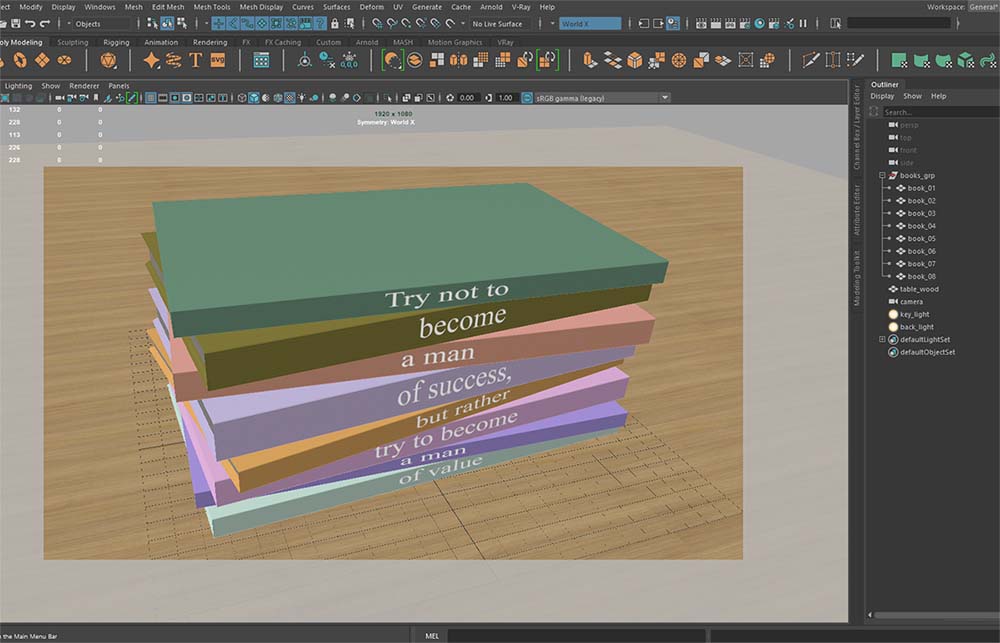
We will be working on the following scene:
Add an ambient occlusion pass:
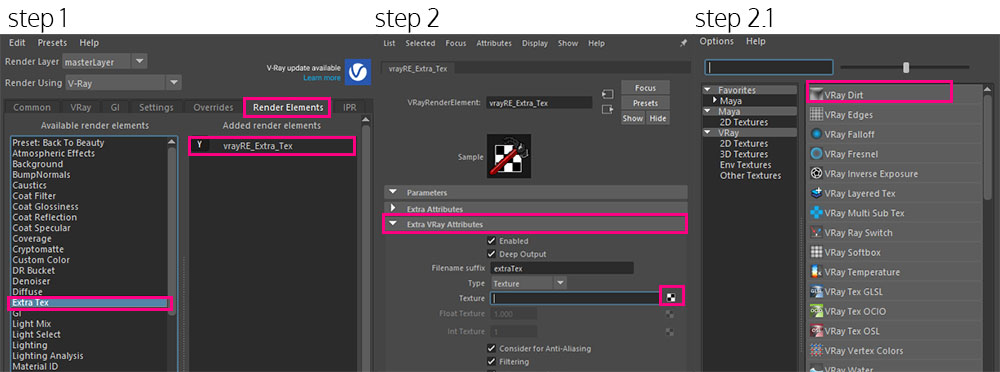
Adding an ambient occlusion render pass is a two-step process. First, we add the render element itself (Extra Tex) and then connect it with the right node (VRay Dirt).
- To add an ambient occlusion render pass go to the Render Elements section in the Render Settings window. In the Availabe render elements (left column) locate the Extra Tex node and click on it. After that, it will appear in the right column.
- Select that new vrayRE_Extra_Tex node and open up the Attribute Editor. Go to Extra VRay Attributes section and expand it. In the Texture option, click on the little checkerboard on the right. The Create Render Node window appears. Locate and select the VRay Dirt node.
The setting of the VRay Dirt node:
Now we have selected the VRay Dirt node, and since the Attribute Editor is open, change some settings, such as Radius and Subdivs.
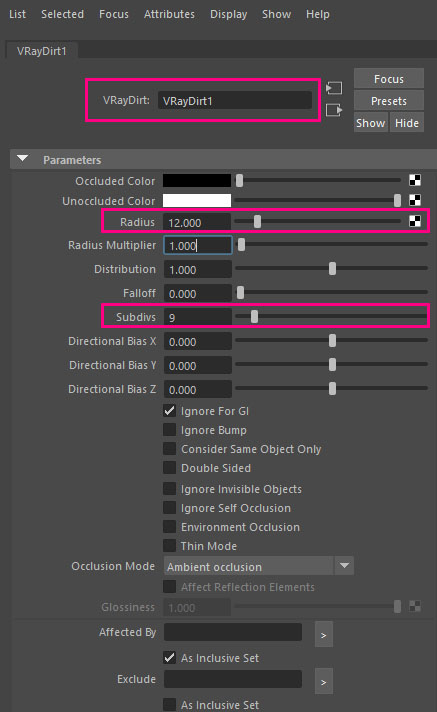
The most important settings are Radius and Subdivision. But since this node has a lot of features to play with, feel free to take a look here, for more information, about that node in general.
Note: We can have access to the VRay Dirt node, from two places. From Shadergraph – Textures tab, and from Render Elements window.
Render an ambient occlusion in Maya:
Now we have set our ambient occlusion, let’s get a quick render through the Vray frame buffer, in order to verify if everything is ok.
Note: In order to see the ambient occlusion render pass, we have to switch from the upper left corner (dropdown) to the correct render pass, in this case, to the “extraTex_VRayDirt1”
If we are not happy, with the results of ambient occlusion we are getting, we can play with the VRay Dirt settings. In my case, I am quite happy with these results, so I call it a day.
Final Render:
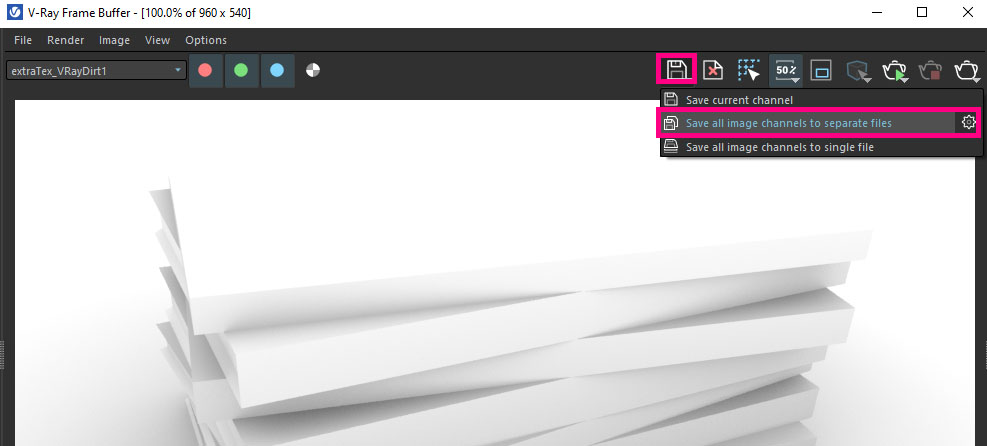
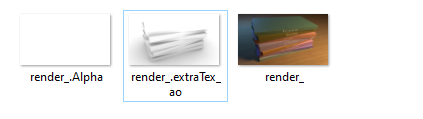
So after we render our scene with the V-Ray frame buffer, go to the save icon and press hold, and choose the Save all images channels to separate files. Select the destination of the folder, in which the files will be saved, give it a name, and we are done. After that, Maya will automatically save all render passes in that folder, for later use in Photoshop, in our case.
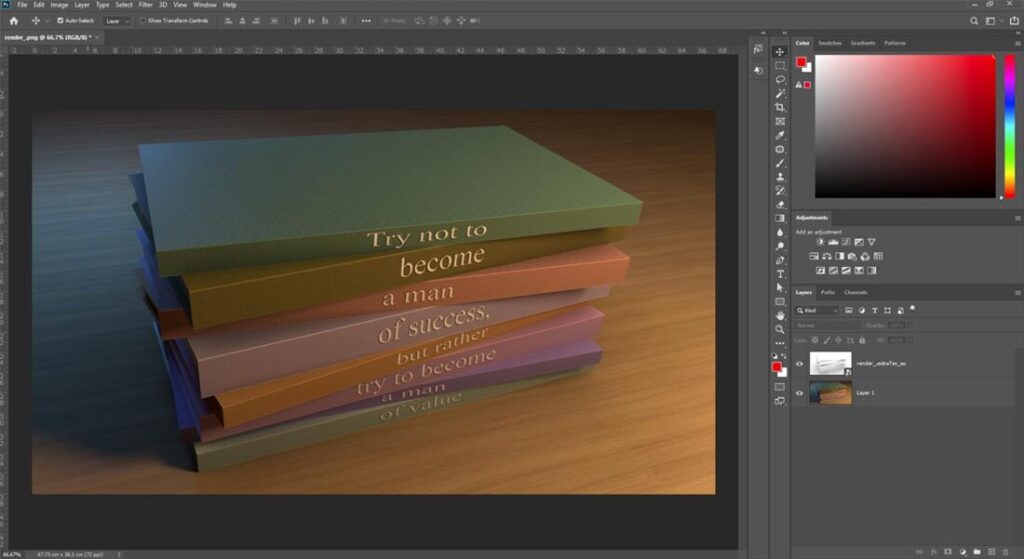
Final composition in Photoshop:
Open up Photoshop and drag and drop the render image (master). Also, drag and drop the ambient occlusion render pass, above the master layer. Lastly set the ambient occlusion (the above layer) to multiply blending mode.
If for any reason your ambient occlusion is strong, feel free to lower the opacity of that layer, in order to minimize the effect. On the other hand, if your effect is not strong enough, you could duplicate your ambient occlusion layer, as many times as you need, in order to get the result you expect.
Here is a comparison of ambient occlusion and without:


5 Responses
Having read your blog, you obviously know what you are talking about. I’m sure visiting my page UQ9 about Airport Transfer will be worth your time!