With smart objects in Photoshop, you can do a lot of things, like working with vector graphics, making nondestructive transforms, and adding filtering quicker, are few of them. Smart objects in Photoshop can be extremely helpful in your workflow.
When you download a mockup for Photoshop, 99% of the creators are using smart objects to create them. And in order to use a mockup in the right way, you must have at least a basic knowledge of the topic. No wonder why is so important to understand the smart object concept.
This article is broken down into two pieces:
- What is a smart object, and what we can do with them
- A practical example of creating a mockup with a smart object from scratch
What a smart object is in Photoshop:
Smart Objects are layers that contain image data from raster or vector images, such as Photoshop or Illustrator files. Smart Objects preserve an image’s source content with all its original characteristics, enabling you to perform nondestructive editing to the layer.
Adobe Official
In simple words, a smart object is just a layer, and if you double-click on it (in the thumbnail area), it will open another Photoshop document, that it keeps separate from your main document, which is linked back to your main document. Any changes you made in a document that is a smart object, the changes are reflected in the main document, after you save the smart object document.
if the concept behind smart objects it’s not really clear at that point don’t worry. Everything will be much easier to understand with the practical part of this article.
Note: In a smart object document besides images, you can have all sorts of graphics such as text, vector files, etc.
A smart object in Photoshop has an icon in the right-down corner of the layer thumbnail, which is used as an indicator to recognize them.
What you can do with a smart object (benefits):
Some of the benefits that a smart object brings:
- Apply transforms (rotate, scale, distort, etc) in a local way. You can make all those adjustments with transforms tools without affecting the original image (inside your smart object)
- Working with vector files. In that way, using smart objects, Photoshop doesn’t rasterize them.
- Appling quick filtering. You can adjust filters to Smart Objects at any time.
- Edit one Smart Object and automatically update all its linked instances.
You can read more about smart objects in general from the official Adobe site, for that matter.
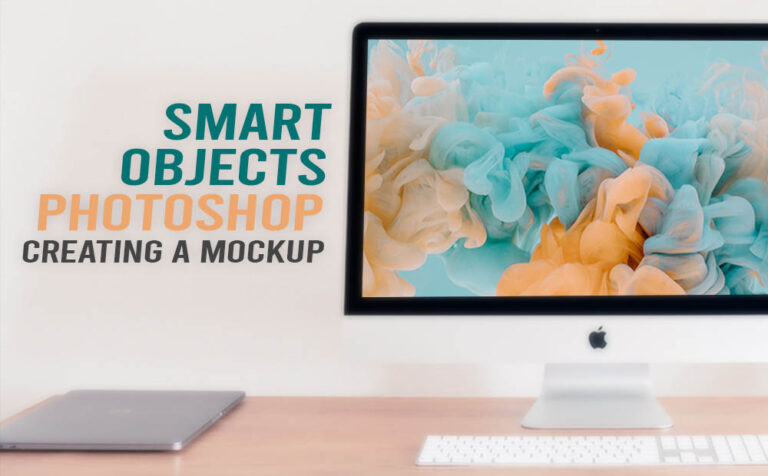
Creating a Mockup with a smart object – The process:
In order to better understand the concept behind smart objects, so next time you can be comfortable using them in your workflow, we are going to create a simple mockup. A simple wallpaper mockup on i Mac computer.
What we are trying to create, is a Photoshop file that could give us a smart way to change the wallpaper on the iMac computer easily, every time we feel like it. And the best way to do that is through a smart object in Photoshop.
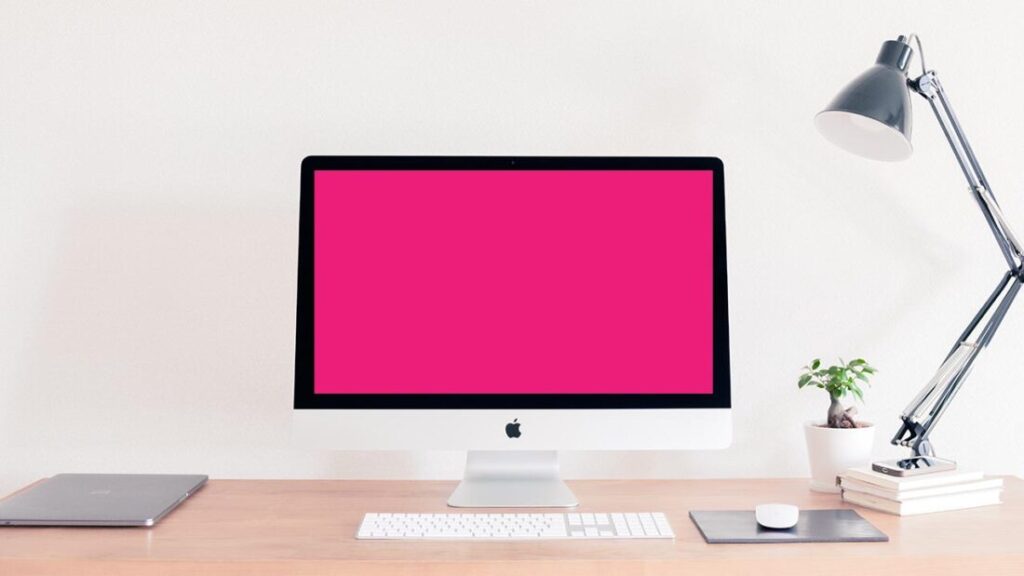
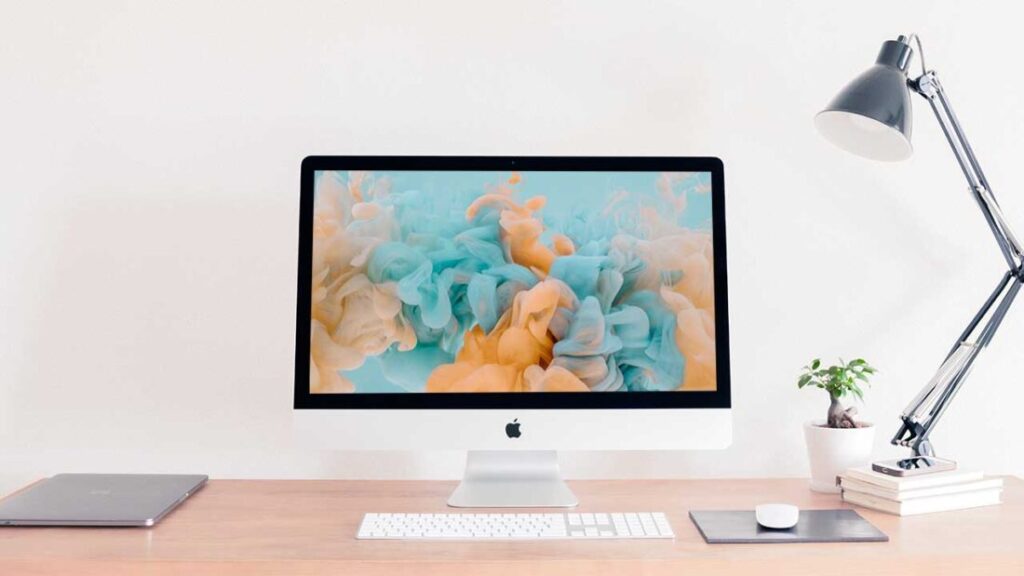
We will be working on the following picture, by Sora Sagano at Unsplash.

For this practical mockup example, we only need one smart object, which will cover the screen area of the iMac computer, so we can alter the wallpaper with ease.
Create the shape (Step 1):
Grab the rectangle tool in Photoshop and create a rectangle shape that will cover the screen of the iMac, in a way that won’t overlap with the bezels of the iMac monitor. Use only the fill color of your choice, not a stroke. Like the image below:
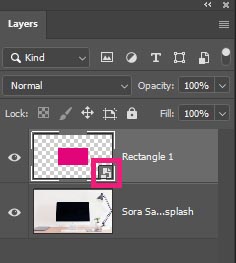
Convert the shape (Step 2):
Go to the main bar in Photoshop – Leyer – Smart Objects – Convert to smart object. In that way our shape layer has been converted into a smart object, as you can clearly see in the layer stack panel.
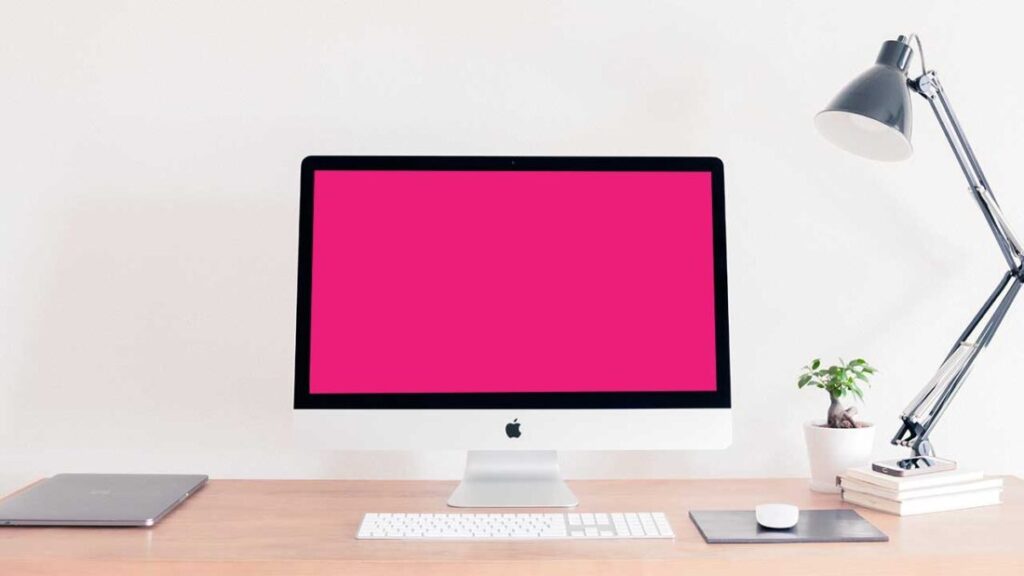
Better transform (Step 3):
Better transform our smart object layer so it can fit-cover perfectly the screen area. In order to do that, go to Edit – Transform and use any combination of tools you need to accomplish it. Now our smart object perfectly covers the screen area:
Import data (Step 4):
Double-click on the smart object layer (in the thumbnail section). Another Photoshop document will open with just the original rectangle shape we created. In this document, we can add-import our new wallpaper, and after we save the document, it will reflect in our main document.
My results are here:
Now we have our wallpaper mockup finished, if we want to change the wallpaper, we just need to open the smart object layer on its own document and replace the file with a new one. After we save the change it will appear in the main document, as we expected.
Conclution:
Smart objects is a powerful and dynamic workflow inside Photoshop. We set it up once, and after that, wherever we want to change something we can do it by changing the smart object source file.
In summary, the steps are:
- create the shape of a smart object
- convert the shape to a smart object
- better transform the smart object to fit perfectly the area you want to cover
- import data to the smart object and save it
our practical mockup example, we used only one smart object. In a more complex mockup, we can use as many smart objects as we want.
Lastly, don’t forget. Instead of using a simple image inside a smart object, we can use all sorts of others graphics such as vectors, text, etc.

2 Responses