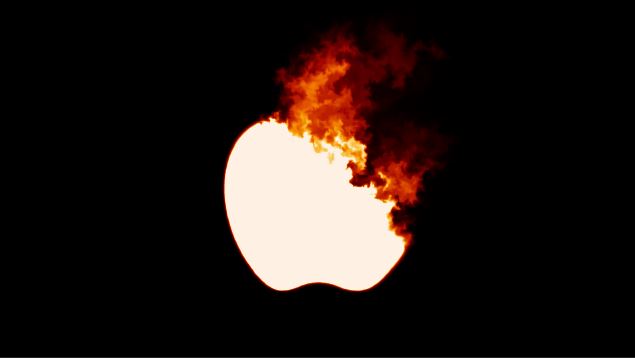
Smoke fire intro logo animation with the powerful fluids system in Maya and After Effects is something worth watching – reading. Fluids in Maya has so many potentials. One of them is to create a dynamic smoke effect and with the help of After Effects you could get the final look (fire) like below:
Note: You could also reverse your video to look like reveal fire intro logo, isn’t it that cool!
You may also want to take a look at “HOW TO CREATE PARTICLE DISINTEGRATION INTRO LOGO ANIMATION EFFECT INSIDE MAYA”
This article is separated in two sections:
- create the smoke effect in Maya
- create the fire effect in After Effects
Let’s start with the first one.
Table of Contents
ToggleWhat we will be learning for smoke effect with fluids in Maya:
- create the fluid version of our smoke intro logo
- play with the settings of our fluid
- set initial stage
- add a dynamic field
- animate dynamic field
- cache fluid
- rendering fluid
- create the fire style in After Effect
I am going to use the apple logo for this particular project. Of course, you can use your own or the logo of the corporation you work for.
Note: Every time you are dealing with dynamics in Maya you have to set the playback speed to Play every frame, free, or Play every frame, Max Real-time.

Create the fluid version of our smoke effect with fluids in Maya:
Let’s jump to create our smoke effect in Maya. Create a new brand scene in Maya to work on.
2D container:
Switch to (FX) module and go to “fluids – 2D container (square icon)”. A pop-up window appears. Go to edit – reset settings, to start fresh. Leave everything as default, but make sure the add emitter is unchecked. You want to use a surface to emit fluid in our scene, that’s why you uncheck the “add emitter” function.
Surface:
Create a plane geometry by going “create – polygon primitives – plane“. In the channel box for width and height set it to 10. Subdivisions don’t really matter, so for the purpose of a lite scene just leave it to 1 for both width and height. Rotate the plane geometry 90 degrees in the “X” axis. At this point, you have covered the fluid container with the plane geometry. Great.
Emit from object:
Select the plane and the fluid note in the outliner or in the viewport and go to “Fluids – add/edit contents – emit from object (square icon)“. A pop-up window appears. Reset settings, and make sure the emitter type is set to “surface”. Click apply and close.
Note: It’s probably a good idea to hide the plane geometry from the viewport for visual purposes. As right now is in the middle of our scene. Select it from the outliner and press “H”.
If you play the animation you could see that fluid is emitted evenly. We actually want to emit in a very specific way. Our logo way, right!
In order to do that, you have to create a connecting link between a texture file (our logo) and the fluid emitter.
Actual fluid logo version:
Open up hypershade by going “windows – rendering editors – hypershade” Go to create section and type file. Press the file note and after selection go to the Attribute Editor to locate your logo file by pressing the yellow folder icon. Ok great.
While you have opened the hypershade with the file note of your logo is ready, select the fluid emitter by going to outliner and expanding the plane geometry. Open up the attribute editor once again and expand the fluid attributes section.
Connection of the file and fluid emitter: Just drag from the hypershade the file note with a mid-click and release it into density emission map section of the fluid attributes.
If you play the animation you will see this time the fluid emits in the shape of our logo.
Play with settings of our fluid effects:
The first thing we have to do is crank up the resolution of our fluids.
So, select the fluid note and go to the Attribute Editor. In the first section “container properties” there is a “base resolution” slider. Set to 250.
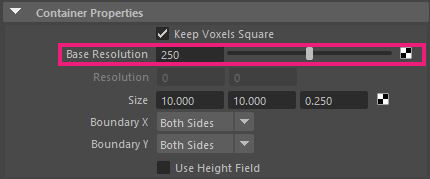
The playback is slower this time, but the resolution of the fluid is much higher.
Also, we don’t want at this point our fluid to be influenced by any force like gravity. Because it will distort the look of our logo.
To eliminate any gravity go to “Dynamic simulation” section for the fluid note in the Attribute Editor and zero out the gravity slider.

One last thing to do is to give more thickness to our fluid. So, go to the fluid emitter, and under “fluid attributes” set the “Density” slider to 2.

Set initial stage for smoke effect with fluids in Maya:
Every time you play the animation it always starts with no fluid and then fills out.
We want to set an initial stage in our fluid system for the effect we are trying to achieve.
Play the animation, from the start and around 150 frames stop the animation. Select the fluid container and go to “Fields/Solvers – Initial Stage – set initial stage (fluids)“.
Now, if you play the animation the first frame will be the last one you stop the animation previously, every time. Unless you clear the initial stage.
You may also select the emitter and zero out the “Rate” because we don’t want our fluid to emit anymore.
Add a dynamic field:
At this stage, everything is pretty much static in our scene. Our logo is fully appearing in our scene with nothing moving on.
So, in order to give it some motion, you have to connect it with some dynamic field.
Before we do that, just expand your timeline to 300 frames to give our fluid some room to grow.
Select the fluid note and go to (FX)module, Fields/solvers – turbulence.
The turbulence note has been created in the center of our scene. Move it to the upper right corner like the image below.
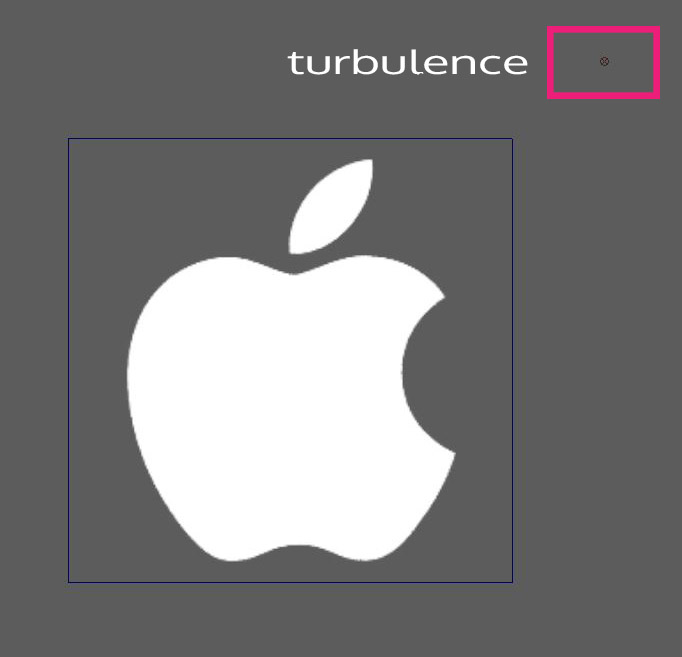
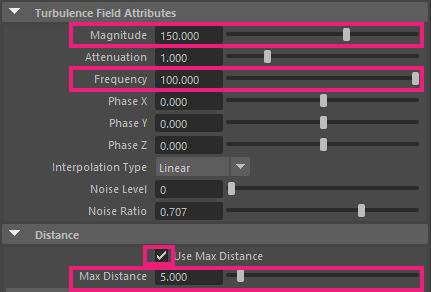
Also, alter some settings on it. Go to the Attribute Editor for the turbulence note and look for the “turbulence field attributes” section. Set the magnitude to 150, and frequency to 100. Also, go to “distance” section and check the use max distance box, and set the max distance to 5.
Animate dynamic field:
At this point, because the turbulence field is far away is not effect the fluid system at all. The max distance we set determines it. So we will set a few keyframes.
Select the turbulence note once again and open up the Channel Box. In frame 1 select all three translates (x,y,z) right-click, and choose click selected. Then, move the turbulence note to the left and down and set another key like we did previously.
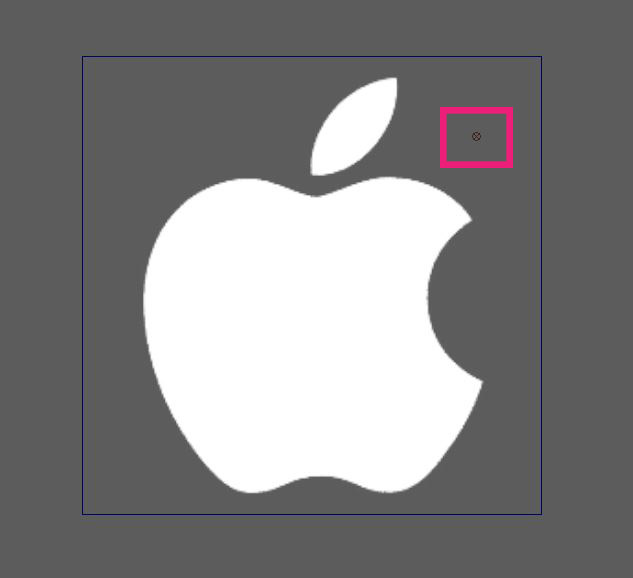
If you play the animation at frame 250 you will have something like the image below:
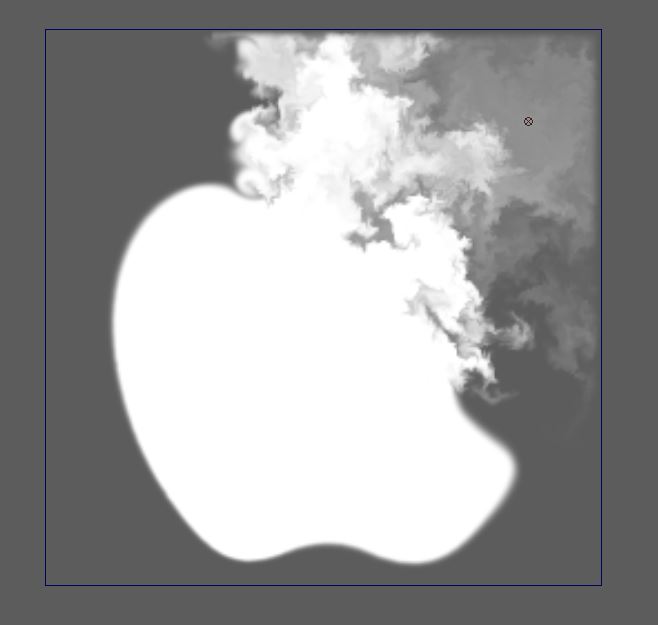
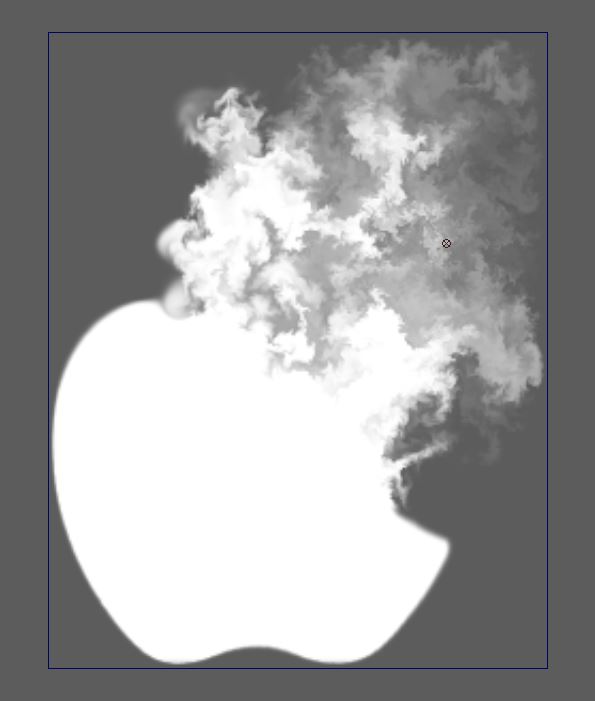
It’s great but, as you can see the fluid container restricted our fluid. In order to fix it, select the fluid and open up the Attribute Editor. Look for “auto-resize” section and expand it, and check “auto-resize”
Cache fluid for smoke effect with fluids in Maya:
If you scrub and not play your animation at this point you will realize something strange happen in the viewport. Every time you have to deal with dynamics in Maya it’s always the same. It’s normal, to be honest. Maya can’t show the results of the dynamic animation if you don’t play the whole animation and instead jump from one frame to another. The solution is cache.
What is a cache:
Basically, a cache is a process of writing in an external file the fluid simulation at each frame.
It’s always a good idea to cache our fluids before we decide to go for the final render.
So, it’s time to create a cache file for our fluid.
Select the fluid and go to (FX) module, “nCache – create new cache – maya fluid (square box)
A new pop-up window appears with a bunch of options. In my case I chose the following options:
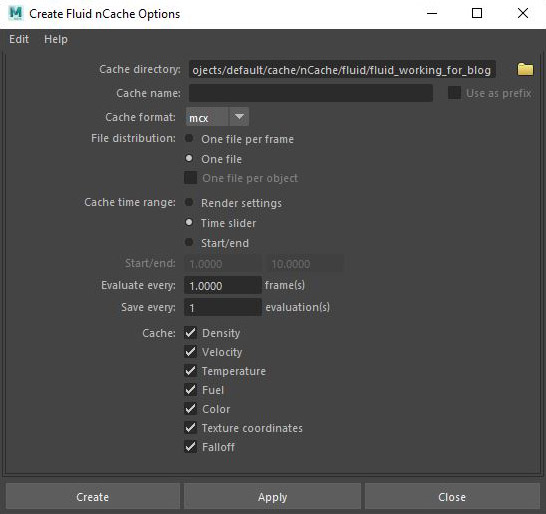
Basically, you select the destination folder for your new cache file and the time range for your animation.
Rendering the smoke effect with fluids in Maya:
All right, we have made the smoke version of our logo. Now it’s time to export it (render). We are going to use Maya software. For this particular project is more than enough.
But before we do that, just create a real quick camera, in order to render through that camera.
So, go (Rendering) module, “Render – Render settings“. In the common tab choose Maya Software for render use. In the image format under file, output choose PNG format. Also, choose name#.ext for the frame/animation ext:. Set the frame range to 1 – 300. Choose the camera you created for the renderable camera. Lastly, set the resolution for your final render. I set mine at 1280×720 (HD).

Feel free to go to Maya software tab and make some other changes for a quality purposes this time.
Close the Render Settings and go to “Render – Batch render, to start your rendering process. It will take some time before it’s actually starting to render the scene.
Give yourself a break, grab a snack or something. It’s going to take some time in order Maya to finish the whole rendering process, although Maya Software is a pretty fast renderer.
Note: If you haven’t set a project from the beginning of this post, the output of your animation will be restored probably on “yourPC/documents/maya /projects/default/images”.
Since we have finished our first section, let’s jamb to the second one, creating the fire look for our intro logo animation.
Create the fire intro logo style in After Effect:
We have created the smoke animation with fluids in Maya. Now the final step, right!
At this point, the whole animation of our logo is looking more like smoke and not fire. We are going to give the fire look inside After Effects pretty easily.
Open up After Effects and import the image sequence of your logo. To do that, go to File – import – file. Locate the images you rendered with Maya. As I said is usually in: yourPC/documents/maya /projects/default/images. Select the first frame and make sure PNG sequence is checked.
You have successfully imported the image sequence of your logo into the After Effects project panel. Right-click on the file and choose New comp from selection.
After playing my animation I have something like this:
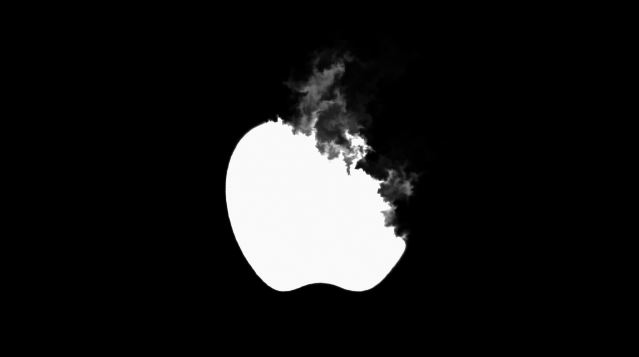
It’s time to give it the feeling of fire. Select the layer of our logo and type in effects & presets “colorama“. Double-click on the Colorama effects while you have still selected the layer to apply the effect.
Go to effect control and expand the Colorama effect. Expand the output cycle and choose the fire preset from the “use preset palette”
Conclusion:
That’s it, you made it. Wasn’t hard right!
The steps we made:
- create the smoke animation with fluids in Maya
- added the fire effect inside After Effects
You could also reverse your layer to look like reveal fire intro logo, if you wish to.
One last thing, if you are into fluids in Maya you should check out the official page for fluids in Maya, to learn more about the ins and outs of this powerful engine.
Hope you guys grab something new out of it. See you next time 🙂


One Response