Import Illustrator files into Maya with ease, with the built-in Adobe Illustrator object tool in Maya. The tool provides you an easy integration between those two pieces of software.
What the Adobe Illustrator object tool in Maya does, is basically take the curves vector path from the Illustrator files and convert them into recognizable curves nodes inside Maya. In simple words, is reading curves from one software (Illustrator) to the other (Maya).
In order for this to work, it’s absolutely necessary that you save your Illustrator file to save it as Illustrator 8 version.
If you save your file in an early version of Illustrator, when you import the file into Maya it won’t work. Also, a good practice is to have a backup Illustrator file in an early version, in case after you save to an older version such as Illustrator 8, you don’t lose some functionalities your file may have.
Use of import Illustrator files into Maya:
- creation of logo
- maze-labyrinth
- wall-floor patterns
Note: I am sure, there are a lot more concepts you can benefit from using the import Adobe Illustrator file into Maya.
Table of Contents
ToggleCreation of logo:
Let’s say you have a logo in 2D format, a classic logo right. And you want to recreate the same logo except this time to be in 3D. Instead of recreating your 3D logo from scratch in 3D software (Maya), you can import your original 2D logo from Adobe Illustrator into Maya, and work from there. Depending on the complexity of your logo, this approach could save you a lot of time.
I have written a whole article about how to Convert a 2D logo into 3D with Autodesk Maya.
Since I have written the above article and explained the whole process in detail, there is no need for further explanation here. Although to have a small taste of the process, it goes like this.
You import your 2D logo into Maya as curves. Then you convert those curves to surfaces. And lastly, you convert those new surfaces to polygonal geometry. After all those modeling processes you may want to apply materials and lighting in your scene so it can be ready for rendering.
Maze-labyrinth:
I don’t know about you, but I love any kind of labyrinth. If you have a design of a labyrinth or you have downloaded one of these from the web in a vector format, you can import it through Adobe Illustrator object tool in Maya.
Give it some 3rd dimension in Maya, send it to a game engine like Unity, put a 3rd person controller, and boom, you have a very simple game you can play, or send to your friends and brag about :). Although, we will be covering only the modeling part in this article. We could cover the second part, the one by sending it to Unity in a future post.
In this example, we have this labyrinth in Adobe Illustrator.
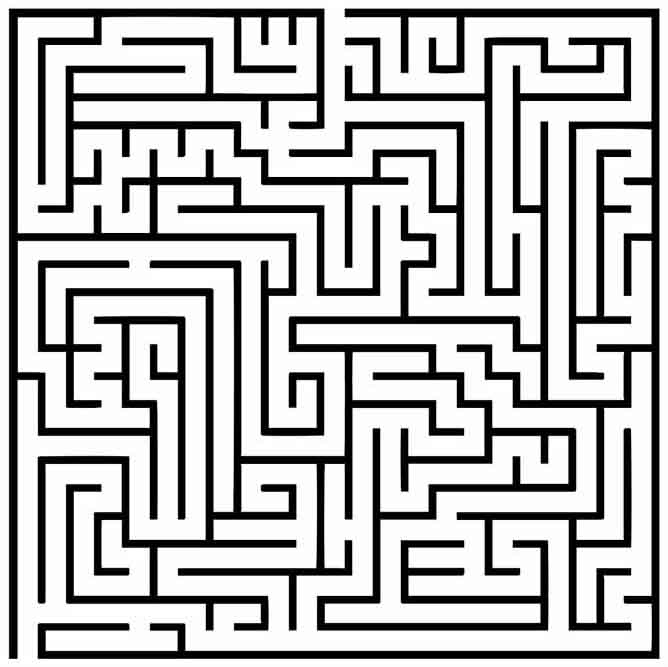
As we already said, we have to save our maze vector Illustrator file to Illustrator 8 version in order for this to work. So do that, and let’s just to Maya.
Go to Create – Adobe Illustrator Object (option box). Select the type: Curves, and locate the maze file you just saved as Illustrator 8 version. Make some rotation at 90 degrees if it’s necessary on the top node (IllustratorCurves1), like I did, at Rotate X-axis.
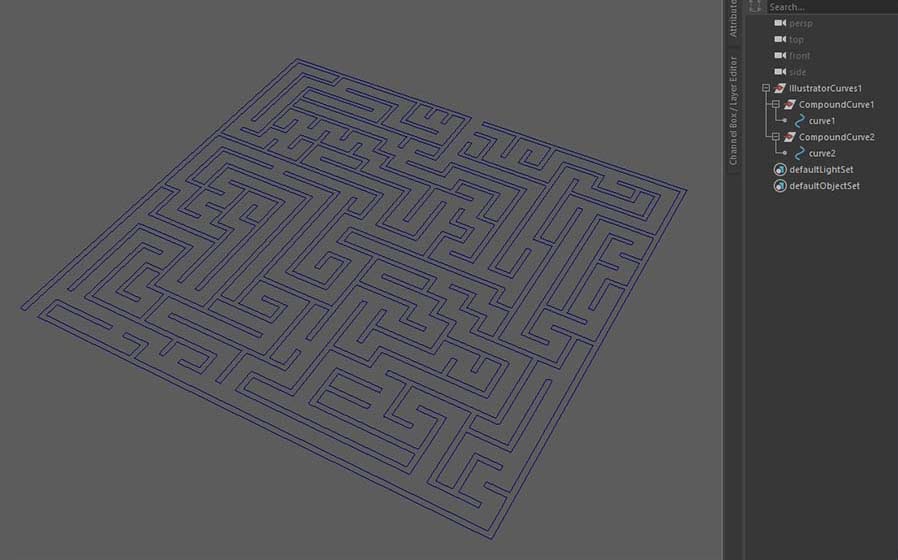
As you can see, we have two pieces of curves in our scene.
Modeling part:
- Convert to surfaces (NURBS)
- converting to polygons
Convert to surfaces (NURBS):
Select both curves either from the viewport of Maya or from the outliner and go to surfaces – Planar. Our cures have been converted into surfaces. Rename the new surface to something like a maze. Feel free to delete all the old curve nodes.
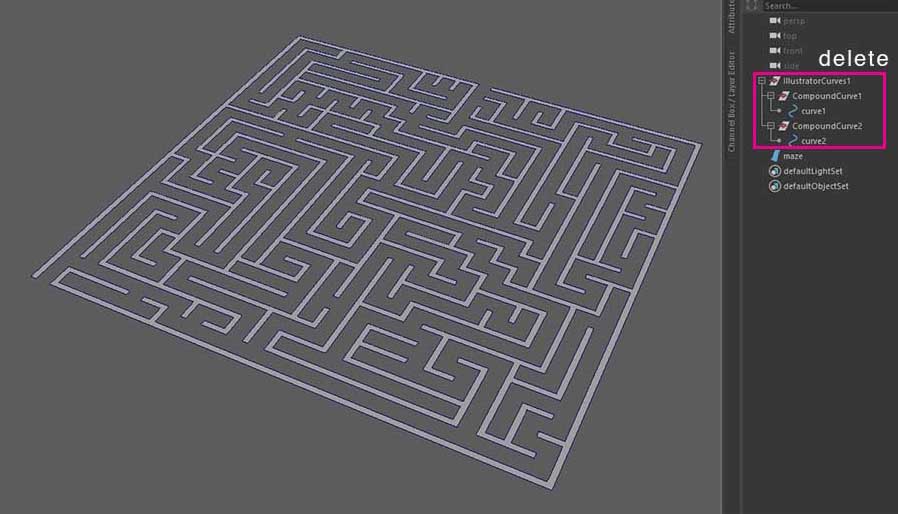
Converting to polygons:
Now it’s time to convert the maze surface to polygon geometry. Select the maze surfaces and go to Modify – convert – NURBS to polygons (square option box). Chose the settings that make the most sense depending on your needs of the heavy scene, etc. You can see my settings for converting to polygon geometry in the image below. Rename your new polygon geometry to “maze”. Feel free to delete the maze surface geometry and only leave the polygonal geometry in your scene.
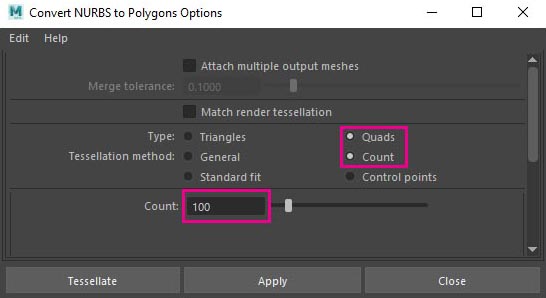
The last thing is to give our maze a 3rd dimension.
So, select the maze geometry, and go to Edit Mesh – Extrude. Give it some height with the local translate Z attribute that you can see as a small popup window in Maya viewport, or by pulling the blue axis upward. Go to object mode and you are done.
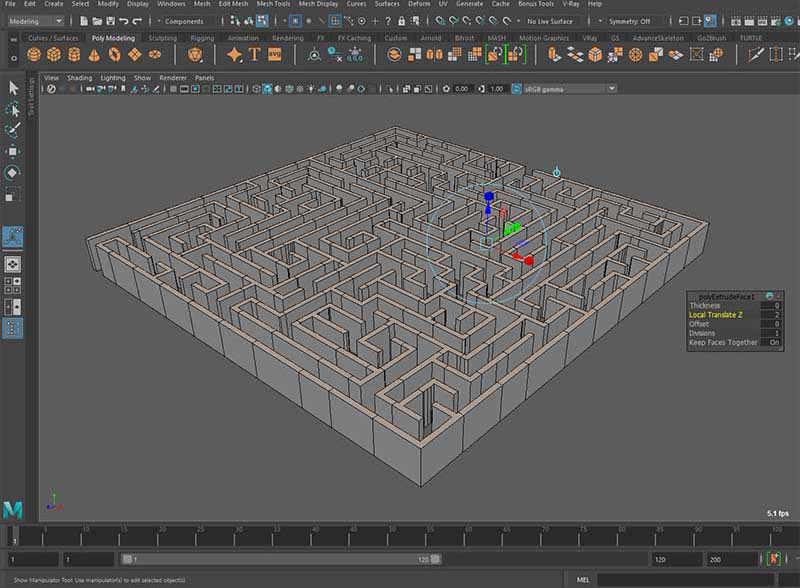
We have accomplished creating a 3D polygonal geometry of a maze that we didn’t actually model, so we can paint, add materials, and much more to it. Pretty cool, right!
Wall-floor patterns:
You can design in Adobe Illustrator very simple or very complex patterns to decorate your walls or floors and of course, bring that file into Maya.
We will be working on this vector pattern graphic, which is pretty simple, and let’s assume a very cool design for full wall decoration.
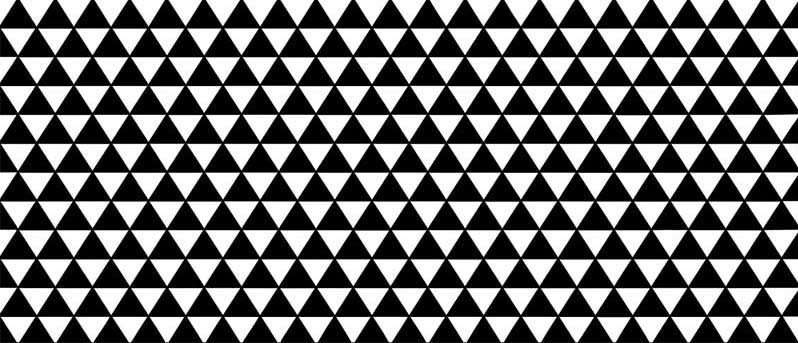
As always save your artwork inside Illustrator in Illustrator 8 version. And open up Maya.
The steps are identical as we went through with the maze example.
First of all, just import your Illustrator file into Maya. Go to Create – Adobe Illustrator Object (option box). Select the type: Curves, and locate the wall pattern file you just saved as Illustrator 8 version.
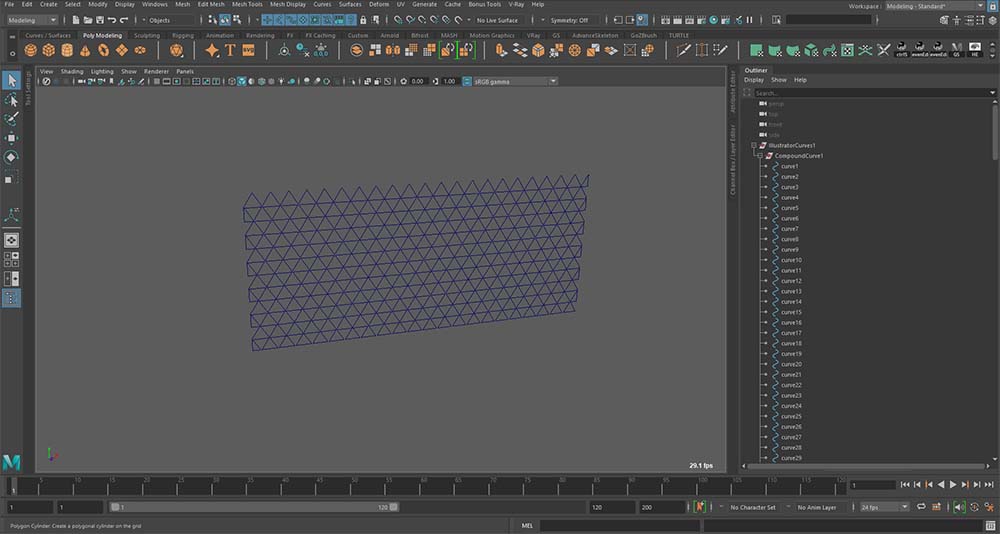
In this case, we have a bunch of curves inside Maya. In my case, it be exactly 206 curves. But no worries is exactly the same approach we did with the maze.
- Convert all curves to surfaces (NURBS)
- converting to polygon geometry
Convert all curves to surfaces:
Select all curves in Maya viewport and go to Surfaces – Planar. Our cures have been converted into a single surface. Rename the new surface to something like a wall pattern. Feel free to delete all the old curve nodes.
Converting to polygon geometry:
Select the wall pattern surfaces and go to Modify – convert – NURBS to polygons (square option box). Chose the same settings we did for the maze project and you are good to go. Rename your new polygon geometry to “wall pattern”. Feel free to delete the wall pattern surface geometry and only leave the polygonal geometry in your scene.
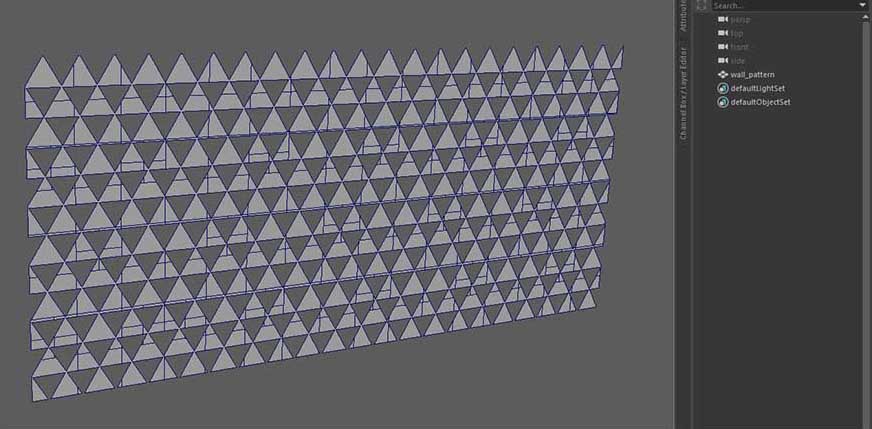
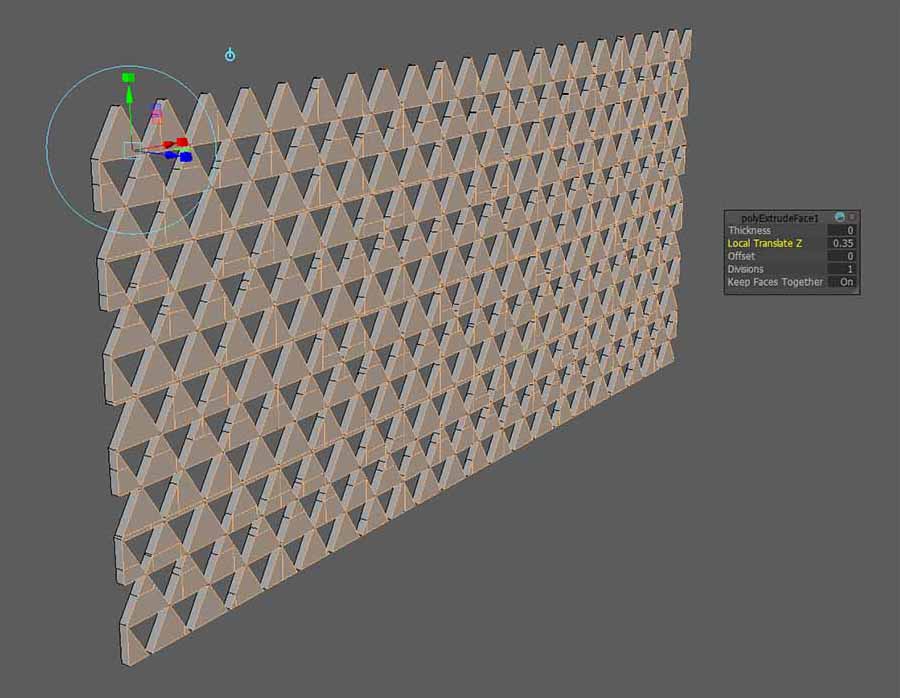
Again, the last step is to make an extrude to our wall pattern, so it can have the 3rd dimension. Once again, select the wall pattern geometry and go to Edit Mesh – Extrude. Give it some thickness with the local translate Z attribute that you can see as a small popup window in Maya viewport, or by pulling the blue axis upward. Go to object mode and you are done.
Conclusion:
You can create pretty cool stuff by using the import Illustrator files into Maya. You can do much more besides, logos, wall patterns, and labyrinths. Those three were just examples of using this method, and how powerful can be.
And don’t forget in order for this to work, your Illustrator file has to be saved in Illustrator 8 version.


