After Effects text presets, makes the text animation process cool and easy. No animation skills are required whatsoever.
If you are using After Effects for video editing purposes and you do a lot of text animation, you should probably take advantage of its built-in text presets. It’s huge. It could save you a lot of time. Plus it has pretty fancy stuff from an animation standing point, that you can apply automatically to any text inside After Effects.
To be honest you don’t have to be any kind of animator or work in the sector of motion graphics in general to produce cool text animations.
Anybody can do it. The only requirement is for you to have some sort of aesthetics in order to choose the right text preset animation to fit at best the purpose of it.
Some other interesting tutorials about After Effects:
- Logo react to music/audio in After Effects (no plugin required)
- Using track matte in After Effects to recreate The Walking Dead Intro
- How to create a simple 2D reveal logo animation with After Effects
- How to control wiggle with slider control in After effects
After Effects text presets:
Text presets inside After Effects enable anyone to create a cool text animation with one click. That’s it.
When you install Adobe After Effects for the first time, the folder which contains all those cool text animations presets had installed on your machine. So no need, for additional steps.
The purpose of a text preset:
The purpose of applying text animation presets on any of your text inside After Effects can be attributed to two reasons:
- fast approach
- fancy animation
As we said, you can apply a text animation preset with only one click, that’s the fast approach part. For the second reason, you could apply a quite complex text preset without animation skills whatsoever.
Note: If you want feather to edit the specific text animation preset you have applied, you may need some animation knowledge inside After Effects.
You can read more about text animation from the official Adobe site.
How to have access on text presets inside After Effects:
There are two ways to have access to text presets inside After Effects:
- Window’s explorer
- Adobe Bridge
Window’s explorer – first approach:
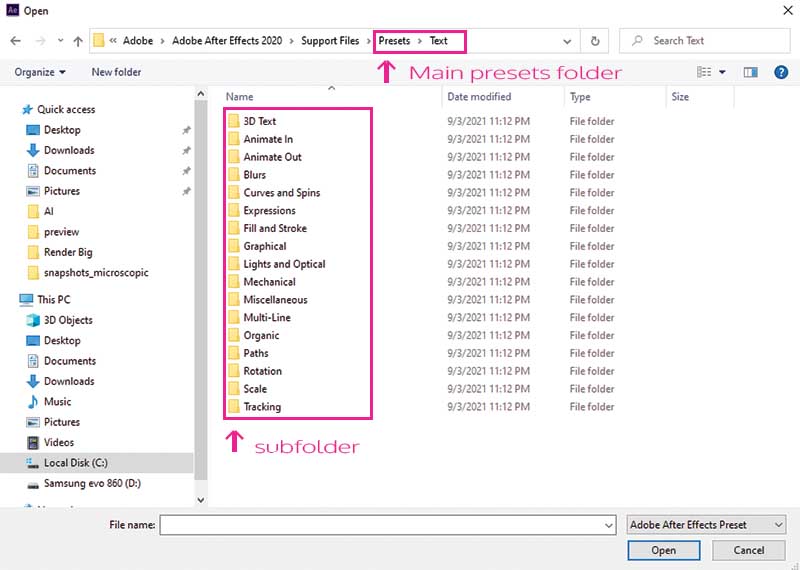
In order to open up the Window’s explorer and select a text preset you have to select a specific text inside After Effects and go to Animation – Apply animation preset.
When you have done that, Window’s explorer opens and you can navigate through the text presets categories folder.
After choosing the one you like After Effects apply the text preset on your selected text.
Adobe Bridge – second approach:
In order to use the second approach, you need to install the Adobe Bridge app on your machine. If you haven’t done it yet, You can do it from here. Adobe Bridge is an amazing piece of software.
The main reason I use it as many others do, guess what is that has great integration with other Adobe products such as Photoshop, Illustrator, After Effects, etc. And most importantly, it shows previews from formats such as PSD, AI, PDF, and of course GIFs and videos.
The benefit of using this method instead of the first one is that Adobe Bridge provides a preview of text animation. So before you choose the right text preset you want, you can see a preview of it, which is extremely helpful.
So, the way to use this approach is again, you have to select a specific text element inside After Effects and go to Animation – Browse presets. Adobe Bridge is launched.
Note: When you hit browse presets, by default, Adobe Bridge opens the general presets folder. You have to select the Text folder in order to navigate through text preset categories and apply the one you like. The path is C:\Program Files\Adobe\Adobe After Effects 2020\Support Files\Presets\Text\
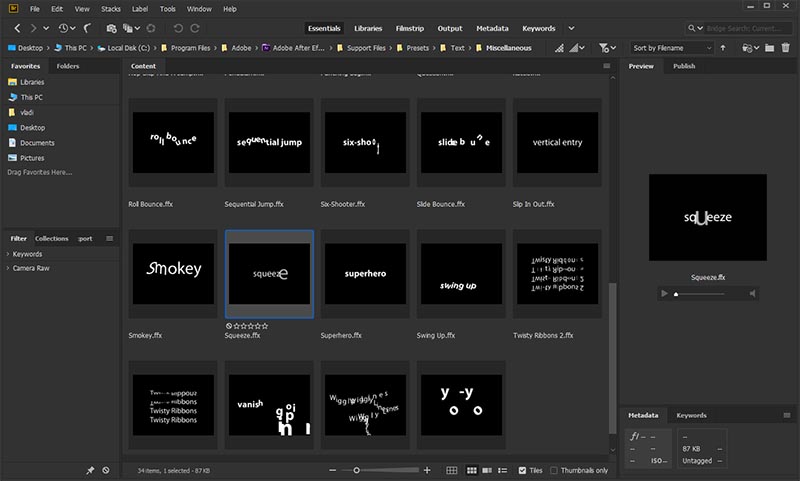
After navigating through text preset categories and finally choosing the right one for your specific text, you can double-click on the thumbnail so it can be applied to your text in After Effects.
The final step (optional):
After applying a text animation preset in After Effects you can call it a day or you can adjust it feather.
If you want to adjust it feather, you can expand your text layer by pressing “U” on your keyboard in order to expand the attributes that are animated.
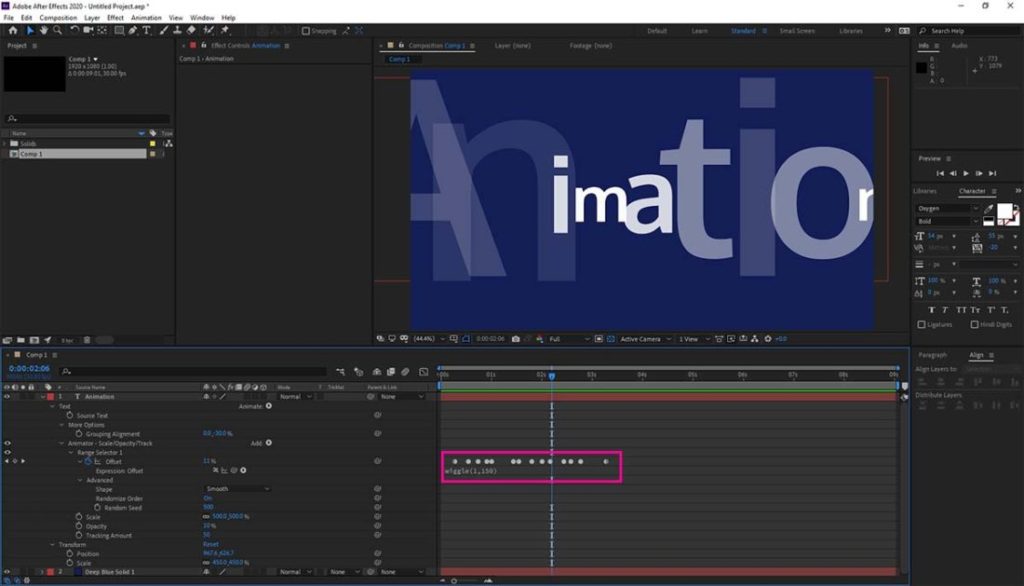
In this way, you can add some other paraments of the text element and make it more suitable for its purpose. And of course, you can play with keyframes, to make it more interesting.



2 Responses
thanks for sharing the information.
Hope you found it interesting