Create a turntable animation in Maya, is a lot faster if you use a python script to do so. The script has a UI with a few key options to play with.
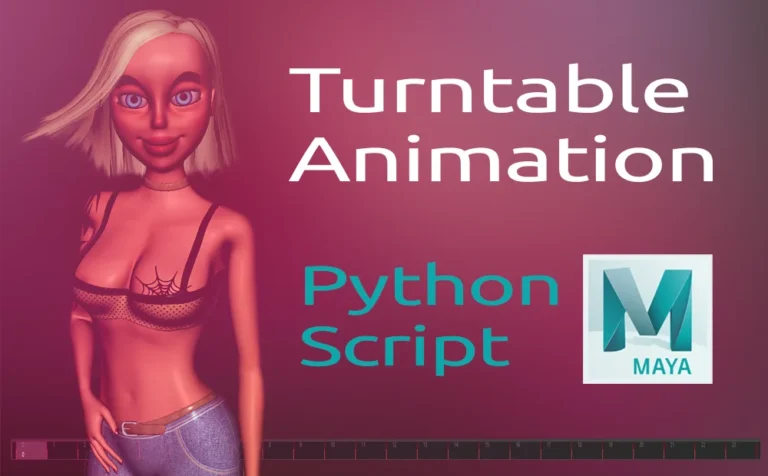
Creating a turntable animation in Maya is a great way to show off your 3D work. From 3D characters to props and landscapes.
In a previous article, we already explore how we can create a turntable animation in Maya.
But since the above approach require a bit of time, wouldn’t be great to create our turntable animation with an easier method!
This is a python script I have generated through chatGPT. Click the line below in order to expand it.
Create a turntable animation in Maya – Python Script
import maya.cmds as cmds
import math

def create_turntable_animation(radius, frames, angle_offset, invert_animation):
    # Get the selected object in the scene
    selected_obj = cmds.ls(selection=True)
    if not selected_obj:
        cmds.error("No object selected for turntable animation.")

    # Get the position of the selected object
    obj_position = cmds.xform(selected_obj[0], q=True, ws=True, t=True)

    # Create the camera
    camera = cmds.camera()[0]

    # Position the camera at the calculated radius from the object
    cmds.xform(camera, ws=True, t=(obj_position[0] + radius, obj_position[1], obj_position[2]))

    # Set the camera's aim to look at the selected object
    cmds.aimConstraint(selected_obj[0], camera, aimVector=(0, 0, -1), upVector=(0, 1, 0), worldUpType="vector", worldUpVector=(0, 1, 0))

    # Create the animation by setting keyframes for the camera's rotation around the object
    for frame in range(0, frames + 1):
        # Calculate the new position of the camera with the added angle offset
        angle = math.radians(((frame / frames) * 360 + angle_offset) % 360)  # Apply offset and convert to radians

        if invert_animation:
            # Reverse the direction of the camera's movement
            angle = -angle

        x = obj_position[0] + radius * math.cos(angle)
        z = obj_position[2] + radius * math.sin(angle)

        # Set the camera's position at the current frame
        cmds.xform(camera, ws=True, t=(x, obj_position[1], z))

        # Set keyframe at the current frame for the camera's position
        cmds.setKeyframe(camera, attribute="translateX", t=frame)
        cmds.setKeyframe(camera, attribute="translateZ", t=frame)

    # Set the end frame of the animation
    cmds.playbackOptions(min=0, max=frames)

    # Feedback to the user
    print(f"Turntable animation created around '{selected_obj[0]}' with {frames} frames, {angle_offset}° offset, and inversion set to {invert_animation}.")

def show_ui():
    # Create the window
    if cmds.window("turntableUI", exists=True):
        cmds.deleteUI("turntableUI", window=True)

    window = cmds.window("turntableUI", title="Turntable Animation", widthHeight=(300, 220))

    # Layout for the window
    cmds.columnLayout(adjustableColumn=True)

    # Create UI elements (Radius, Frames, Offset inputs)
    cmds.text(label="Turntable Animation Settings")

    radius_field = cmds.floatFieldGrp(label="Radius:", value1=10.0)
    frames_field = cmds.intFieldGrp(label="Frames:", value1=240)
    offset_field = cmds.floatFieldGrp(label="Angle Offset (°):", value1=0.0)  # New offset field

    # Create checkbox for inverting the animation
    invert_checkbox = cmds.checkBox(label="Invert Animation", value=False)

    # Create a button to create the animation
    cmds.button(label="Create Turntable Animation",
                command=lambda x: create_turntable_animation(
                    cmds.floatFieldGrp(radius_field, q=True, value1=True),
                    cmds.intFieldGrp(frames_field, q=True, value1=True),
                    cmds.floatFieldGrp(offset_field, q=True, value1=True),  # Pass the angle offset
                    cmds.checkBox(invert_checkbox, q=True, value=True)  # Pass the invert animation option
                ))

    # Show the window
    cmds.showWindow(window)

# Show the UI
show_ui()
Feel free to put the script on a shelf in Maya for easy access.
Turntable Animation in Maya with Python Scipt:
This python script, basically create a camera and add an aim constraint attached to it, looking at the selected object we choosen. Additionally, it creates keyframes (we had specified). We can also offset the position of your camera, and choose the orientation of our turntable.
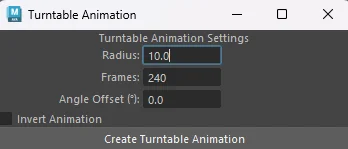
- Radius: The radius that your camera will be animated
- Frames: How many frames will be created
- Angle Offset: The position of your camera
- Invert Animation: clockwise or not for orientation
Note: Make sure you export your turntable animation by reducing the last frame. The last frame is always the same as the first frame. And there would be a short delay if you don’t reduce it at the end of the animation.
Turntable Animation Script in Action:
In this example, we will use this python script to create a turntable in Maya for a 3D character.
Steps:
- Run the script
- Create a “looking object” for our camera
- Adjust any settings on the script window
- Reposition the “looking object” for a perfect turntable shot
- Reduce the last frame
Read more about turntable in Maya from Autodek.


2 Responses