Create a material in Maya can be done in lots of ways. We will cover all the possible ways.
Since most of us (3D Artists) have our own ways of doing things in the 3D world, that suit our habits and routines it’s good to know that Maya has covered us.
You can watch the video below for a more visual approach.
Feel free to take a look at other Maya trips and tricks video tutorials.
Also you may find interesting the following Maya articles:
- The search tool in Maya
- Faster loading Autodesk Maya by unloading unnecessary plugins
- Put a Mel / Python script on a Shelf in Maya for easy access
- How to enlarge a picture without losing any quality at all
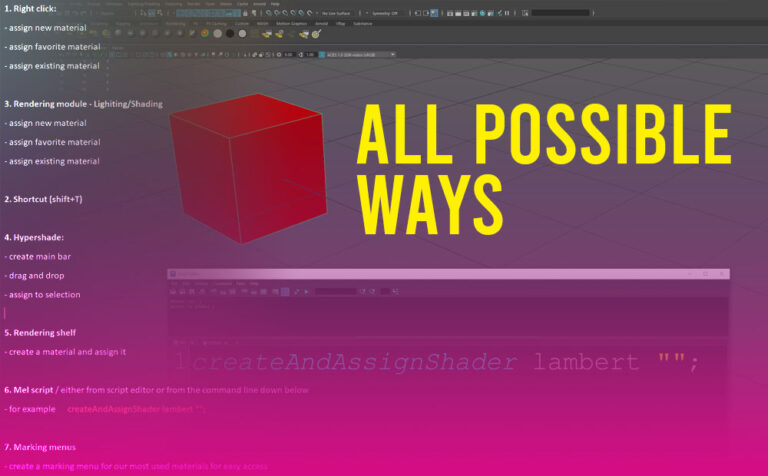
Create a material in Maya (all possible ways):
I found out 7 possible ways to create and assign materials in Autodesk Maya.
Right-click (method 1):
Select your object in Maya scene or from Outliner and then right-click, and select the following options:
- assign new material
- assign favorite material
- assign existing material
Rendering Module – Lighting/Shading (method 2):
Switch to the Rendering module, and go to the Lighting/Shading panel from the main bar in Maya. In that way, we can have access to the same options as above (Assing new-favorite-existing material).
Shortcut (Shift+T) (method 3):
We can also create a new material through a shortcut (Shift + T). In the new popup window, select the preferred material to apply to your object.
Hypershade (method 4):
Of course, it couldn’t be missing from the list the most official way to create and assign a material in Maya. Which is through Hypershade.
We can have acceess to Hypershade either from the little blue sphere icon next to the rendering settings icon, or through Windows – Rendering Editors – Hypershader.
Through that window, we can create and assign materials to our objects more efficiently through connection nodes.
Rendering shelf (method 5):
Additionally, we can assign a material through the Rendering Shelf.
Mel script (method 6):
We can also create and assign a material through mel script, which is not a very popular or fast way to do so. Nevertheless, we can do so either from the Script Editor or from the little command line down below.
Just type the following command:
createAndAssignShader lambert “”;
Where “lambert” you can change the word to other material as well, such as blinn, phone, etc.
Marking menu (method 7):
Lastly, we can create a marking menu for our most used materials for easy access. Basically, you create a new marking menu with your most used materials. Give it a “shorcut” for activation and you are good to use it when you need it.
See the video above for more information on how to set it up.


