Quick unwrap a head in Zbrush with a few strokes. Using tools like UV Master in Zbrush and taking advantage of control painting inside it, you can accomplish pretty decent results with a little effort.
This technique is pretty easy and although it does not have the best results like if you unwrap a head in 3D software such as Maya, 3DS max, etc., it’s not time-consumed or complex to follow through for unwrapped 3D objects.
Relevant topics for Unwrap 3D objects:
- Unwrap a head in Maya with auto unwrap UVs tool (bonus tools)
- An interesting way for UV unwrapping a curved pipe geometry in Maya
You could also watch the Youtube version of this port:
Why use UV Master in Zbrush:
I believe there are two reasons to use UV Master instead of using a more suitable 3D package to unwrap an object.
- More comfortable using Zbrush instead of any other 3D package
- Not having any other 3D package for that purpose
Note: In the production pipeline, where there is more than one artist, for a project, someone could work on the modeling task and someone else could create the UV for that model. In any case, implementing different techniques on different software could be only a good thing.
How to control painting in Zbrush works:
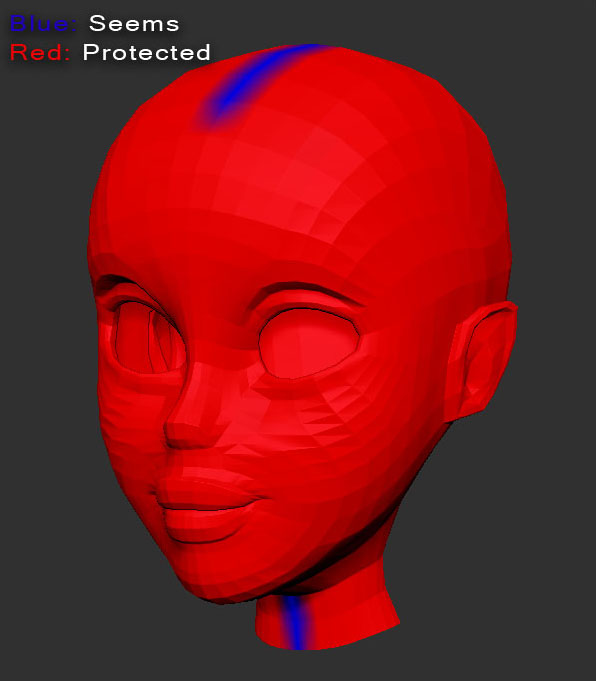
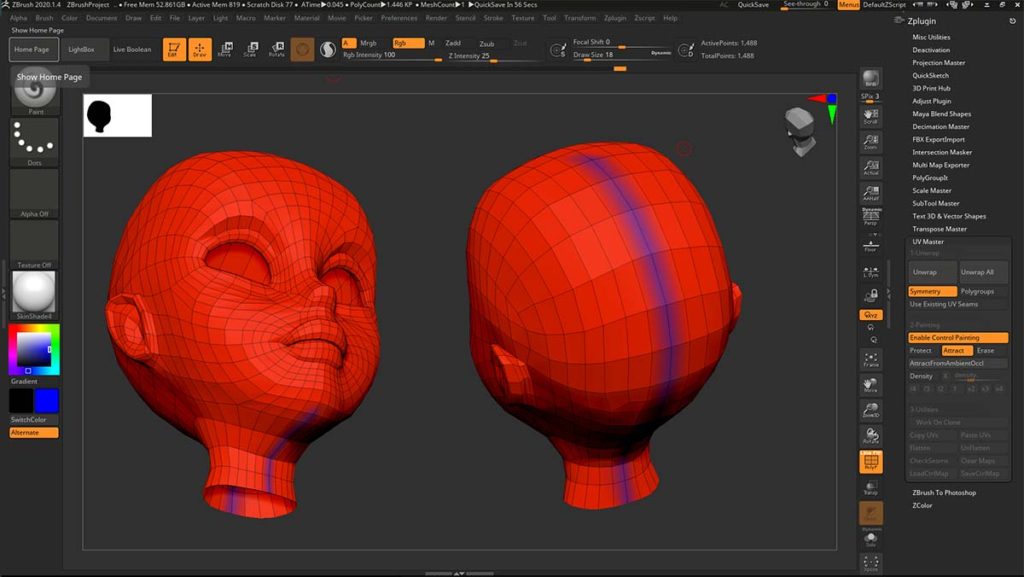
Control painting in UV Master inside Zbrush works as the name suggests. You pain with strokes either where the UV must be protected (red) or either where you want to put the seems (blue) of your 3D object. So in the following image, you can see clearly where we have put our seems and what areas we have protected:
So, basically, because it’s a brush tool, you can have as much fun as you want with it. We all love brushes, especially when they help us to manage a pretty tough subject like creating UVs.
Of course, UV master has other interesting features and tools like adjusting the density of your new UVs, working on clones, using ambient occlusion for even faster results, etc.
In this post, we will focus only on the basics of UV master. Which is to paint – put our seems and also to paint – protect the areas we want from our head model.
You can find more about UV Master in general from the official site of Pixologic.
So let’s start..
Using control painting to quick unwrap a head in Zbrush:
This is a Maya scene with our 3D head model in place. As you can see the UVs that already has it’s not quick proper for the painting process.
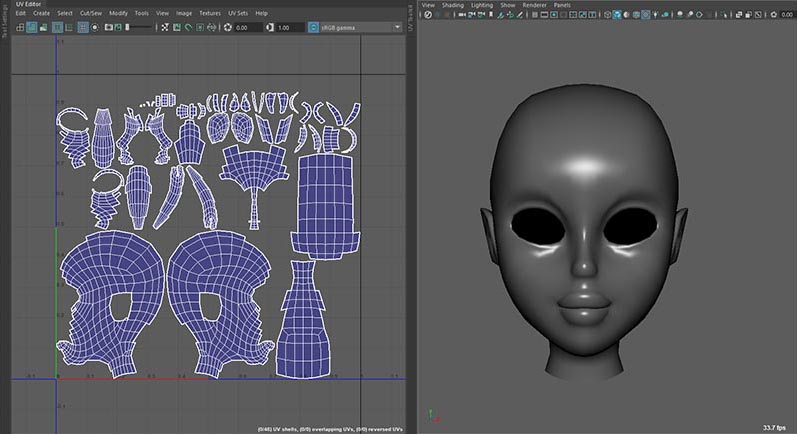
So, we are going to export this head model over to Zbrush and try there to create new UVs with the UV Master – control painting technique. Select your model and export it as an OBJ or FBX format. I exported mine as OBJ one.
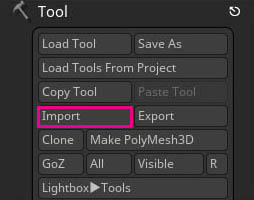
Open up Zbrush and import your model, by going to tools – import. Navigate to the folder that contains your OBJ file and import it.
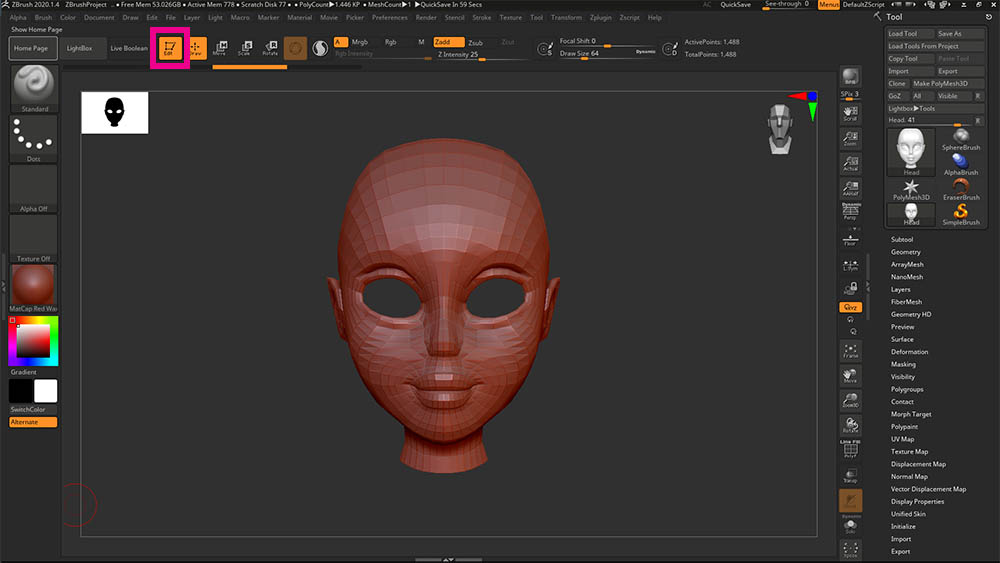
Now your file has been imported into Zbrush. Left-click and drag with your mouse so your model appears on the Zbrush canvas. In order to edit your model, you have to press the “edit” button in the main bar of the Zbrush, or just press the “T” for a shortcut.
Using control painting:
Now we have our model placed in Zbrush it’s time to actually create new UVs.
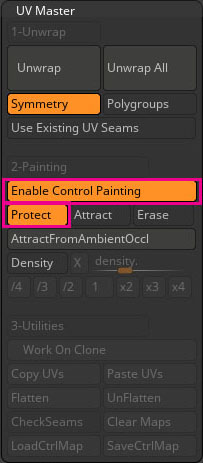
Go to Zplugin in the main bar of Zbrush and find the UV Master palette. Enable the control painting and also click the protect option.
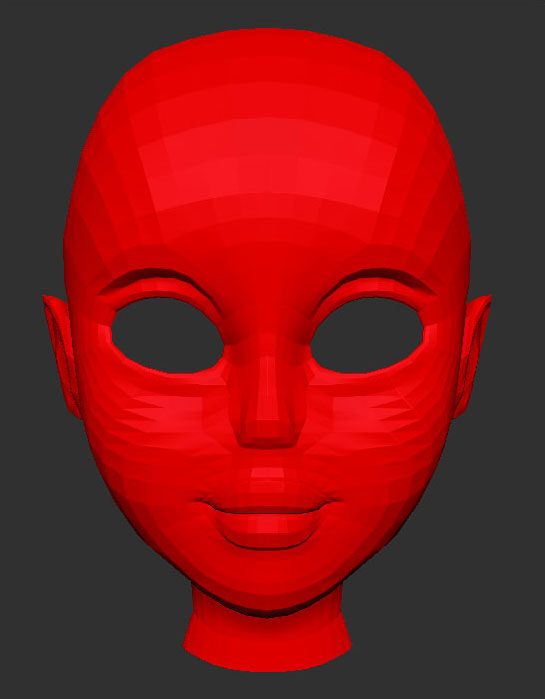
In this way, we are telling Zbrush which area we want to be protected. In our case, we just want to paint the entire model with red color. So, go to the color menu in the main bar and click on the fillObject. Now our model has been protected entirely since it’s covered in red.
Note: In other cases, you may have to paint locally on your model instead of filling with color the entire model.

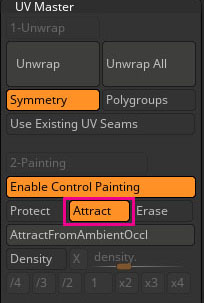
Now it’s time to paint our seems into our model. Go to UV Master once again and this time click on Attract option.
At this point, It’s a good idea to enable the symmetry tool. Also, it’s quite helpful if you enable the draw polyframe (shift + F) mode.
As if we working in a 3D package like Maya, we just need to determine where to put ours seems. After that, we just paint with blue color (attract) where supposedly your seems will be.
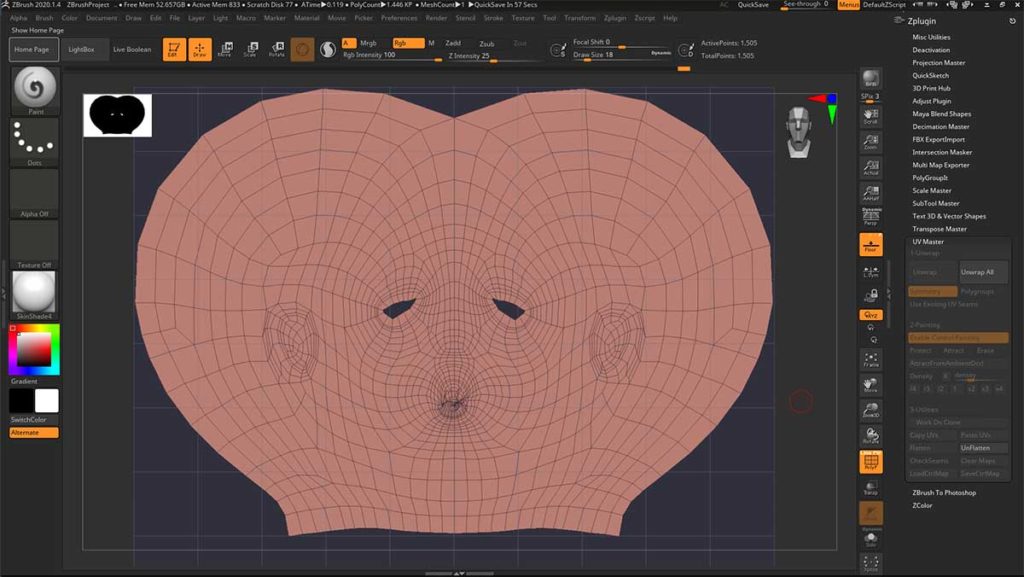
Finally, we just press the Unwrap button in UV Master in order for the new UVs to be created. To see the results, press the flatten option in the same window. When you want to exit the flatten mode, just press the unFlatten button.
Note: You could smooth the new UVs you just created by pressing the Shift key and painting with left-click as many times as you need in the flatten mode.
Now we are ready to export our model by going to Tool palette – export.
Our head model has new UVs and now it’s more appropriate for the next part, which is the painting process inside 2D software or even in 3D software like Substance Painter or Zbrush.
Conclusion:
Using UV Master and control painting to quick unwrap a head in Zbrush is not a perfect technique. Although I think is a fast one and quite decent.
As I said, if you don’t have any other 3D package for that particular task, you can definitely count on Zbrush for that matter.


2 Responses
Very much appreciated. Thank you for this excellent article. Keep posting!
Thank you, I am glad you like it