Count number in After Effects effect is quite useful, either for motion graphics, infographics or just for video editing purposes. Making a simple count number in After Effects is pretty much a few steps process. It’s extremely easy to accomplish.
So, no further discussion let’s jump in After Effects to make it happen 🙂
Feel free to take a look at some other interesting articles about After Effects:
- Countdown in After Effects fundamental. Simple theory and practice
- Step progress bar animation with step percentage count in After Effects
- How to create a presentation of progress bar infographics in After Effects
- How to create a simple progress bar – infographics element in After Effects
- Logo react to music/audio in After Effects (no plugin required)
Table of Contents
ToggleFundamentals of count number in After Effects:
Open up After Effects, and make a new composition, doesn’t matter the resolution it’s up to you. I made mine Full HD.
Grab the type tool and just click anywhere in your composition. Don’t write anything, just click. Expand the text layer from the triangle left to it, expand one more time the text from the triangle. You now see the source text among a few other options.
Alt + left click on the stop-watch opens up the expression function in after effects.

Let’s delete “text.sourceText” and just type “time” to see what will happen. Play the animation.

As you can see there is a count number and we made it. Wait a minute, what can I do with all those numbers counting it’s quite confusing unless we are a physicist or something it doesn’t make any sense, am I right! Absolutely, you are. You can easily fix it by updated the “time” expression to “Math.round(time)“
Note: “Math.round” is a function that makes a decimal point number to be a whole number.

That’s I am talking about, am I right or what 🙂
As you play the animation, you will realize that the count number is running in real-time, which means every second it passed, the count number will be +1.
Well, is not bad or good, it’s how it works in general. We can make it work in different ways.
Different ways:
Let’s say for example we want it to be:
- running not in real-time but 2x faster. We type in the expression box, “Math.round(time*2)“
- running 2x slower. We type in the expression box, “Math.round(time/2)“
- instead of updating one by one, to update 10 by 10 in real-time. We type “Math.round(time)*10“
- instead of updating one by one, to update 10 by 10 in 2x faster. We type “Math.round(time*2)*10”
- and so forth..
Count number in After Effects/ infographic element with slider control expression :
Ok then, now you have the fundamentals of count number let’s examine another approach. The approach of slider control expression. We can make really cool stuff with it.
The great advantage of this approach is you can control the behavior of multiplay elements at once by linking them all in one slider parament.
So, we will make a simple but cool infographic count number project.
You may also want to check out “How to control wiggle with slider control in After effects”
Process:
Start a new composition and again grab the type tool and just click anywhere in your composition and leave it as it is. Now make a new Null object and go to Effect – Expression controls – Slider control. I have renamed my Null object to “slider ctrl” and my type layer to “number”. It’s always a good practice to rename your layers, for organizational purposes.
Now that you have created the slider ctrl and the type layer you have to link them together. The way we do that is by expanding both layers, alt + left click on the stop-watch of the type layer and grabbing the @ icon, and linking intro the slider parament of the slider ctrl layer.

All right. If you play the animation, nothing seems to happen and it’s partly truth. I said partly because as you can see the slider shows 0 and in the composition, you have 0 as a number, right. The reason you haven’t any movement it’s cause you haven’t animated the slider yer. To confirm it, just grab the slider parament of the slider ctrl layer and move it around. You will see automatically the composition with the numbers is updating.
At this point in the number layer, the expression is “thisComp.layer(“slider ctrl”).effect(“Slider Control”)(“Slider”)”
Animate the slider of the slider ctrl to give it some action. I set a key on 0 frames to be 0 and on 3 (90) seconds to be 100. If you play the animation the same decimal points appear once again. To fix it, just replace the above line with: Math.round(thisComp.layer(“slider ctrl”).effect(“Slider Control”)(“Slider”)) and you are good to go.
Note: All the above different ways we mentioned earlier for controlling the counting, faster / slower and so forth still apply.
All right, we have a simple count number so far. I have aligned mine in the center of the composition. Now it’s time to add a bit of infographic.
Add the infographic element:
Now it’s time to add a circle shape to make it more interested and to back up our counting properly. Without selecting anything grab the ellipse tool and make a perfect circle. Use only the stroke, and make it any color you choose. Also, increase the stroke width. Also, rename the layer circle shape.
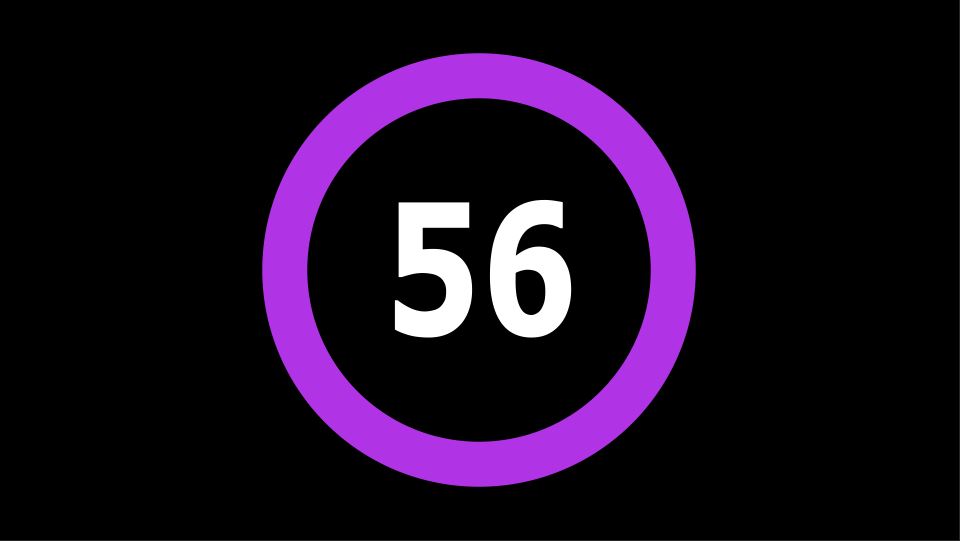
Go to circle shape layer and expand it. Press the “Add” button the far right button of the contents and choose “trim paths“
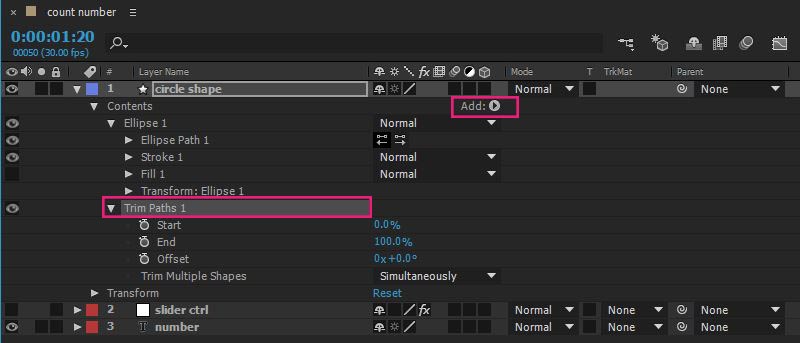
Zero out the “End” property from the trip paths and connect the start property with the slider parament of the slider ctrl layer by expanding it and make the connection with the @ icon as we did earlier. Now the “start” is linking with the slider that also controls the count number. Play the animation.
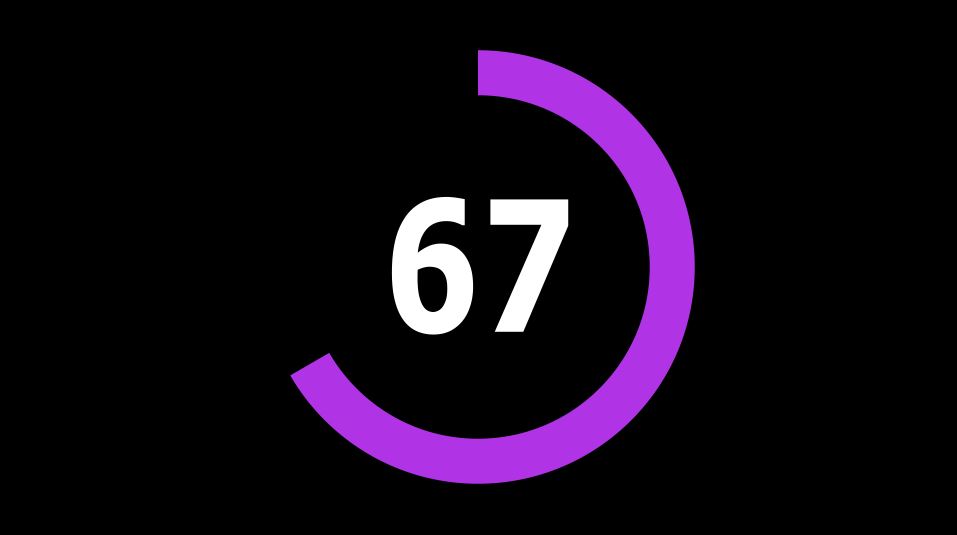
That’s it, you made a simple infographic element.
After some extra work, which is out of the scope of this post I came up with the following final video:
Summarize:
You could create many cool things with the power of slider control expressions and count numbers in After Effects. As you can see with a small knowledge of a bit of expression we could manage to make a simple but interesting effect. Feel free to get into more expression in After Effects, it’s really powerful and it could save you a ton of extra time mostly from an animation point of view. With this technic, you could also make a clock count, progress bar, and many more.
I hope you gain something out of this post. I would be happy to see what you came up with.
Thank you for your time, see you next time. Until then happy creative time 🙂




4 Responses
That’s awesome thanks! It’s a simple technique to create counters that saves a lot of time. I’m also using Counter preset when I need counters that reach to more than million and if I need commas in my counters
https://www.vdodna.com/products/counter-preset/
I am glad you find the post interesting Danny. I wasn’t aware of the Counter Preset tool, thank you for that. It looks like it could save a lot of time with great potentials.
Hey, I’m trying to get a counter from 0 to 98,000,000,000 but the limit here is 1,000,000. How to bypass this?
Hey Daniel,
Actually is a great question. You are right about this. The maximum number for the slider control is 1.000.000. We can’t go further than that. You can bypass that by editing your expression and multiply it by 98000, so you can reach 98.000.000.000.
I assume you control your count text through a null object with slider control.
Make the following animation: In frame 0, set the slider control to 0. Go as many frames as you need forward and set the slider control to maximum, which is 1.000.000. Then, go to your source text expression and click on it to edit it. At the end of your expression add *98000. This will multiply your slider control by 98000. So your expression will look like this:
thisComp.layer(“Null 1”).effect(“Slider Control”)(“Slider”)*98000
Lastly, don’t forget to add the Math.round function at the beginning of your expression and put the necessary parentheses. Finally, your expression will look like this:
Math.round(thisComp.layer(“Null 1”).effect(“Slider Control”)(“Slider”)*98000)