Z-depth render pass in Maya is really a great way to create depth-based effects in the post-production process, such as DOF or fog. We can use those effects for a more realistic or artistic look in our final image.
In this article, we are going to focus on the DOF (depth of field) effect. We are going to explore how to create a z-depth render pass in Maya with the V-Ray renderer, and how to use that render pass in Photoshop to create the actual DOF effect.
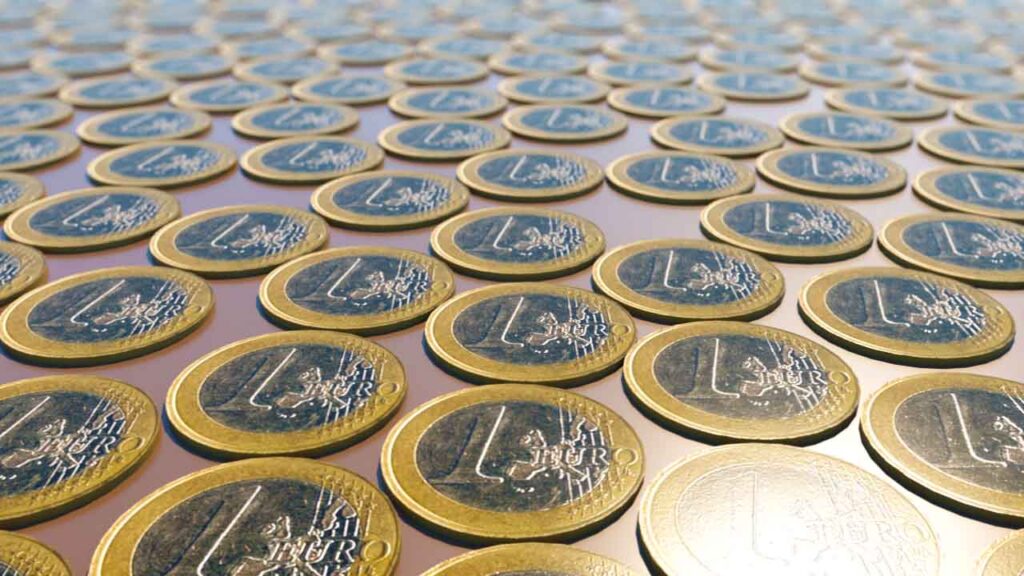
Here is the final result we will accomplish from this tutorial:


What is a Z-depth render pass:
Before we dive into the process of rendering a Z-depth pass, inside Maya with the V-ray renderer, let’s take a look at what it is and why it’s important.
Z-depth, or depth information, generally speaking, is the distance between the camera and the objects in a 3D scene, which is measured in units such as meters, or feet. All those information is stored in a grayscale image. In that image, white areas represent the objects closest to the camera, and the black areas represent the objects far away from the camera accordingly.
The Z-depth render pass is used most of the time in the post-production process as a mask, to identify the areas (black and white) of the scene, to create depth-based effects, such as DOF (Depth of field) or fog.
Why the Z-depth render pass is important:
Generally speaking, when we deal with depth-based effects inside 3D software, and not as a render pass, like the Z-depth pass, but as an actual render of the particular depth-based effect, is an extremely time consumed render process. Even though the result of the render pass (Z-depth) is less impressive compared to the actual render of the depth-based effect, I will personally choose it 9/10 times, every time. And that’s why I believe it’s important to grab the technique of the Z-depth render pass.
Add a Z-depth render pass in Maya:
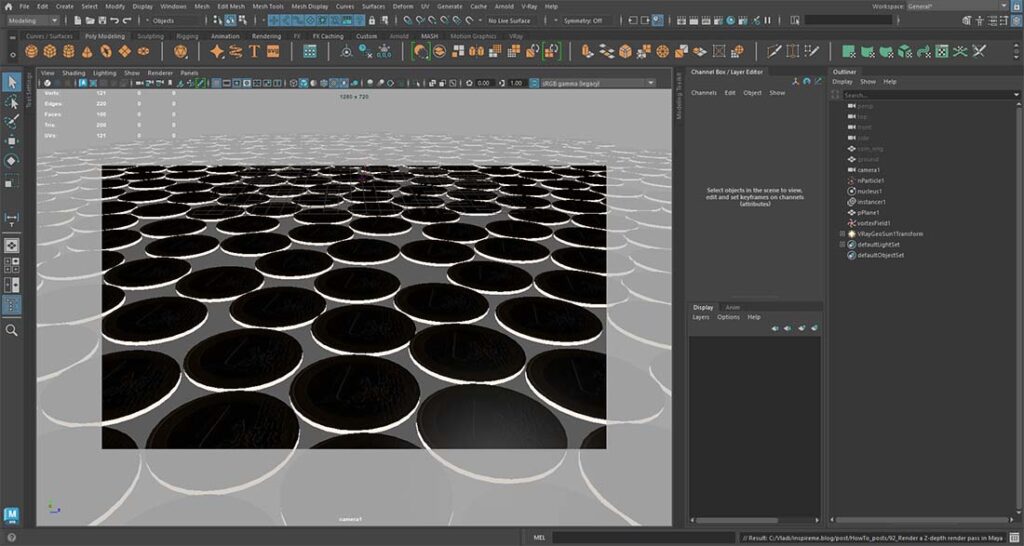
Here is the Maya scene we will be working on. It’s nothing fancy, just some bunch of random euros currency. Although it has some depth in the background, it could benefit from o DOF effect.
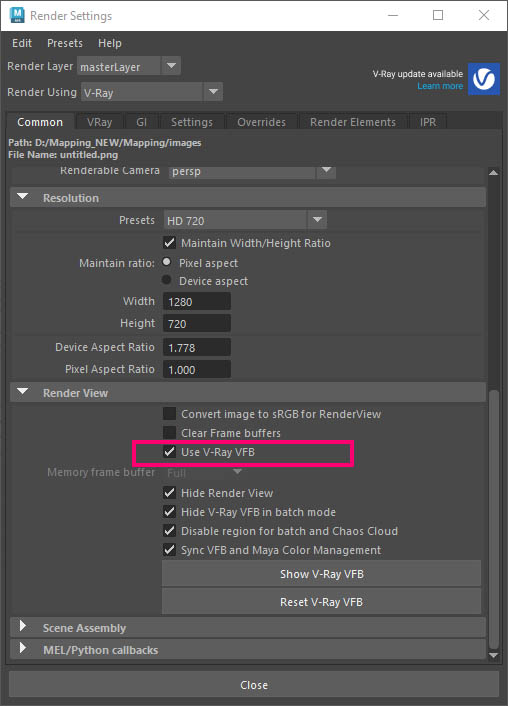
But before we add the actual z-depth render pass, we should click the checkbox on the Render View – Use Vray VFB first. By doing that, we allow the VRay frame buffer to render our scene and not the build-in renderer, which allows us to take advantage of render passes (render elements)
That has been checked, it’s time to add the actual Z-depth render pass. For doing so, go to Render Settings – Render Elements – Zdepth (down the list – left column). Now we can select the vrayRE_Z_depth node in the Added render elements (right column) and open up the Attribute Editor, so we can take a look at its paraments.
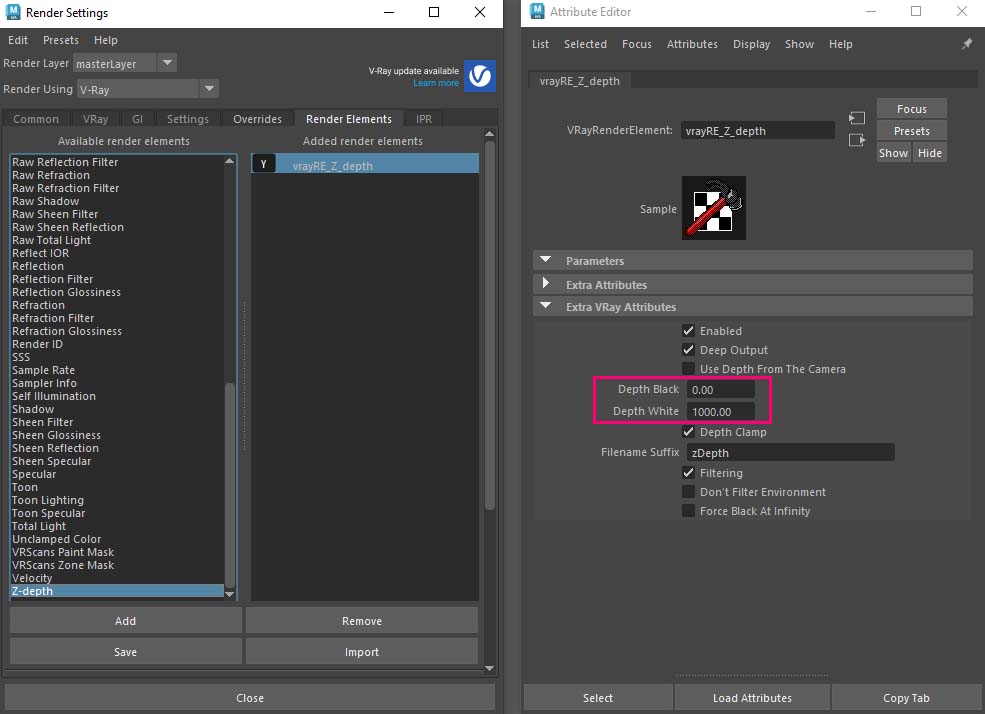
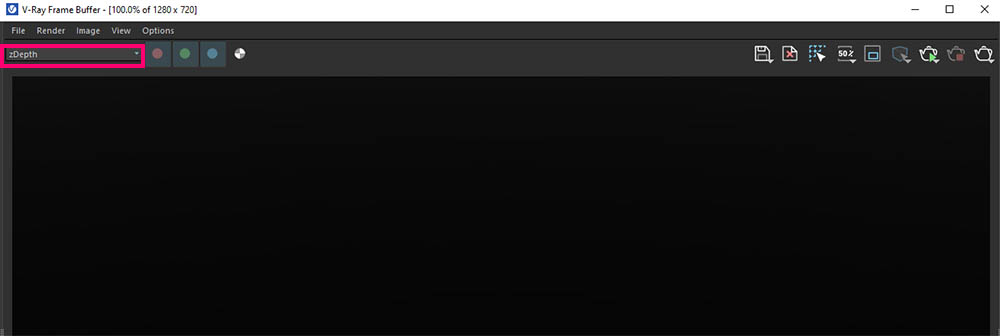
If we render our scene right now, the Z-depth render pass won’t show anything, at best it will be incorrect, since we haven’t calculated the distance between the camera and objects yet. In other words, we haven’t say Maya through Z-depth (Depth Black and Depth White) what distance to consider as closer or far away from the camera.
We are going to fix that in the next step.
For more dive into all the paraments of the Z-depth render pass feel free to take a look at their official site.
Calculate the distance between the camera and objects:
Now we have our Z-depth render pass in place, it’s time to calculate the distance between the camera and objects in our scene. And the way to do that is through the distance tool in Maya.
We are going to do that for both Depth White and Depth Black paraments.
Calculate the Depth White distance:
Go to Create – Measure Tools – Distance Tool.
Go to the top view, and first click closer to the camera and then click again far away from the camera. The Distance tool will show a numeric value of that distance, as you can see from the image below:
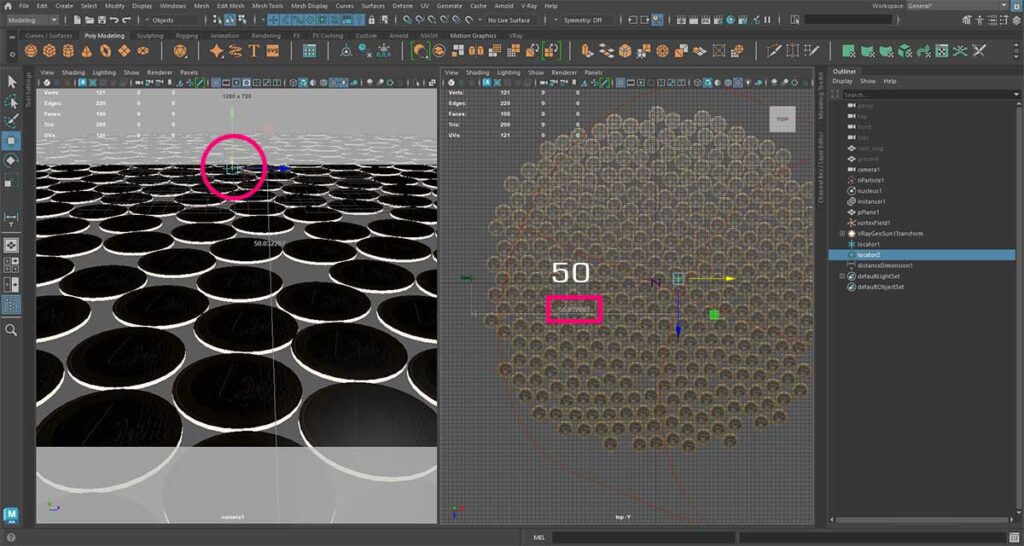
The distance we have in our scene is approximately 50 units.
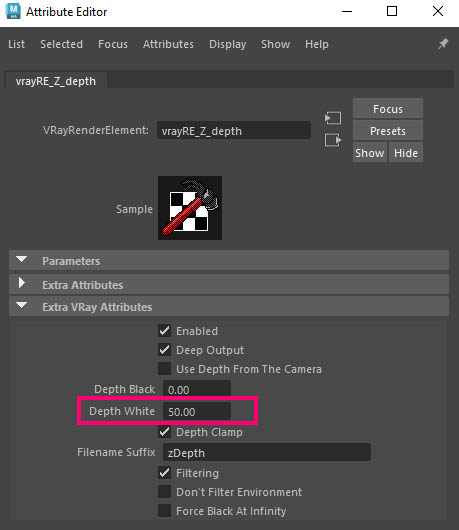
Set that value to your Depth White parament under the Extra VRay Attributes, like the image below:
If we now re-render our scene, the Z-depth render pass will show something similar to the image below:
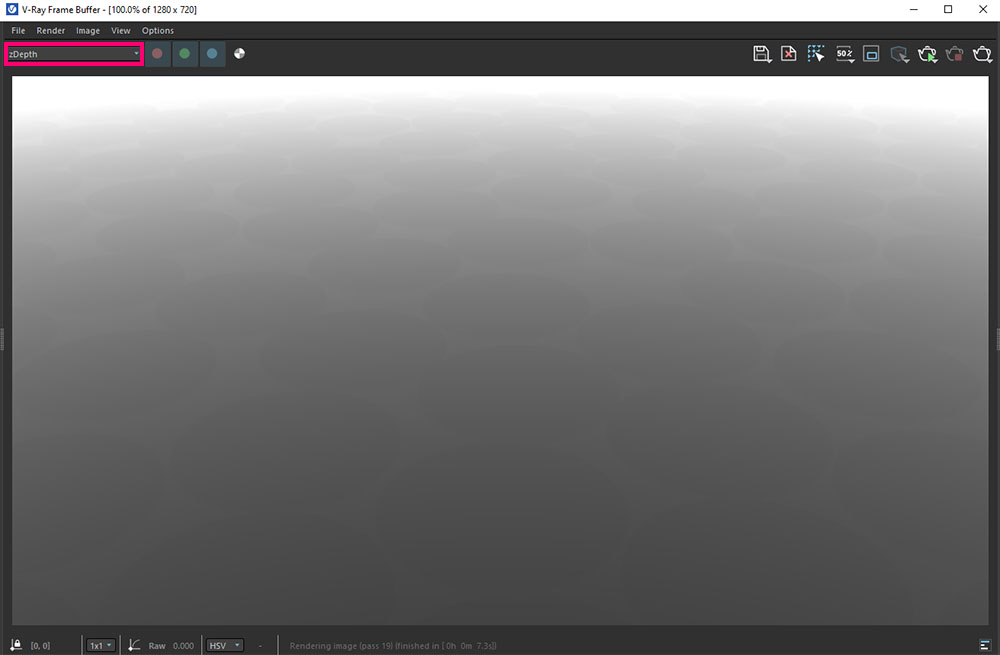
But as you can imagine, the above image is not right, at least yet. Because we want at least some portion of the down part to be quite black and not a lite gray. In that way, the black area will be 100% not blurry and the white area will be 100% blurry. Otherwise, our whole image will be some kind of blurry, which is not the case of a DOF effect.
In order to determine where 100% of black stops, we are going to once again use the Distance tool.
Calculate the Depth Black distance:
Since we already have the Distance tool in our Outliner, select the locator 2, and position it quite close to the camera, like in the image below:
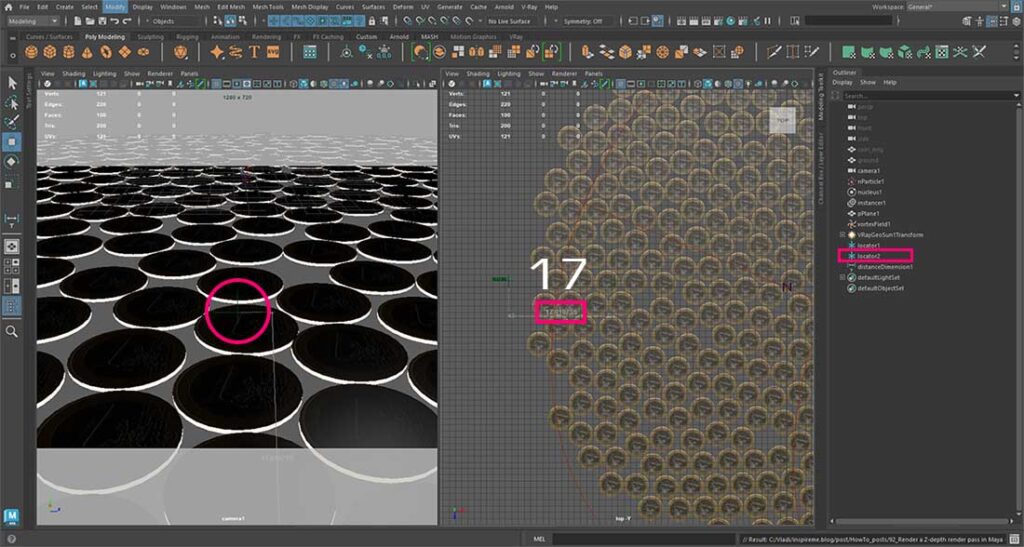
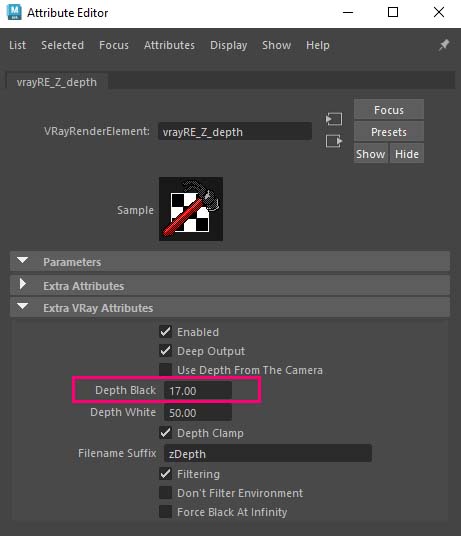
Now put that number (17) in the Depth Black parament under the Extra VRay Attributes, like the image below:
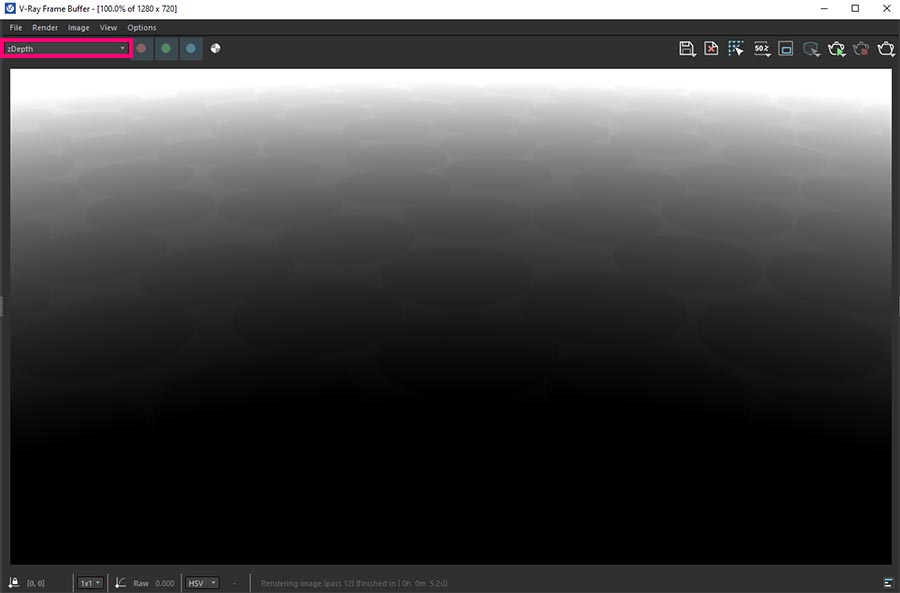
Now if we re-render our scene once again, the result we are getting is what we wanted for the Z-Depth render pass. Those colors mean, that the down part of our image will be 100% not blurry, and as we go up the image will get blurry. Exactly what we want for our DOF effect.
Note: We can easily invert the colors from our Z-Depth render pass inside Photoshop if we want to.
Render and save the Z-depth render pass:
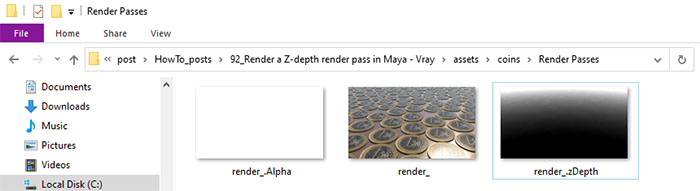
In order to create the final composition in Photoshop, we have to render and save all the necessary render passes, which in our case is just the RGB color (master) and the Z-depth render pass.
So after we render our scene with the V-Ray buffer, go to the save icon and press hold, and chose the Save all images channels to separate files. Select the destination of the folder, in which the files will be saved, give it a name, and we are done. After that, Maya will automatically save all render passes in that folder, for later use in Photoshop, in our case.
In the following and last section of this tutorial, we are going to actually create the DOF effect in Photoshop.
Create the actual DOF effect in Photoshop:
We could create the final DOF effect in the post-production process either inside Photoshop or in After Effects. If you are not familiar with using After Effects for that particular purpose of image editing, you can take a look here, so you can see what After Effects brings to the table.
That being said, let’s create the DOF effect in Photoshop.
Open up Photoshop and drag and drop the render image (master). Also, drag and drop the Z-Depth render pass, below the master layer, like in the image below:

Creating the DOF mask:
Follow the steps below to create the DOF mask:
- Go in the second layer (Z-Depth) and in the thumbnail right click and select “Select pixels“
- After that, press ctrl+C (for copy)
- Then select the first layer (master) and go to the Channel tab
- Press the little plus icon (create a new channel)
- Now since the new channel is selected, press ctrl+v (for paste).
- For organizational purposes, rename that channel to DOF
- Select the RGB channel
- We can now, disable the second layer (Z-Depth) from the layer stack in Photoshop
We can see the above steps with visuals in the gif file below:
Applying a Lens Blur filter:
In order to use the mask we created in the above step, we are going to need the Lens Blur filter.
Since we have selected the master layer go to Filter – Blur – Lens Blur.
A new window popup. In that new window, just make sure that the Depth Map is in the new channel (DOF) we created in the previous step. After that, just play with the settings in order to get the best result.
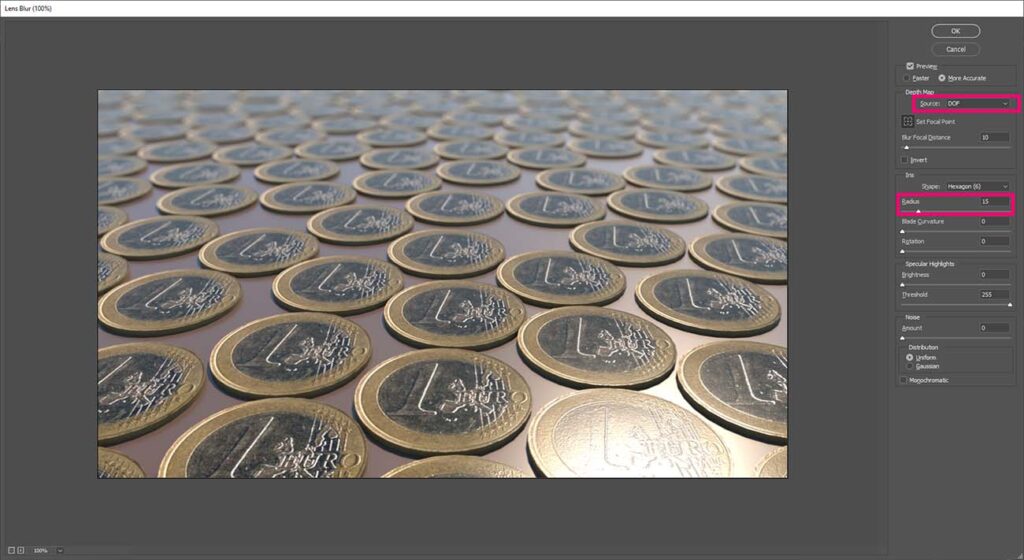
We can make the effect of DOF as strong or lite as we want. After some color correction, here is the final result:


6 Responses