Delete multiple bindpose nodes and re-create a single one in Autodesk Maya, with a single small line of code. This technique is extremely easy to apply. No need for professional coding skills, just a simple understanding of nodes and general stuff in Maya.
You can also watch a Youtube video I prepared about this technique:
Table of Contents
ToggleWhat is bindpose in Maya:
The bind pose is the pose that the skeleton is in when you bind skin and so it is the base (or rest) pose of your character. When you pose a character’s skeleton after skinning, the skeleton’s actions deform the skin. The only pose that does not cause deformations to the skin is the bind pose.
“by Autodesk Maya”
What this basically mean is that bindpose is the stage before your character, props, or really anything has any influence of deformation on it. Usually, this pose stage is the pose you model your 3D model from the start, most of the time a T-pose.
You can find some other interesting information about this subject, such as, how to go to bind pose, change the bind pose, etc. at the official site of Autodesk
If you are into rigging in Maya, and trying to speed up your workflow, you definitely want to check out some of the following life-saving articles below:
- Free smooth skin weights tool in Maya (for fast and better results)
- Joint splitter mel script tool for Maya (time-saver for rigging)
- Create facial GUI controls with free mel script in Maya
- Create auto rig controls in Maya with free Python script
- Python script for mirror cluster deformer in Autodesk Maya
What’s the reason to delete multiple bindpose in Maya:
What’s the reason to delete all those multiple bindpose you have in your scene in Maya and re-create a single new one!
Well, I think there are two reasons, and one of them is important:
- Skinning problems, outside of the 3D package Autodesk Maya
- Organizing purpose
As you probably guessed, the first is the important one. The organizing reason is for your own peace of mind.
Skinning issues in Unity Game Engine:
Plenty of times, the reason my 3D models haven’t behaved the way I was expected when I imported them into the Unity game engine, for animation-skinning purposes, guest what! It was always the multiple bindpose nodes from Maya, that prevented it from behaving correctly.
After deleting all that extra multiple bindpose in Maya and re-creating a single bindpose for my 3D model, everything was fine when I re-import it into Unity. The skin information this time was as I expected.
Note: If you are using an old version of Unity, something like 5.6, and you are tired of the white interface you may want to try the dark one from here.
The process of deleting multiple bindpose in Maya:
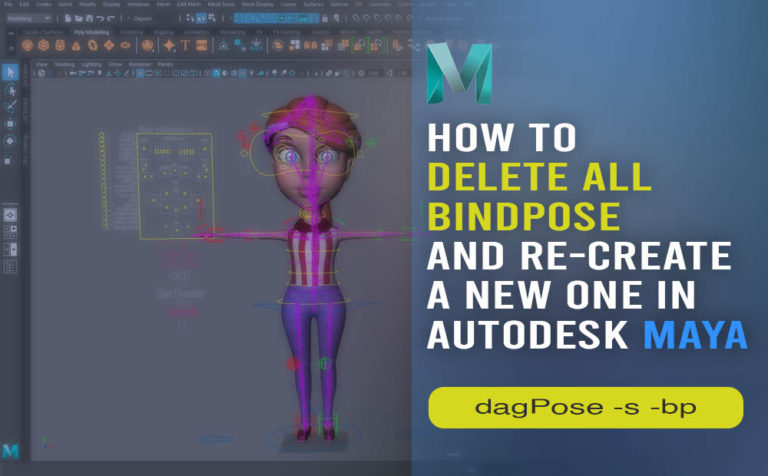
We will be working on the following 3D Model:
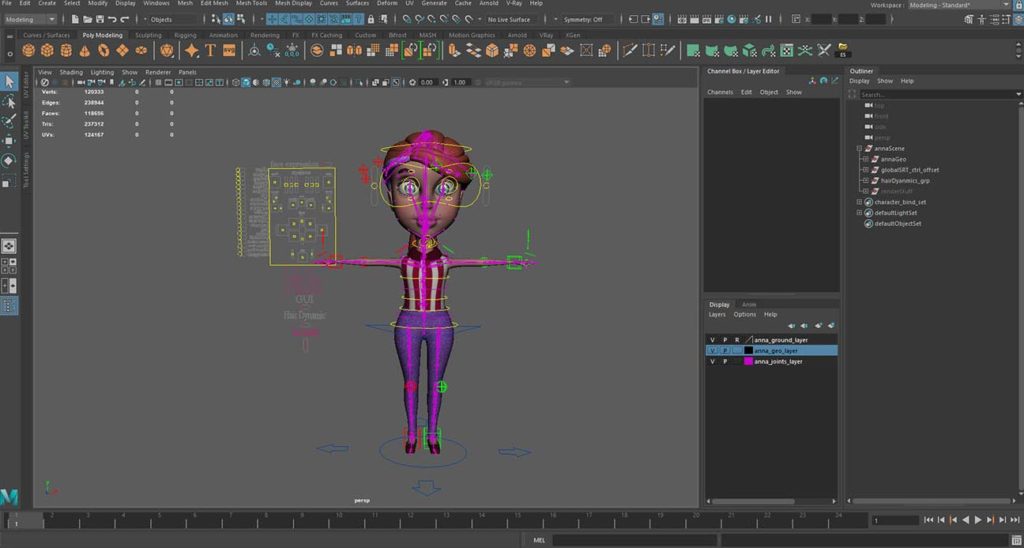
In order to locate if I have multiple bindpose nodes for my 3D character in my scene, I have to go to the Outliner panel, right-click, and select the option (Show DAG objects only). After that, I can manually search for all bindposes in my scene.
Note: Depending on the complexity of your scene, the list may be quite long. If that is the case, you can use the search bar on the Outliner.
Delete multiple bindpose nodes:
So, in the search bar of the Outliner type: *bindpose*. As you can see, the Outliner gives us all the bindposes nodes at once.
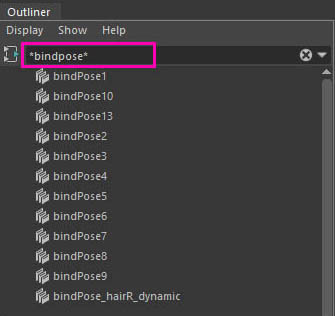
Select all of them, and hit the delete button on your keyboard.
Re-create a single bindpose for your 3D model:
Now, in order to create a single bindpose for your 3D model, you have to select all the joints of your 3D model and then, write a simple Mel script.
So, as we have selected all the joints of our 3D model, open the Script Editor and write the following Mel line of code over there, and hit ctrl+enter to be executed, like the image below:
dagPose -s -bp 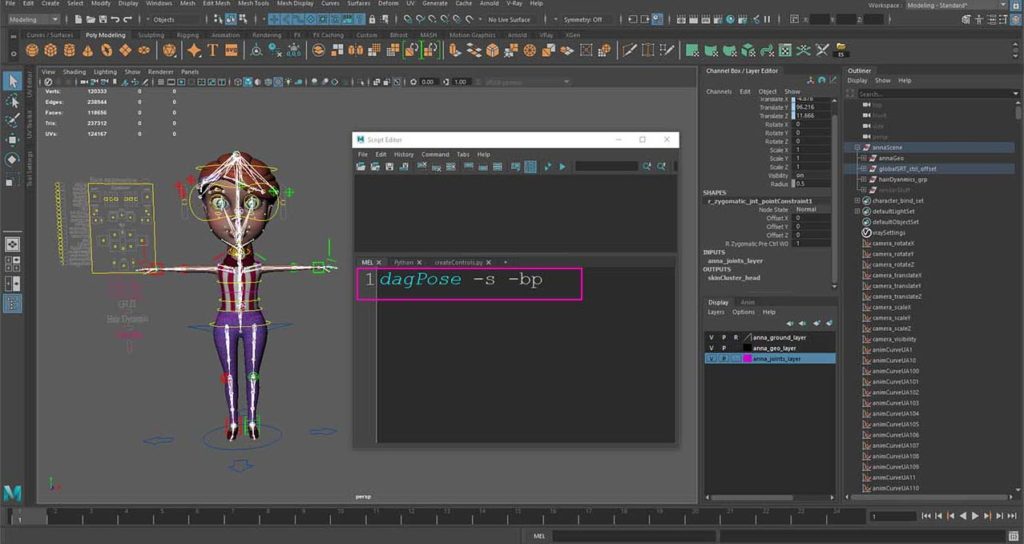
That was it.
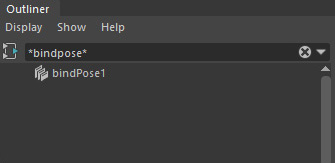
If you search in the Outliner for bindpose, you will get one bindpose node.
3D Anna Character Rigged Model:
If you found 3D Anna Character interesting, you can find more info about her in the links below:
- Anna Rigged 3D model at Cgtrader
- Anna Rigged 3D model at Turbosquid




4 Responses